
|
603-630-5658
|
|
tinypontoonboats@gmail.com
|

|
REQUIRED TOOLS
Installing the remote throttle/shifter mounting plate on our Mini Steering Console is a simple procedure and requires some basic tools. Please be aware that this process requires reaching inside the box and having to install three nuts blindly, so we consider this installation to be a 4/10 on the DIY scale of difficulty. Below we have provided a list of the tools required for your installation, as well as part numbers and links to where you can get the specialized tools from McMaster, which is a reasonably priced industrial supplier. Click on the part number to view the item on the McMaster website. Most customers will have these tools on hand. These tools should also all be stocked at your local home supply or hardware store.
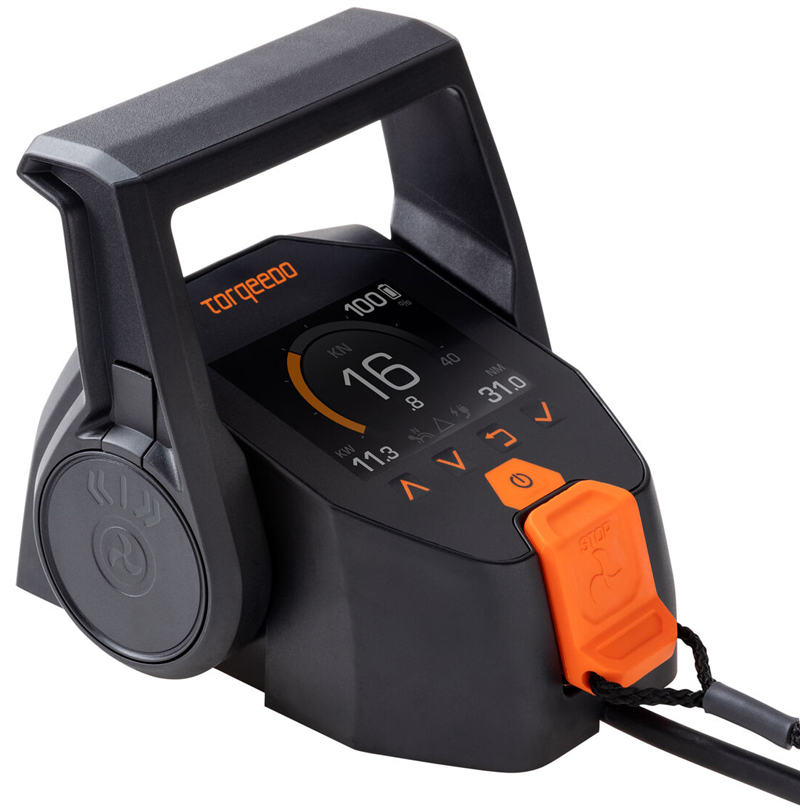
These instructions cover the common remote throttles/shifters for Torqeedo and ePropulsion electric outboard motors. However, for the sake of simplicity, we are working with Torqeedo's most common current throttle, being their "Torqlink" throttle, part number 1976-00. The only difference between mounting these throttle assemblies and others available is the nuts and bolts that fasten the throttle itself to the aluminum mounting plate. If installing a throttle other than Torqeedo part number 1976-00, you may require different tools for fastening the throttle itself. Please contact us if you have questions about this. Please be aware that we DO NOT cover installing the control cable itself through the plastic steering console shell. We recommend a hole be drilled and a grommet be installed to insert the cable into the side of the steering console shell. Please contact us for details on this.
|
|

|
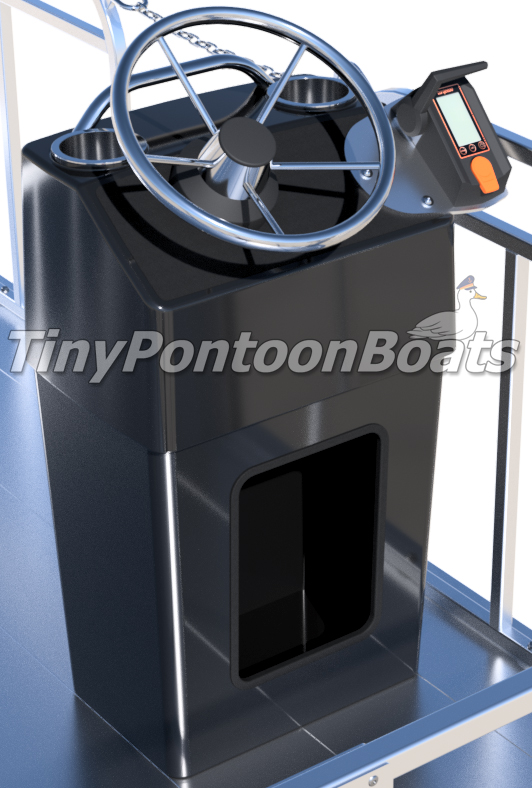
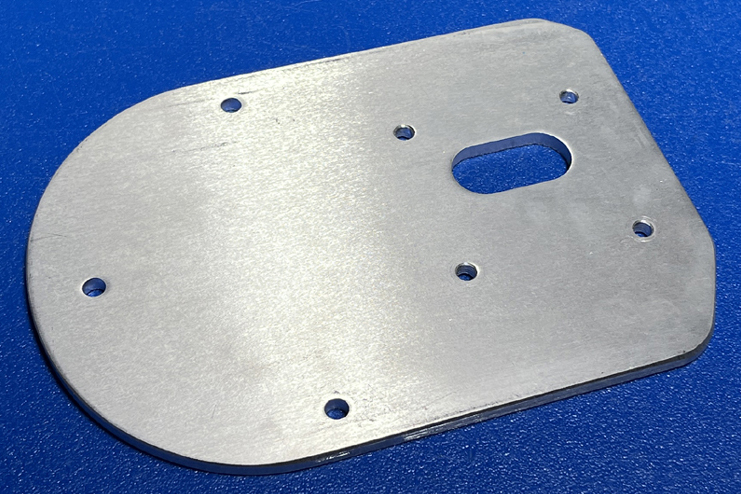
STEP 1
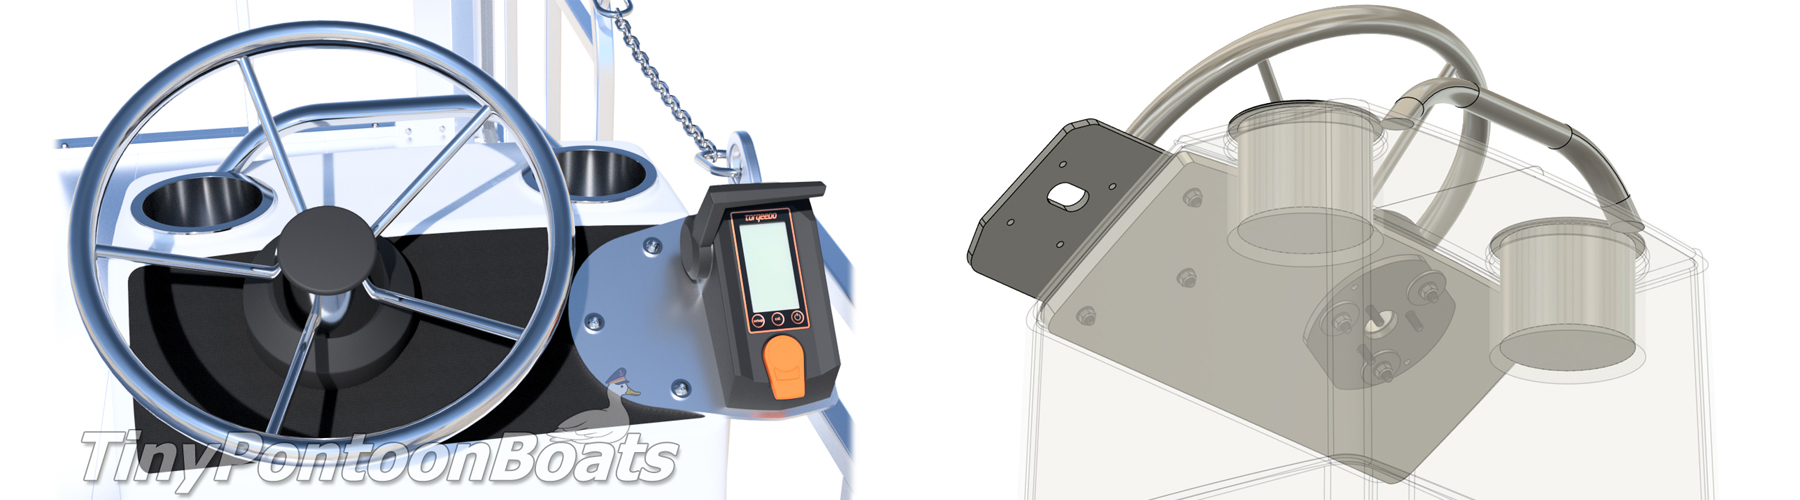
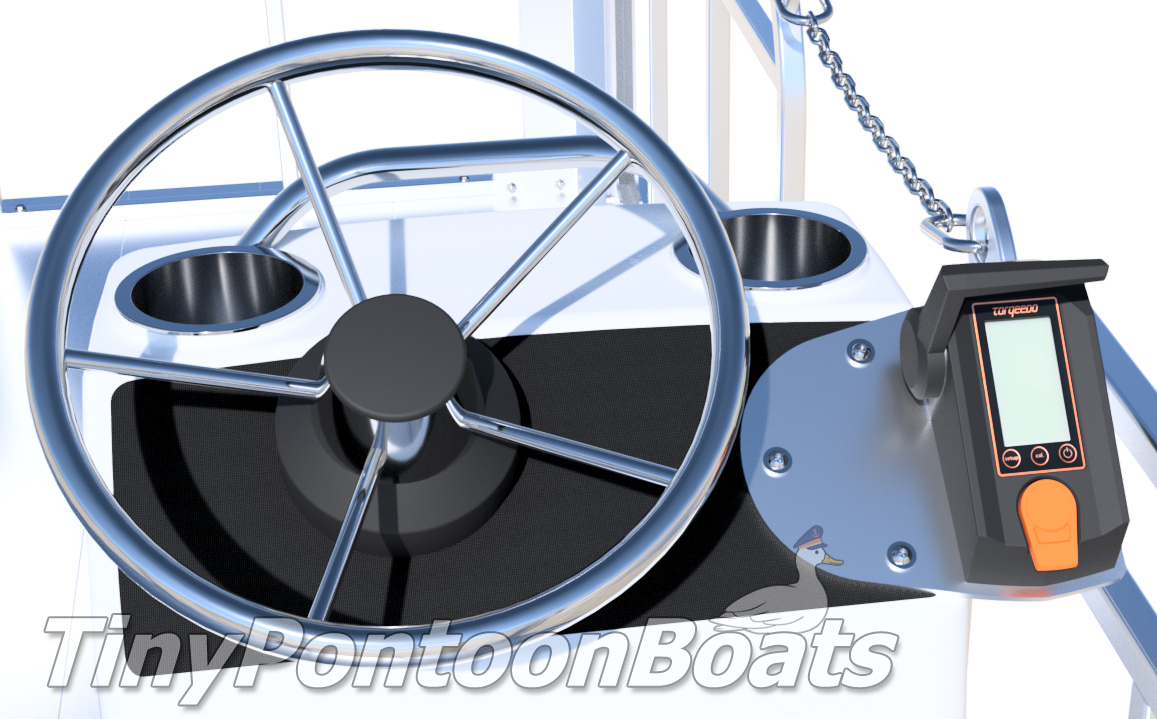
Locate the 1/4" thick aluminum mounting plate that comes with your kit. If you are working with a different throttle than shown to the right, we will let you know about any specific orientation for installation after your purchase. However, you'll note that the right side of the plate is designed to match the shape of the throttle it is intended for. As mentioned above, we are installing the "Torqlink" throttle, part number 1976-00, in this set of instructions. The mounting plate for this throttle has a notch on the lower right corner to match the throttle housing.
|
|
|
STEP 2
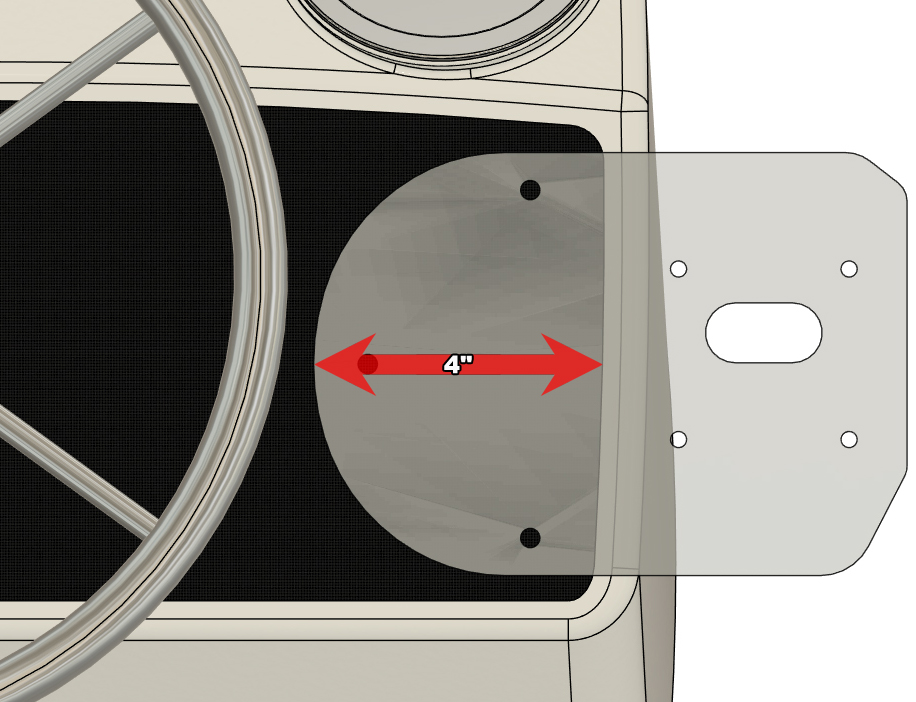
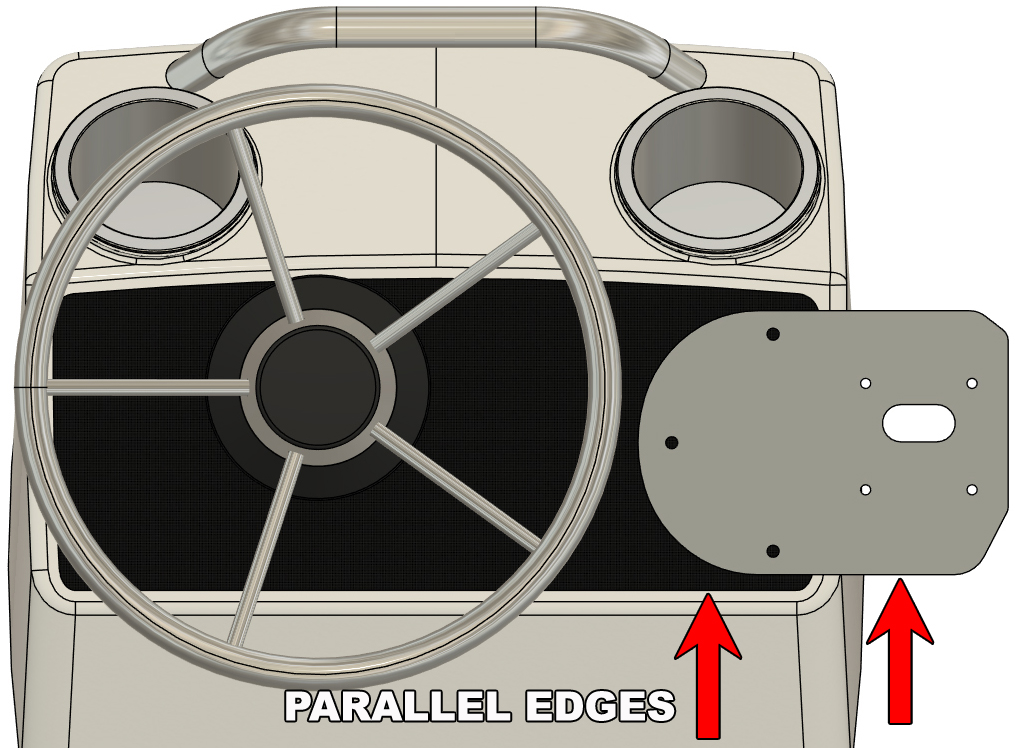
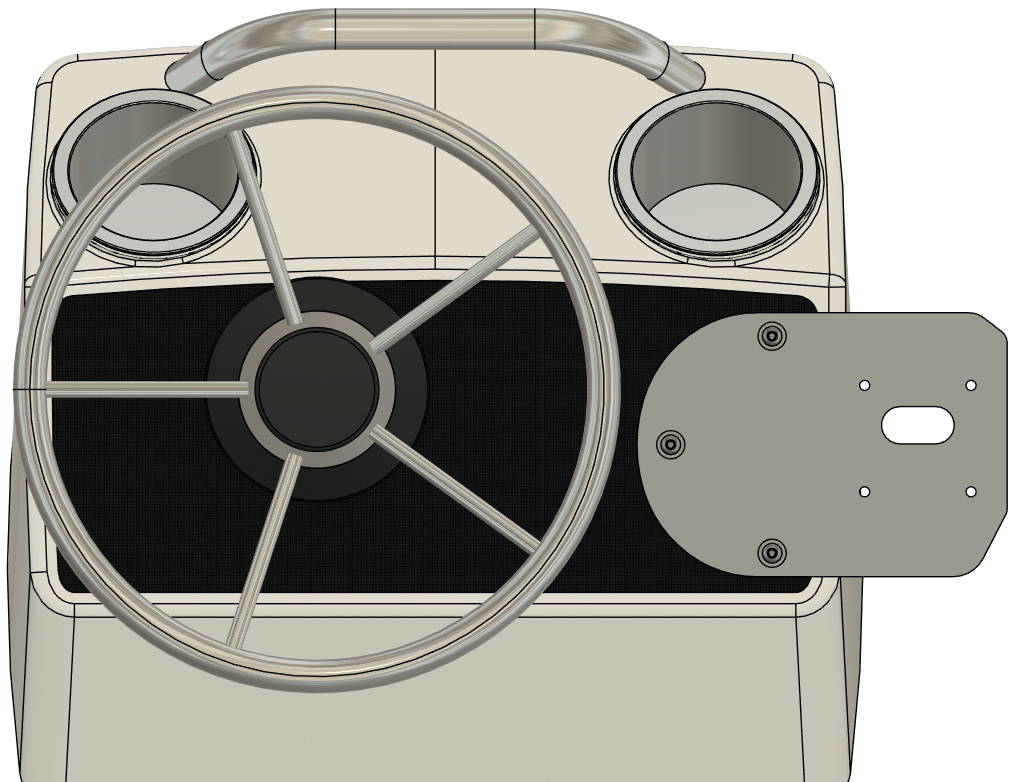
Place your aluminum mounting plate on the dash panel in the position shown in the two diagrams to the right. In the first diagram, we are referencing the right central edge of the textured black dash panel decal. Locate the left edge of the plate 4" from the right edge of the decal. As shown in the second diagram, the bottom edge of the plate is to be mounted parallel to the bottom edge of the dash decal.
|
|
|
STEP 3
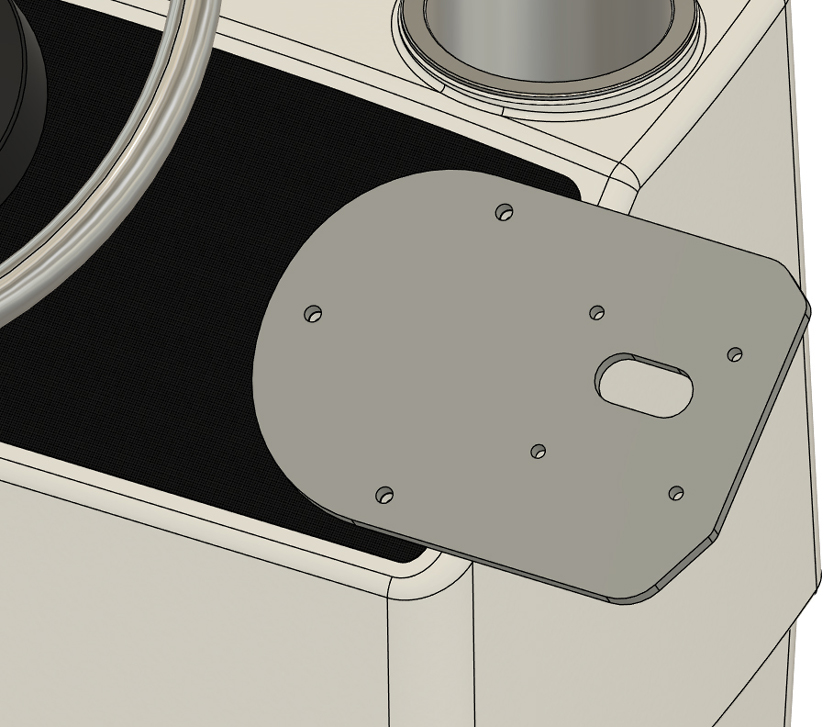
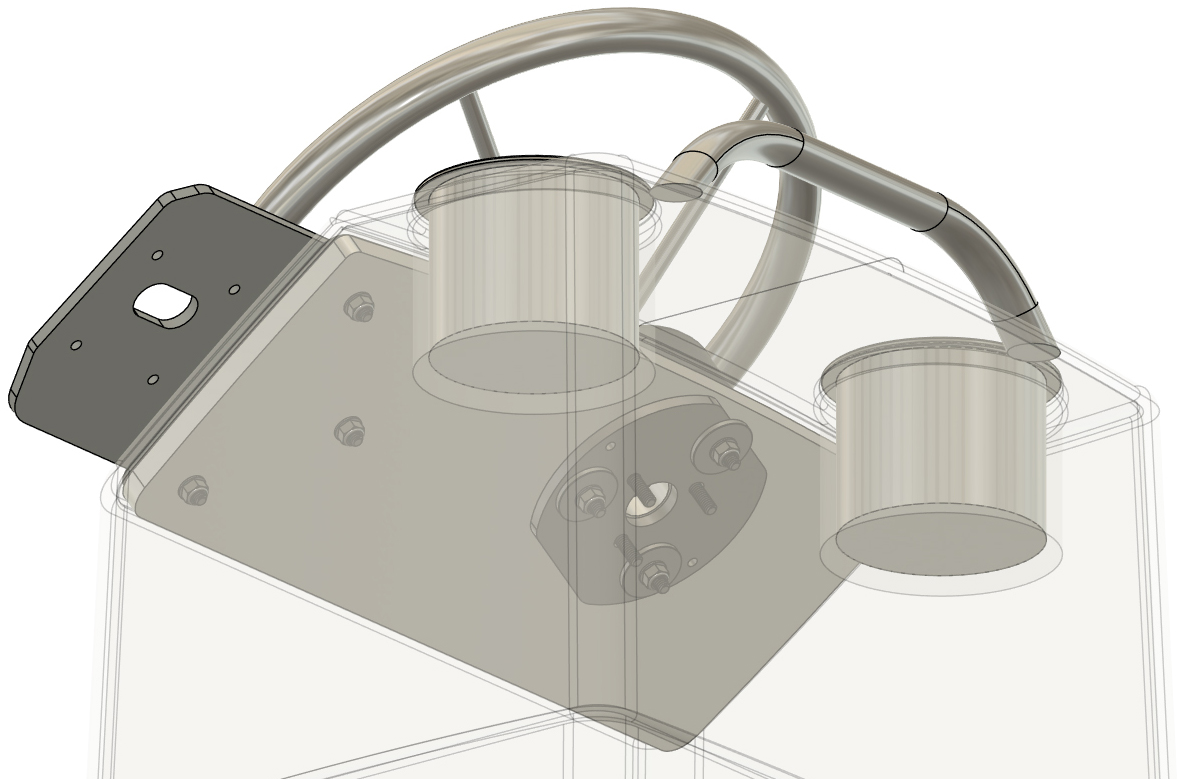
Using your electric drill and a 1/4" drill bit, drill through each 1/4" bolt hole on the left side of the aluminum plate and all the way through the dash panel of your steering console. The aluminum plate plus the steering console will have a combined thickness of approximately 1". After you drill through each hole, insert a 1/4" x 1 1/2" button-head Allen bolt with flat washer from your bag of hardware labeled "Mounting Plate Hardware" or similar.
|
|
|
STEP 4
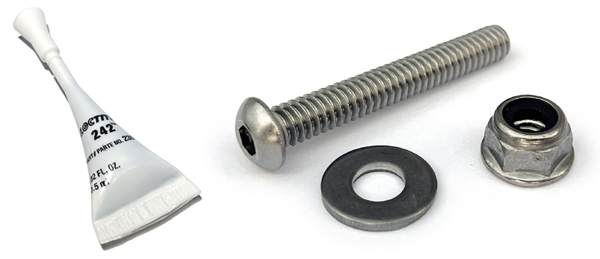
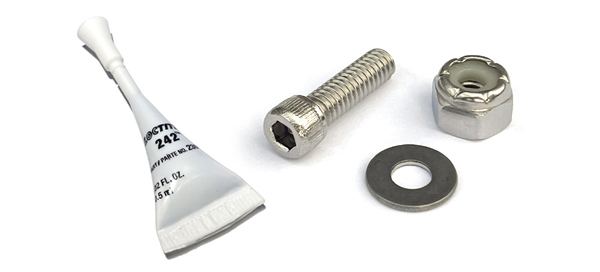
From your bag of "Mounting Plate Hardware", install 1/4" flange lock nuts on the bolts that you just inserted through the aluminum plate and dash panel. You will have to reach into the front opening of the steering console to install these nuts against the back surface of the dash panel. Apply 2-3 drops of the included blue LocTite 242 on each nut before installation. Tighten all three nuts and then double-check that all 3 sets of nuts and bolts have been tightened.
|
|
|
STEP 5
If installing a different throttle than we are working with here (Torqeedo part number 1976-00), you may require different tools and alternate mounting hardware may be included. Follow the same procedure we show here to mount your throttle and we will provide required special instructions after your purchase. Please contact us if you have questions.
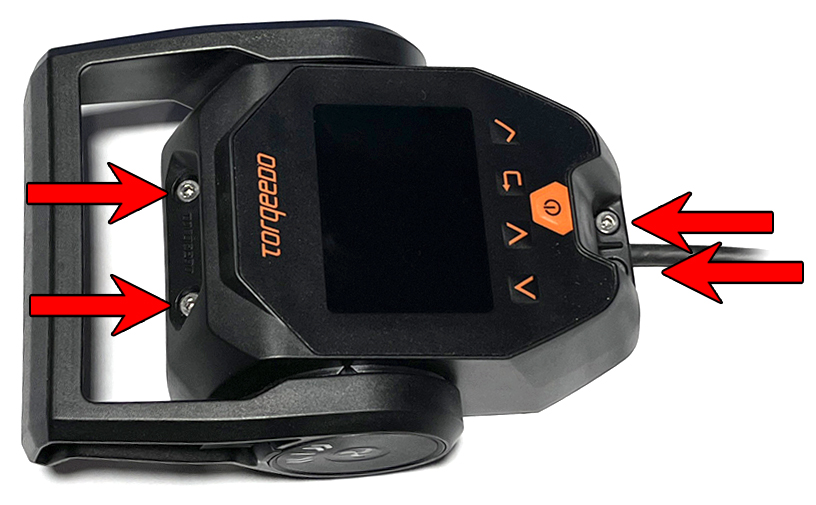
Unbolt the base plate of your throttle assembly. The Torqeedo throttle we are working with here uses 4 small Allen bolts. Remove the bolts and place the top portion of the throttle assembly aside. From the bag of hardware labeled "Shifter/throttle mounting hardware" or similar, bolt the throttle base plate to the top side of the aluminum mounting plate. Be sure to orient the shifter/throttle base plate in the correct manner to match-up with the upper portion of the assembly. Insert a 12-24 Allen bolt with flat washer through each of the remaining small holes on the bottom of the plate and through the aligning bolt holes in the throttle base plate. Install a 12-24 lock nut onto each bolt and be sure to apply 2-3 drops of the included blue LocTite 242 to the threads of each nut. Tighten all four nuts and bolts and double-check that they are all tight. Our aluminum plate is not mounted to the steering console in the picture we show here.
|
|
|
STEP 6
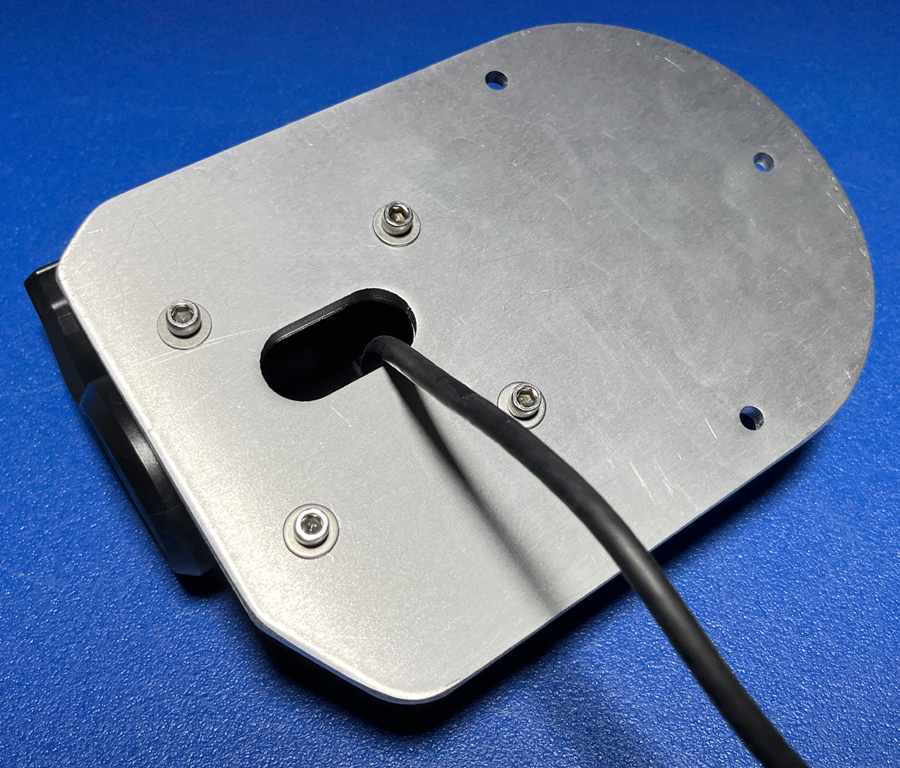
Insert the control cable through the central hole in the aluminum mounting plate and use the bolts you removed at the start of step 5 to reinstall the upper portion of your throttle assembly. An alternate throttle assembly is shown installed in our picture here.
This portion of your assembly is now complete! |
|