
|
603-630-5658
|
|
tinypontoonboats@gmail.com
|

|
REQUIRED TOOLS
Installing the Teleflex cable steering box in our Mini Steering Console requires the Tiny Pontoon Boats hardware and adapter kit and some simple tools. This set of detailed instructions will walk you through the procedure. Please be aware that the process requires some real dexterity and is a 7/10 on the DIY scale due to having to install fasteners blindly. Below we have provided a list of the tools required for your installation, as well as part numbers and links to where you can get any specialized tools from McMaster, which is a reasonably priced industrial supplier. Click on the part number to view the item on the McMaster website. Many customers will already have the majority of these tools, if not all of them. These tools should be stocked at your local home supply or hardware store as well.
|
|

|
STEP 1
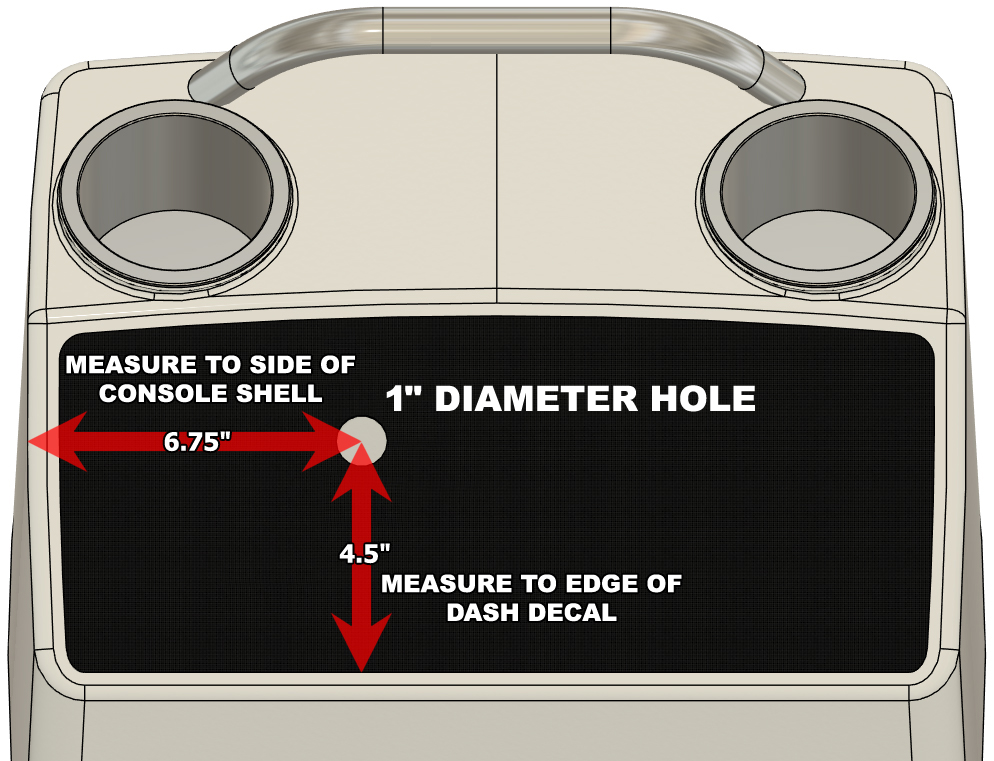
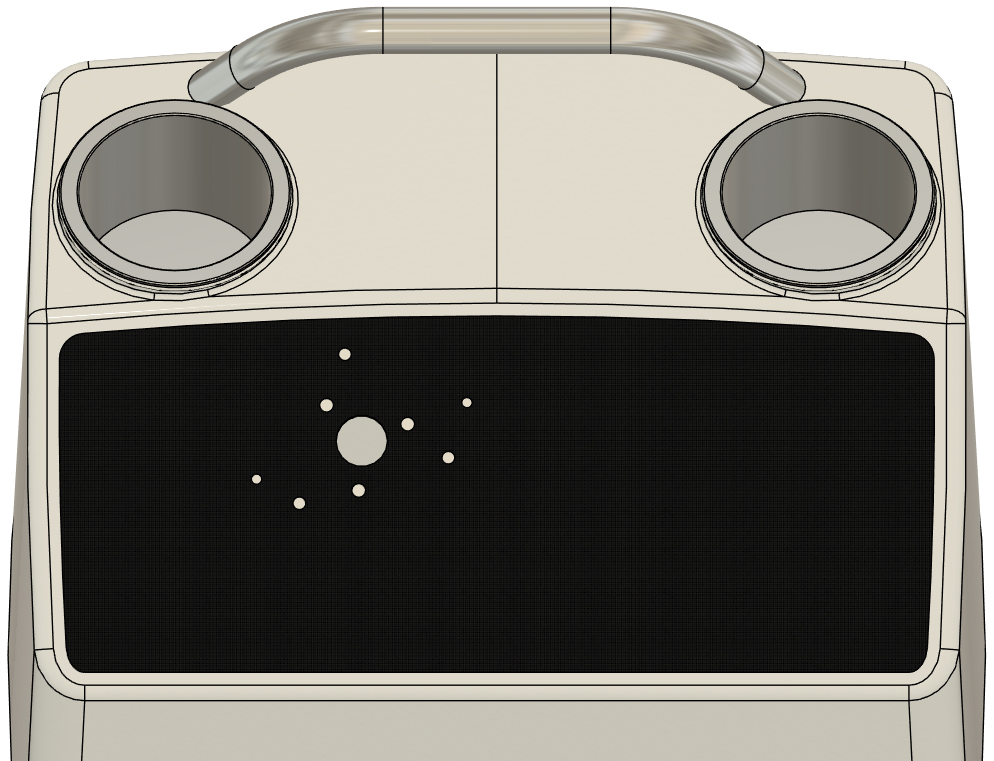
Locate the position of the hole the steering shaft installs through. To the right we have provided a diagram showing where you need to position and drill a 1" diameter hole. We prefer to use a step-type drill bit with a 1" maximum diameter for this. The 1" hole allows for a tight fight for the steering box as it has a shaft support boss that extends partially through the hole in your dash panel. It is possible that you'll have to ream the 1" hole slightly for your tight fit. The tight fit minimizes water intrusion when the assembly is complete.
|
|

|
STEP 2
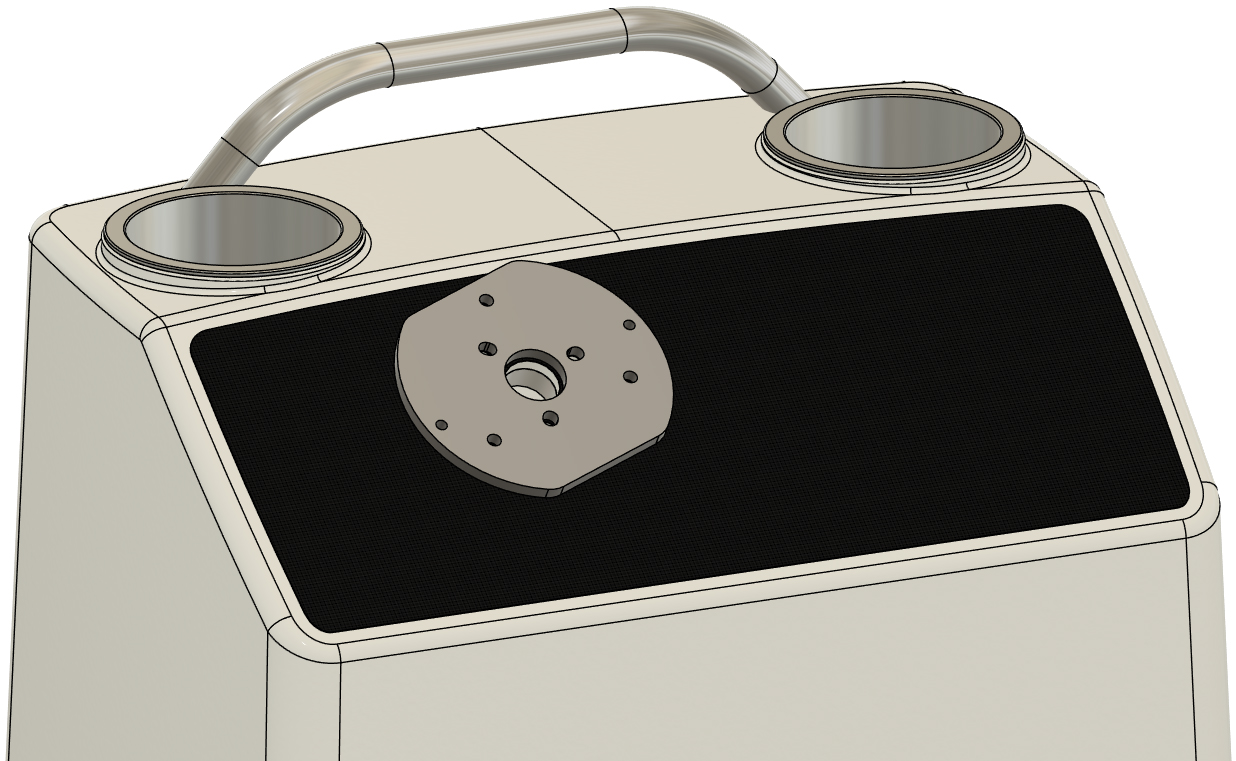
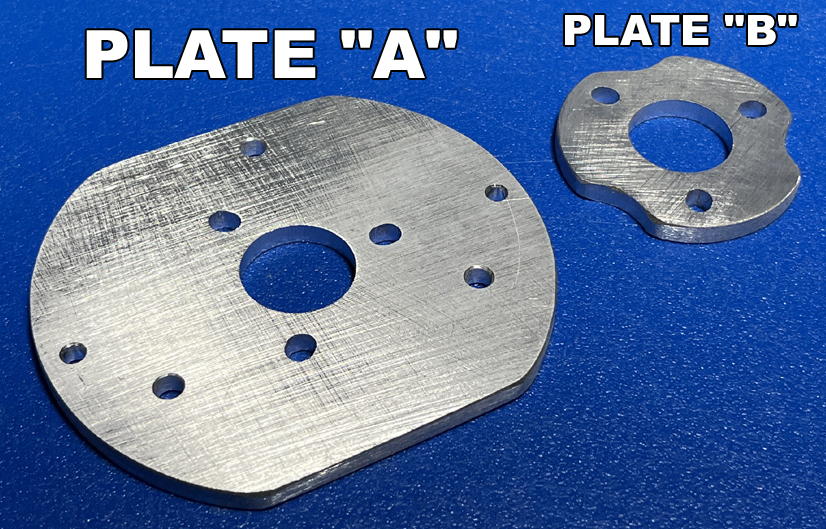
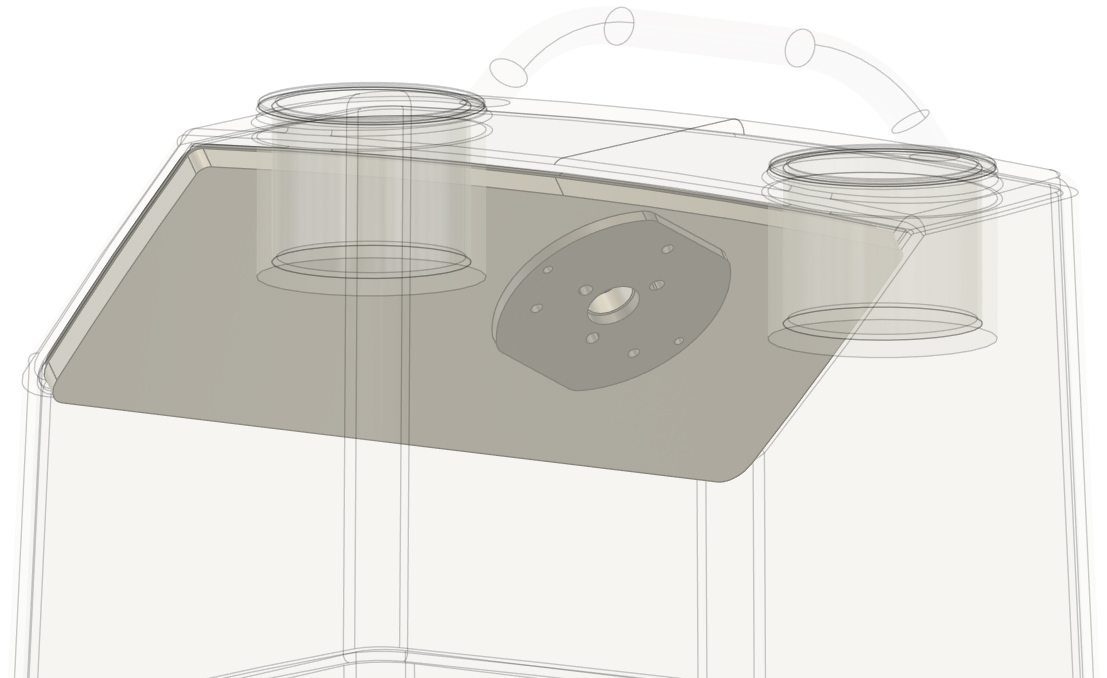
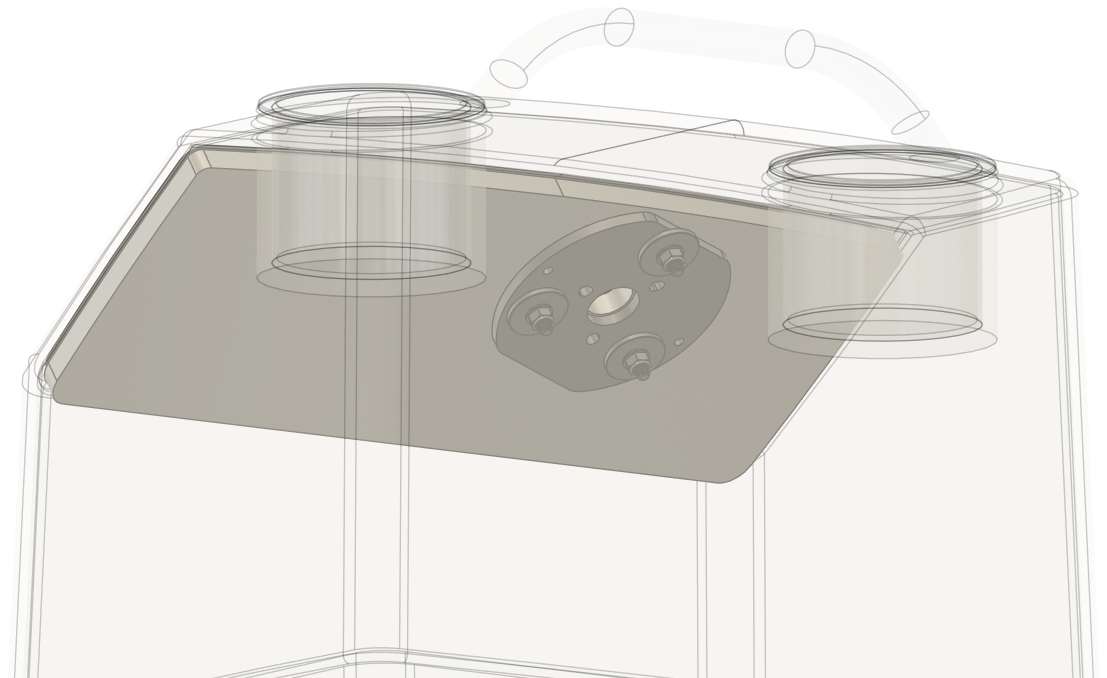
The steering box mounting kit includes two 1/4" thick aluminum plates. From this point forward, we will refer to the larger plate as "Plate A" and the smaller plate as "Plate B". In this step, we are using Plate A as a bolt hole template.
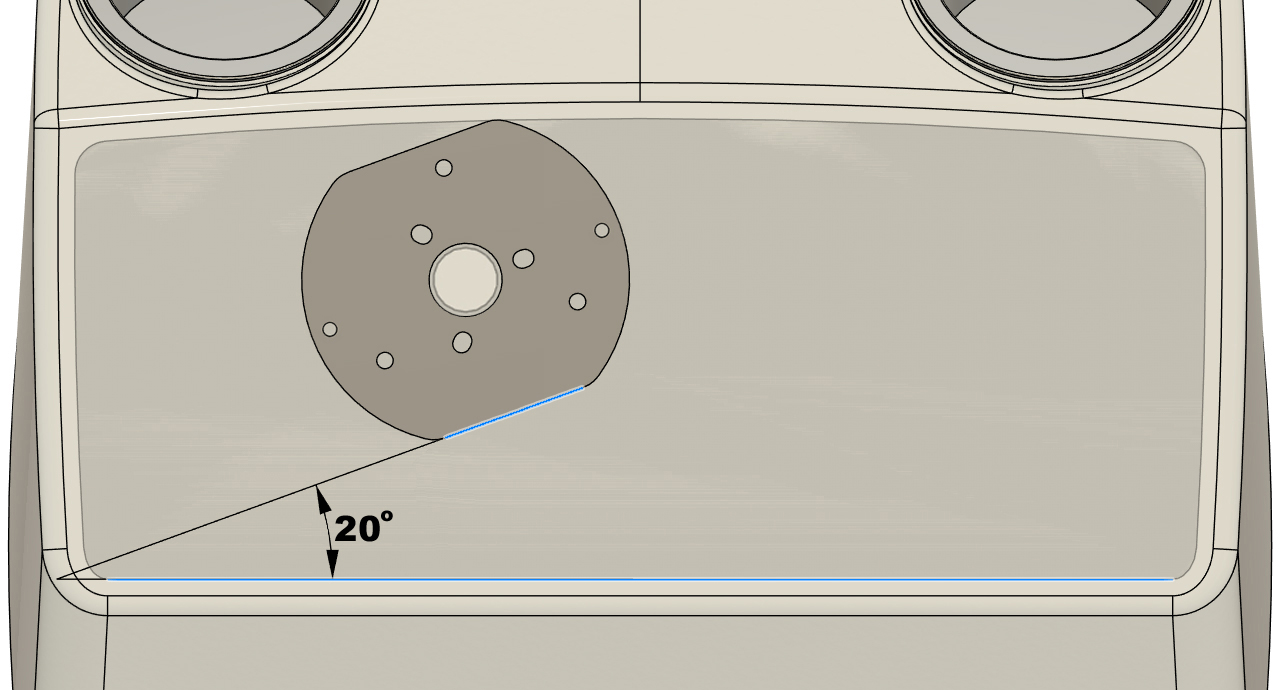
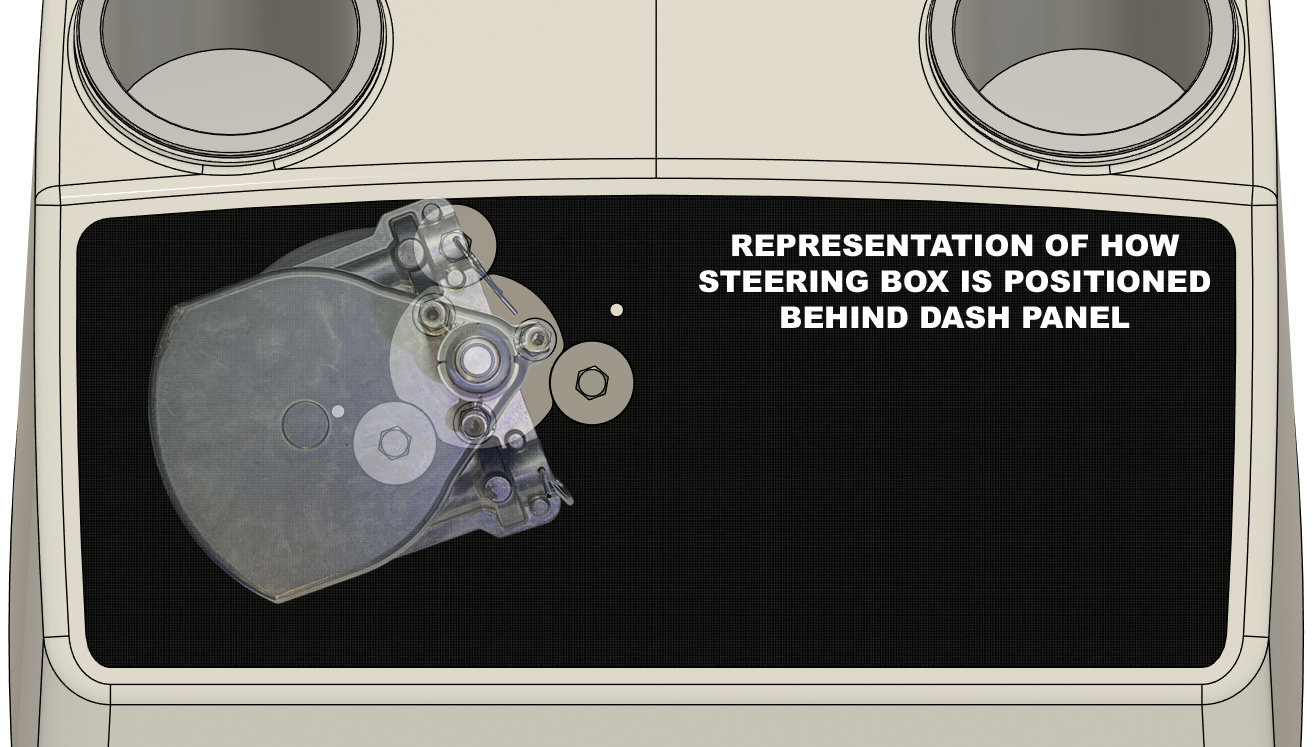
Place Plate A on the surface of your dash panel as shown to the right. Be completely certain that that the holes are oriented as shown in our diagram. Center the large central hole over the 1" hole you drilled in your dash panel. Use a protractor (angle finder) to angle the plate so that the straight bottom edge is tilted 20° from the straight bottom edge of the black dash panel decal. This 20 degree angle is critical for the installation of the steering box. If this you fail to follow these instructions, the box will interfere with the left side cup-holder inside the steering console.
|
|
|
STEP 3
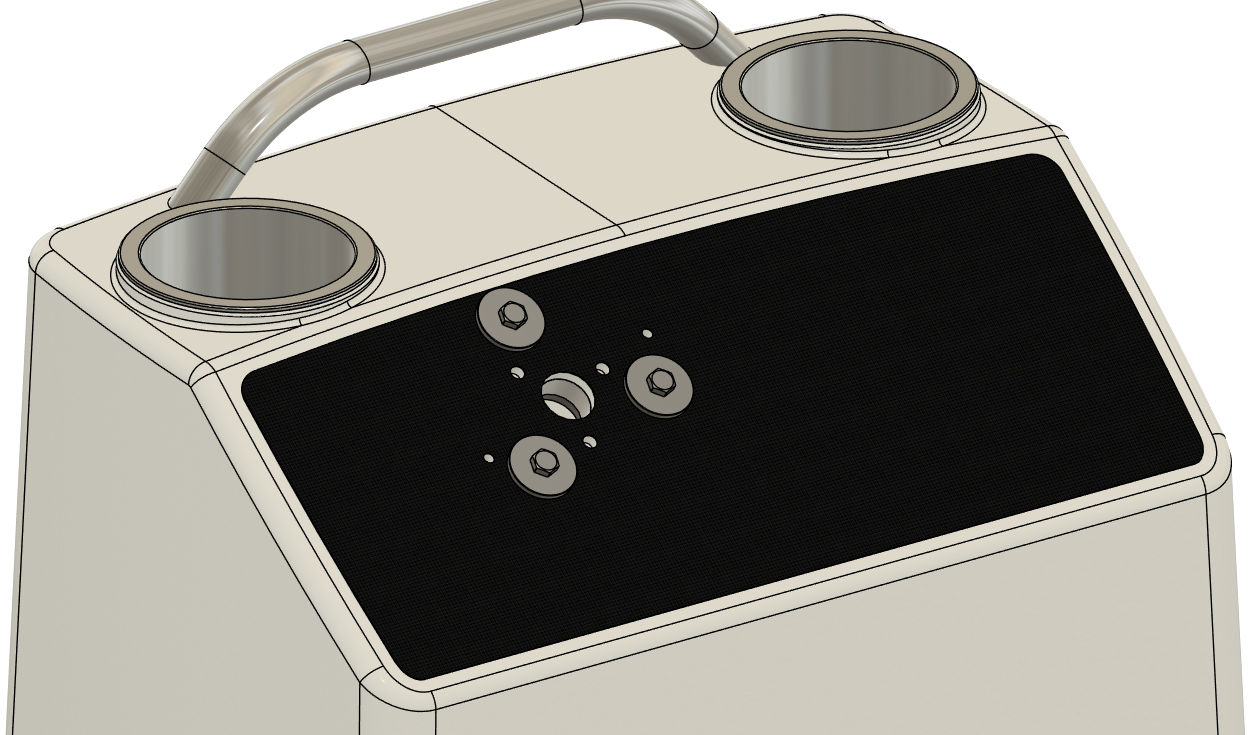
Using your electric drill and a 13/64" drill bit, drill through the holes pointed out with the yellow arrow and go all the way through the plastic dash panel (will be about 3/4" thick overall + 1/4" plate). After drilling one hole, insert one of the 10-32 Allen bolts into the hole to pin the plate into position. Drill the other small hole and insert the other bolt. The 10-32 Allen bolts will be in the hardware bag labeled "Bezel Hardware" or similar.
Next, drill through all the other holes in the plate with a 1/4" drill bit. We recommend drilling through the 3 outermost 1/4" holes and inserting 1/4" bolts from the bag labeled "Inner Adapter Plate Hardware" or similar as you drill those holes. After, drill through three remaining inner holes with the 1/4" drill bit. Remove all the bolts you inserted through the newly drilled holes and remove Plate A from the surface of the dash panel.
|
|

|
STEP 4
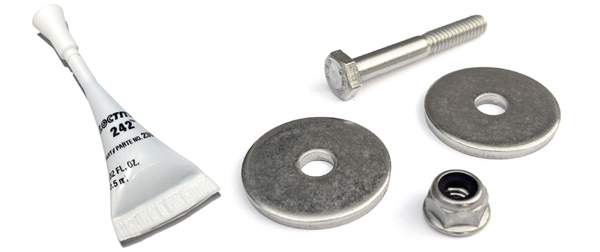
The next step is to bolt Plate A to the back side of the dash panel. Using the hardware from the bag labeled "Inner Adapter Plate Hardware" or similar, insert 1/4" x 1 3/4" hex bolts with the included thick fender washer through the outer surface of the dash panel in the outer set of 1/4" bolt holes as shown. Reach inside the steering console through the main opening and install Plate A over the bolts. Be sure that it is oriented as shown. Install a fender washer and flange lock nut onto each bolt. When installing the nuts, be sure to apply 2-3 drops of the included blue LocTite 242 on the threads of the nut. This both lubricates the threads and helps ensure that the bolts never become loose. Double-check that all the nuts and bolts are tight and move onto the next step.
 |
|
|
STEP 5
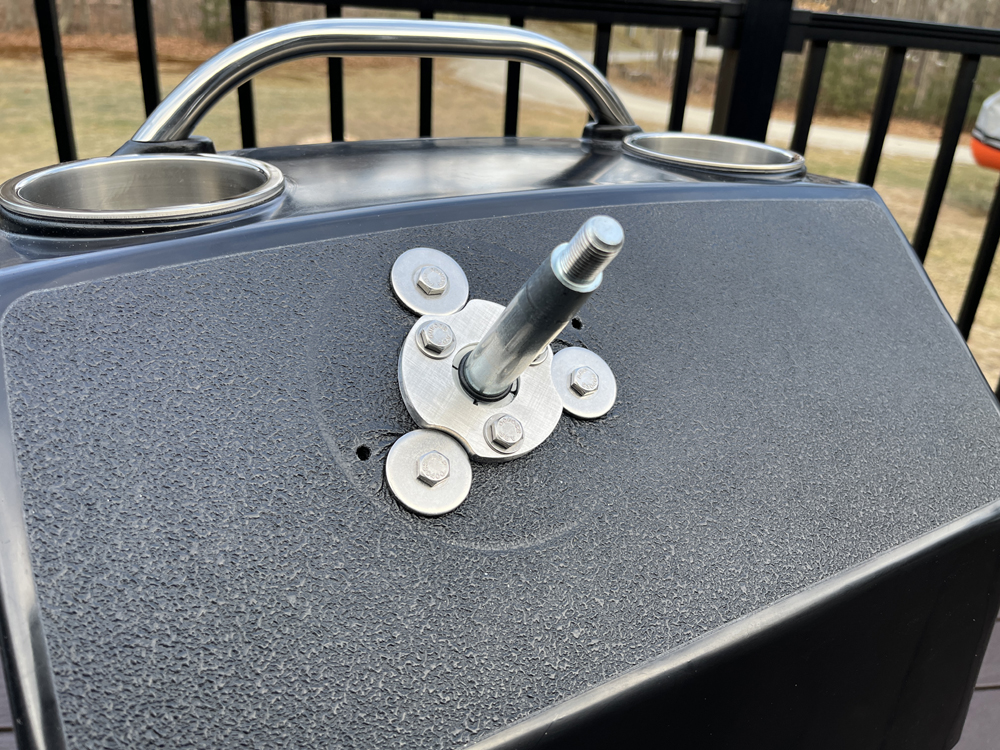
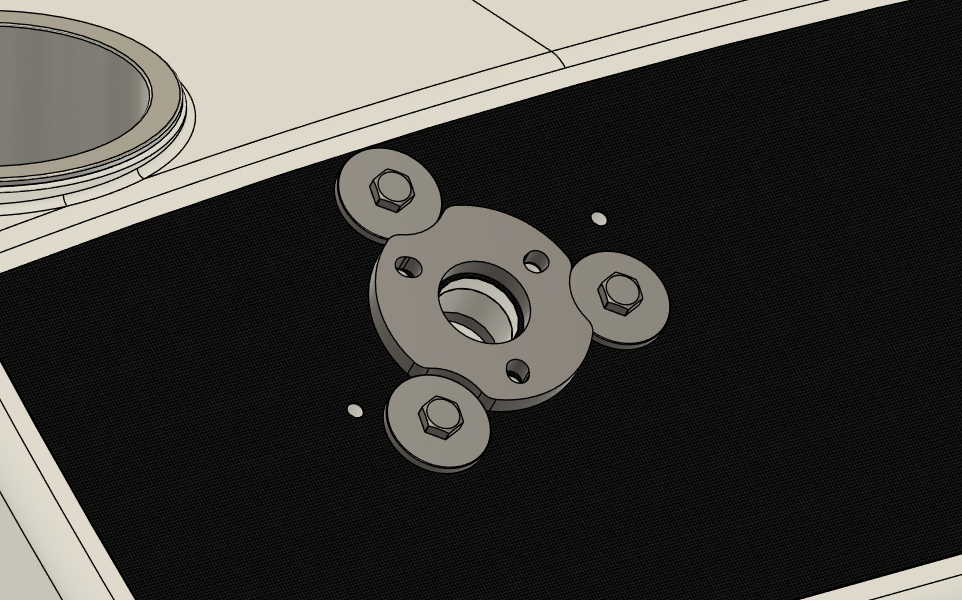
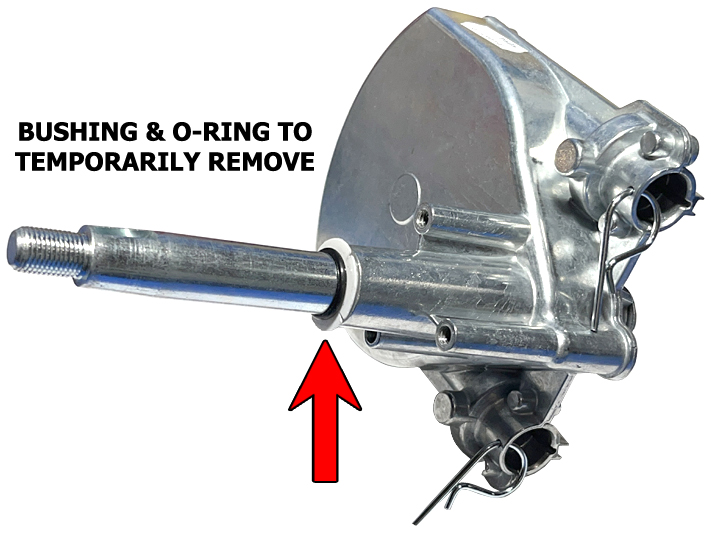
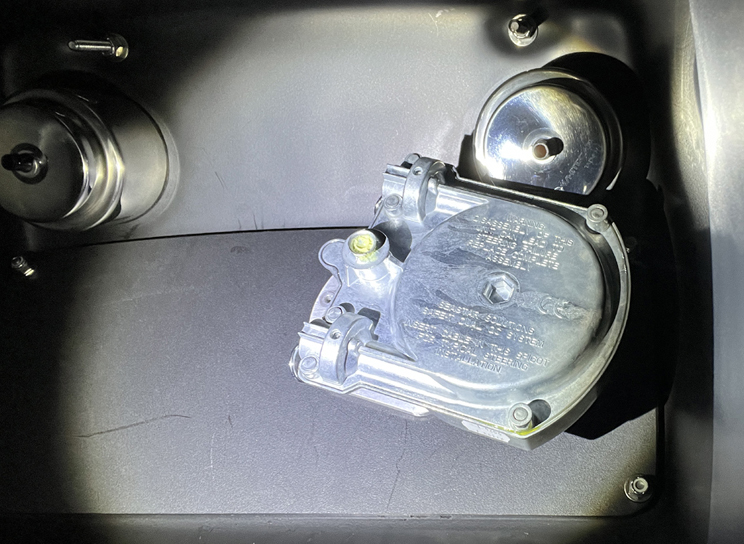
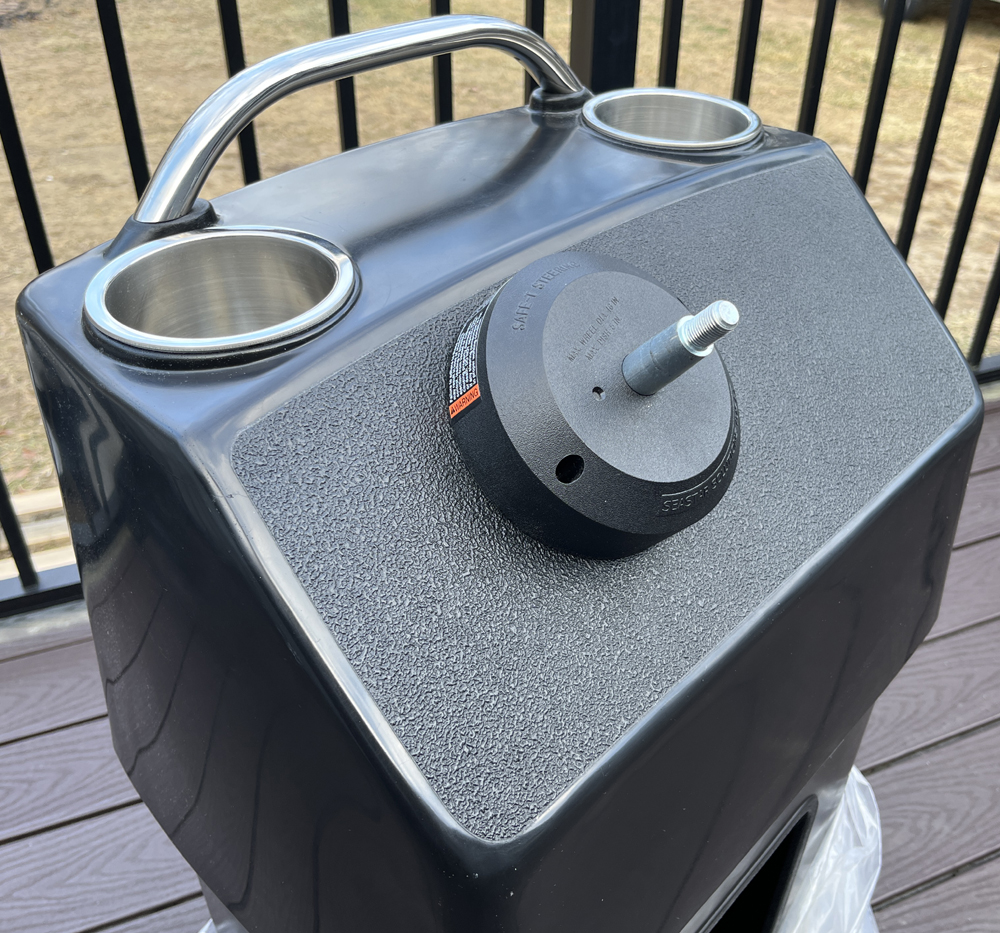
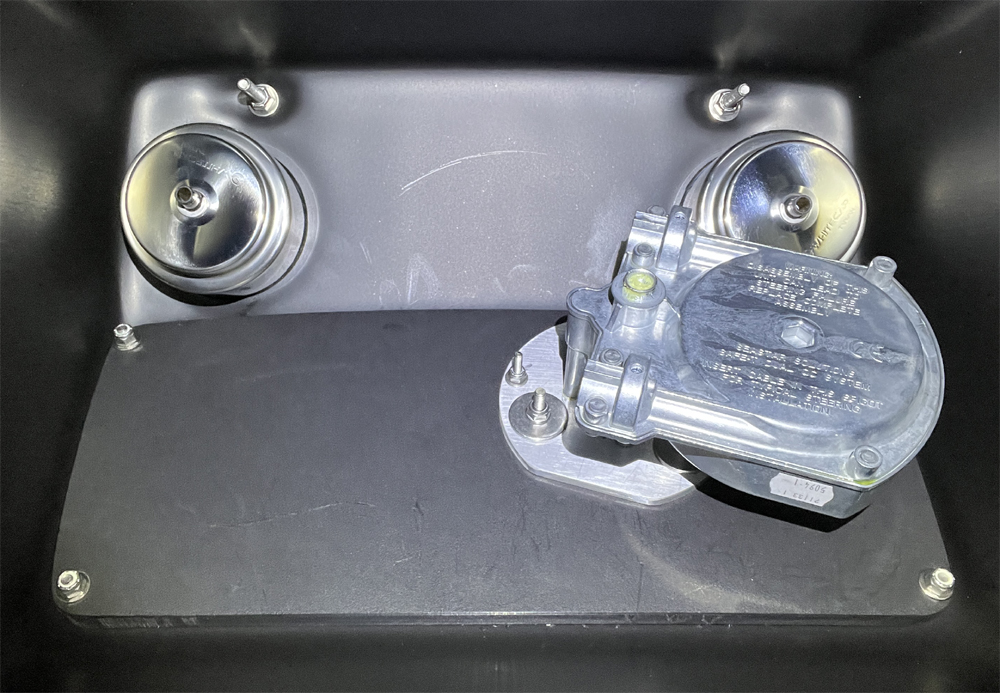
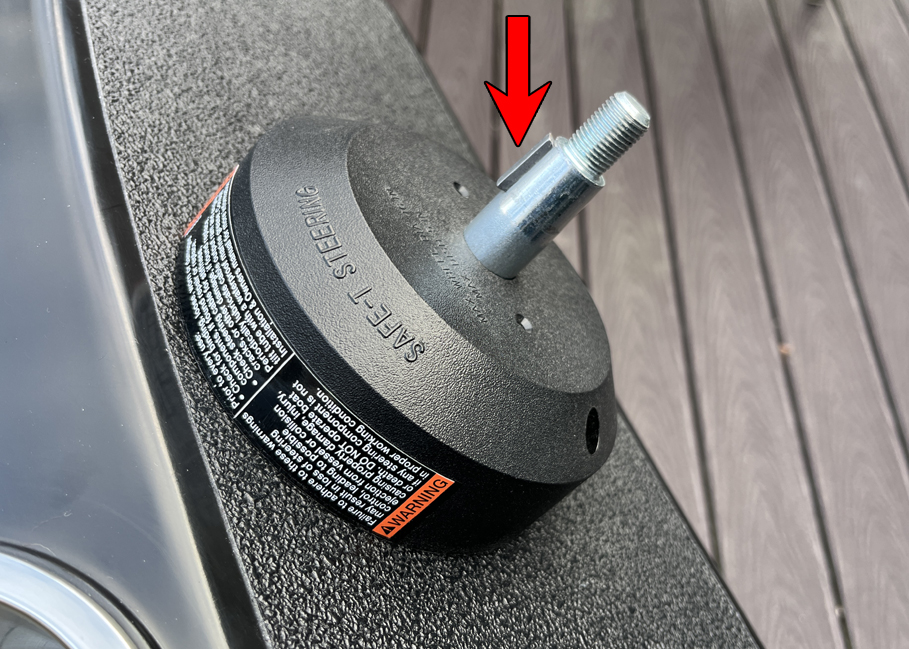
Place Plate B over the central 1" dash panel hole as shown and locate the bag of hardware labeled "Steering Box Hardware" or similar. Also, locate the steering box and temporarily remove the plastic bushing and O-ring pointed out below. Reach inside the steering console from the main opening with the steering box and insert the shaft through the 1" hole and orient the steering box as shown. You will have to force the aluminum housing boss through the 1" hole. If the aluminum housing boss is too difficult to press into the hole, use your 1" drill bit and over-size the hole a bit. Typically, the 1" hole will allow you to press the steering box into the dash panel and it provides a nice tight fit.
With the aluminum steering box pressed through the dash panel, align the bolt holes in the steering box with the bolt holes in Plate A. From your hardware bag, install a 1/4" x 2" hex bolt with a SAE flat washer as shown. Before inserting the bolt with washer through the dash panel, apply 3-4 drops of the included blue LocTite 242 to the threads. This may be a little messy when you go to insert the bolt, but is 100% necessary. Tighten all three bolts and then double check that they are all tight. Reinstall the plastic bushing and O-ring onto the steering box shaft. You may have to use a flat-blade screw driver to push the bushing back into position. 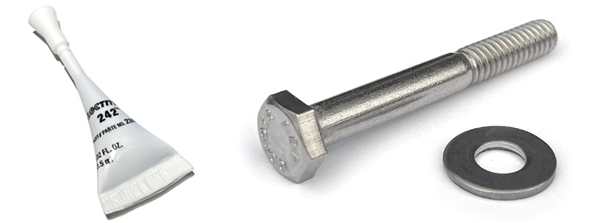
|
|
|
STEP 6
The next step is to install the steering shaft trim bezel. Two bolts hold this plastic bezel to your dash panel. One bolt is easy to install and the other can be tricky to reach, especially if you have large hands. If you have sausage fingers, we recommend finding a helper with small hands to reach the last nut you need to install.
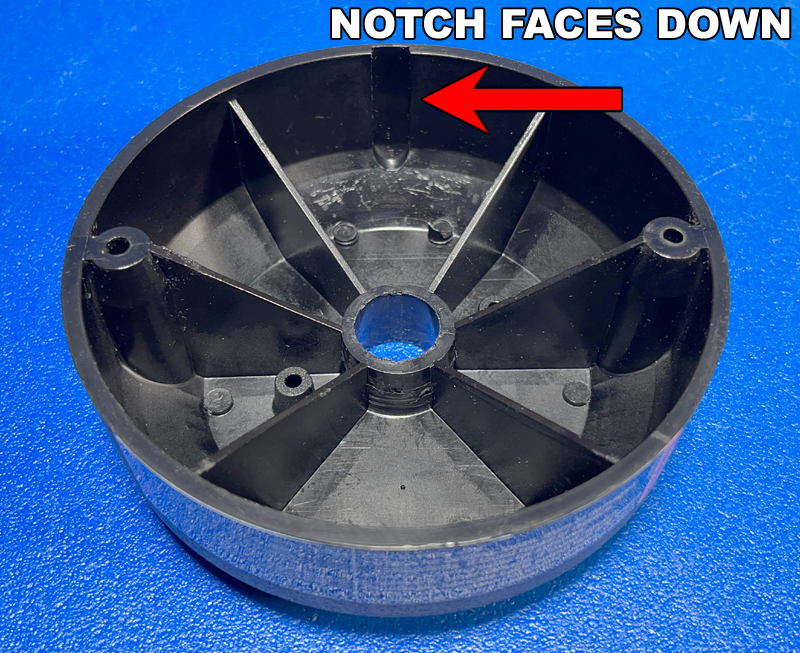
First off, locate the bag of hardware labeled "Bezel hardware" or similar and verify that the included 10-32 x 2 1/4" bolts fit through the bolt holes in the plastic bezel. They typically do, but it's not unheard of for there to be a little bit of "flash" remaining from the molding process. If necessary, drill through the bolt holes with your 13/64" drill bit. Place the plastic bezel over your steering shaft and orient it so that the notch pointed out below points down. The wording molded into the bezel will also be upright. If the lettering is upside-down, the part needs to be rotated. Align the bolt holes with the holes in your dash panel and install a 10-32 x 2 1/4" Allen bolt (without washer) through each hole. You will have to use your 5/32" hex key (Allen wrench) to drive the bolt through the hole. With the bolts pushed into place, install a flat washer and lock nut onto the bolt from inside the steering console. Tighten both sets of nuts and bolts. The nut that is behind the left side of the steering box is tough to reach, but once you have a wrench on the nut, the bolt can be turned and tightened from above. PRO TIP: When tightening the 10-32 Allen bolt, you'll only be able to turn the Allen wrench from the short end as you have to reach into the recess of the trim bezel. A small 1/4" drive deep-well socket works great as a comfortable extension for the tiny Allen wrench.
|
|
|
STEP 7
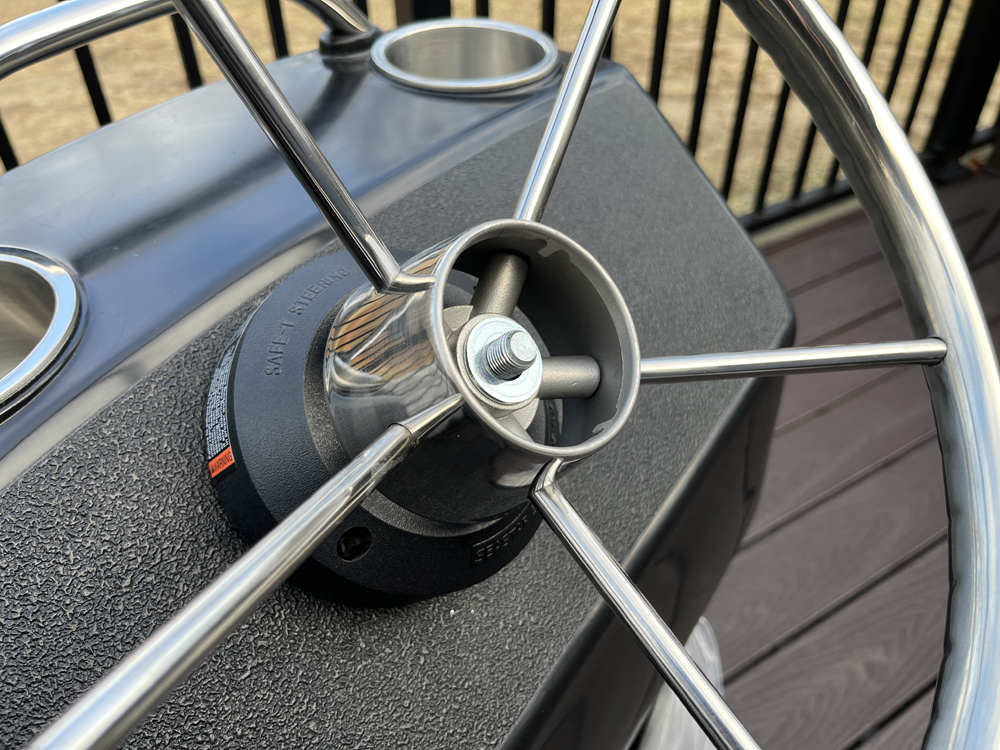
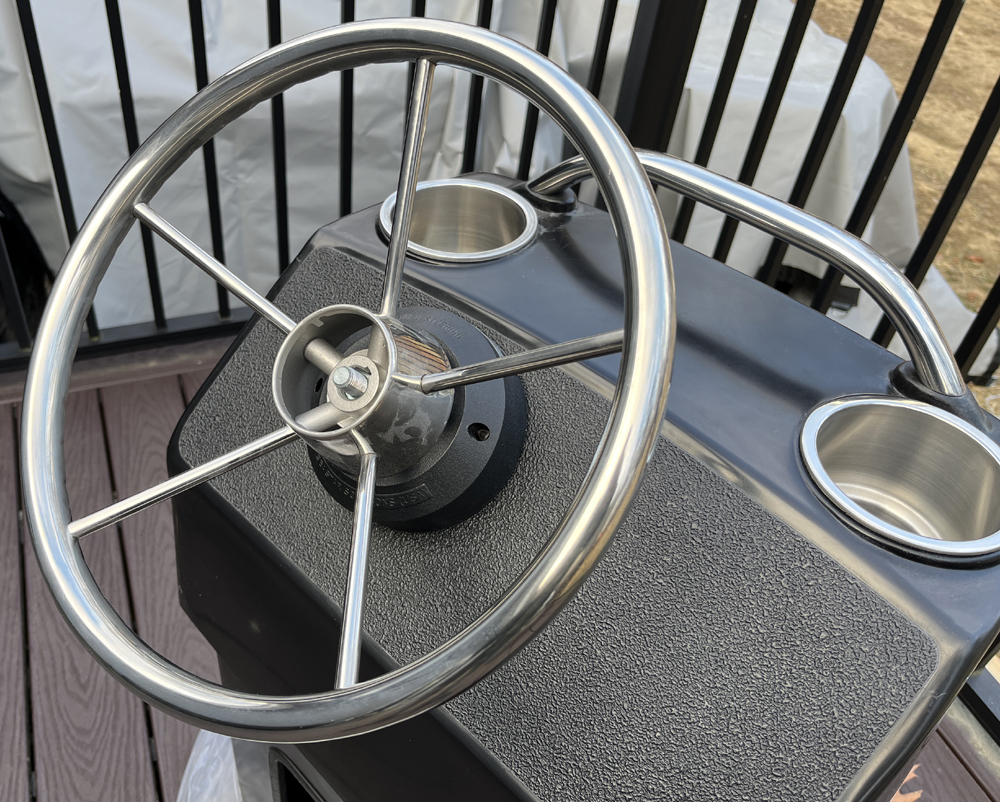
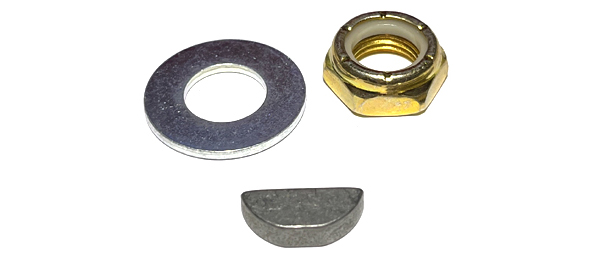
Now onto the easy part! The Sea-Star steering box and cable kit you purhcased includes a bracket and a small batch of hardware that you do not use for this application, but there are three parts that you do need. From the Sea-Star box, locate the 1/2" flat washer, 1/2" lock nut, and shaft key shown below.
Install the shaft key into the keyway of your steering shaft as shown. You may may have press it into position. If it is a tight fit, we recommend using a small C-clamp to push it into the machined recess. DO NOT HIT THE KEY OR SHAFT WITH A HAMMER. With the key installed, slide your steering wheel onto the shaft as shown.
|
|
|
STEP 8
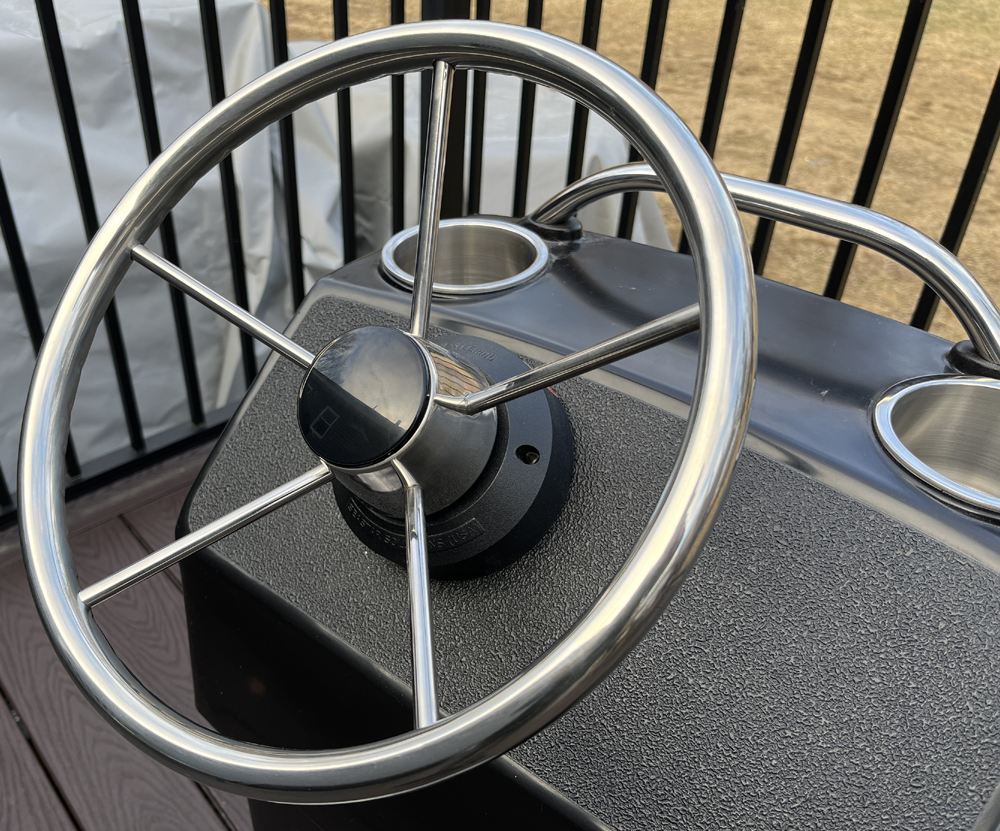
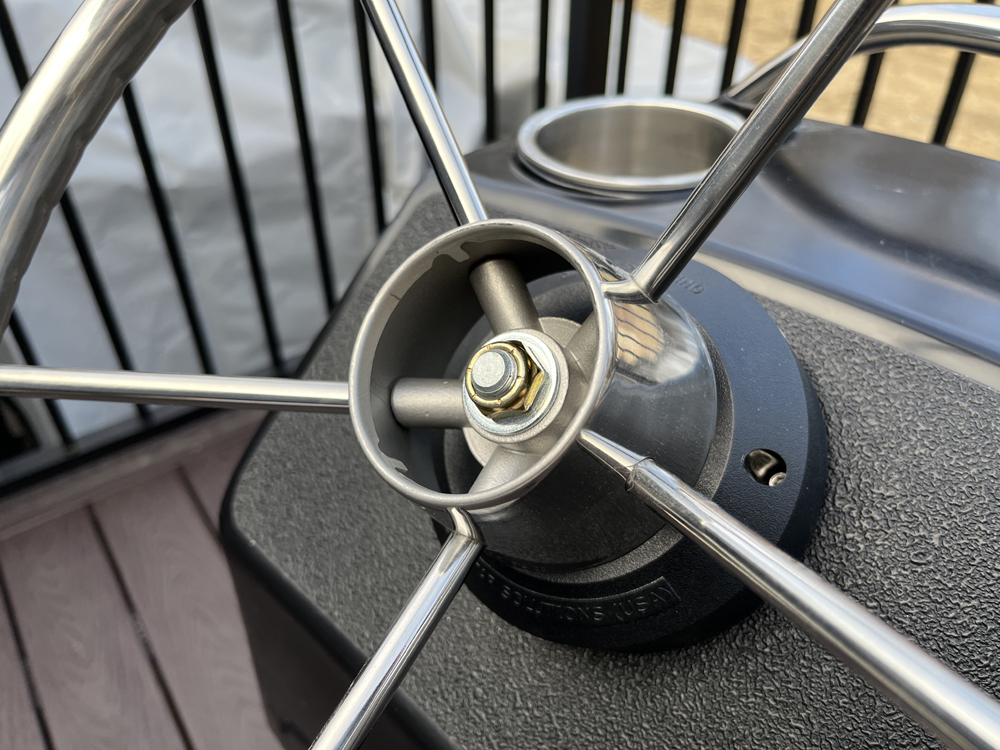
Install the 1/2" flat washer, apply 2-3 drops of you remaining blue LocTite 242 onto the shaft threads, and install the 1/2" lock nut. To stop the shaft from spinning when tightening the nut, hold the steering wheel for leverage. With the nut tightened, install the central cap that comes with the steering wheel, and you're done!
|
|