
|
603-630-5658
|
|
tinypontoonboats@gmail.com
|

|
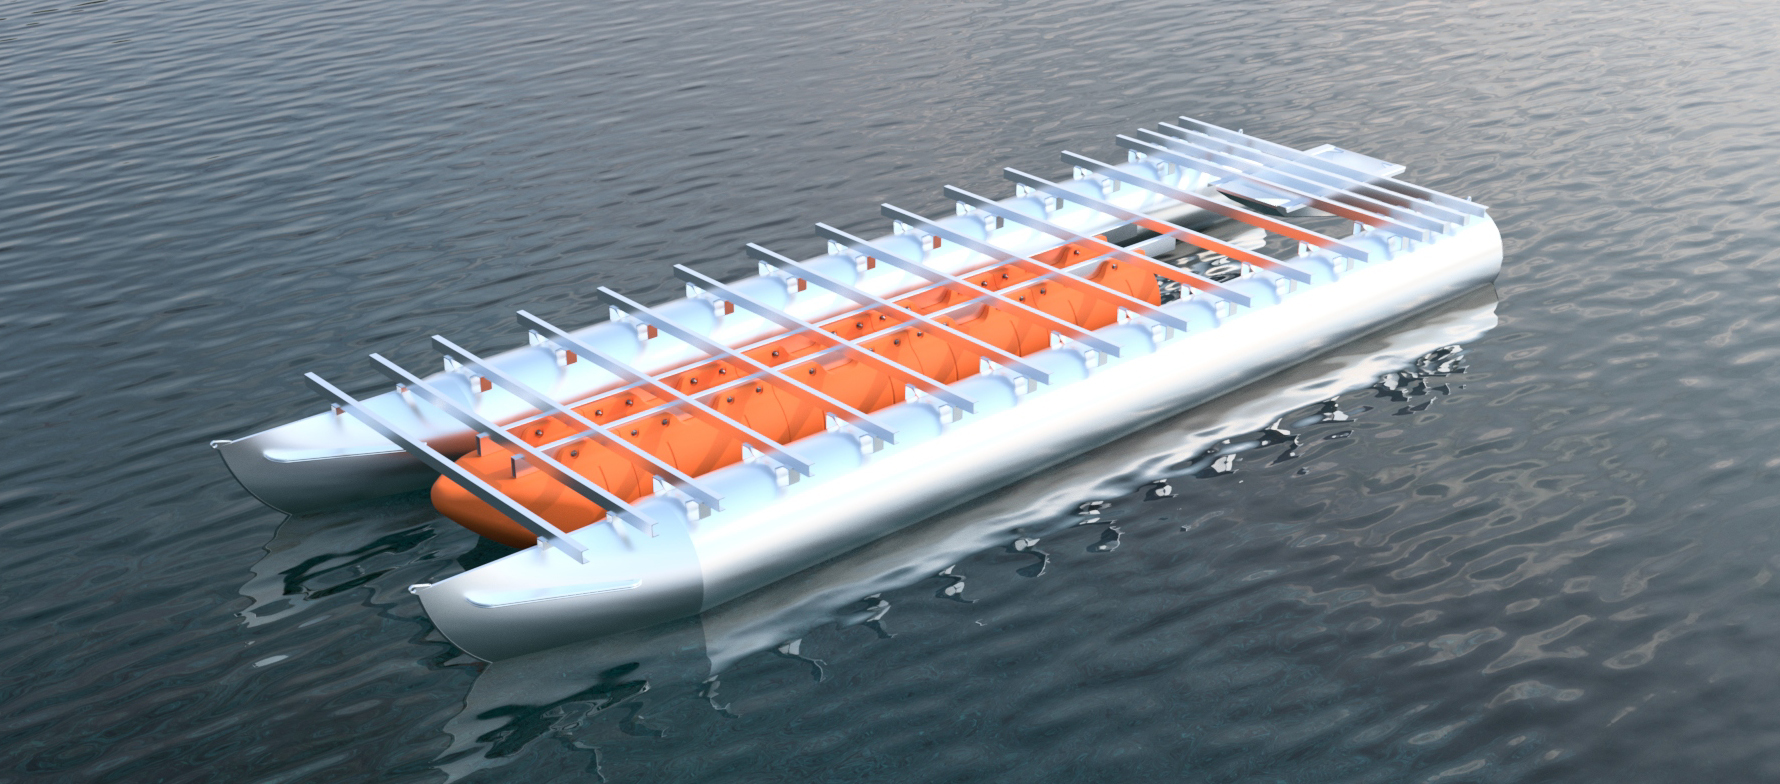
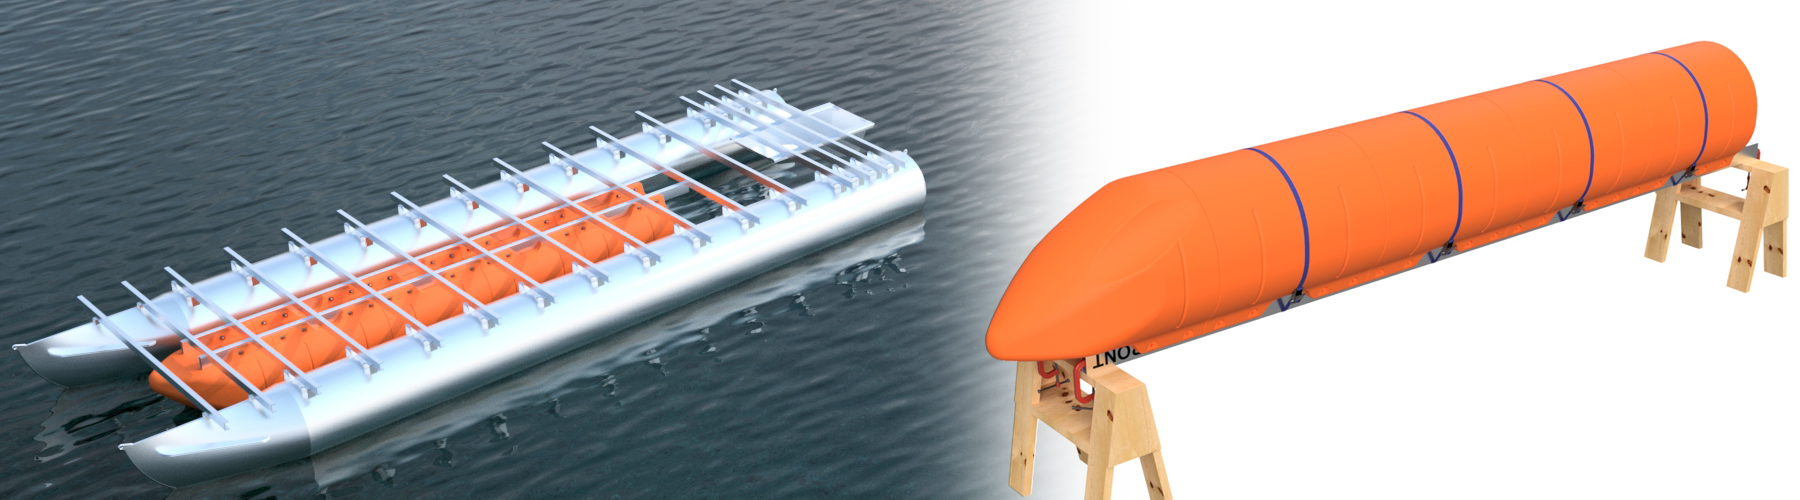
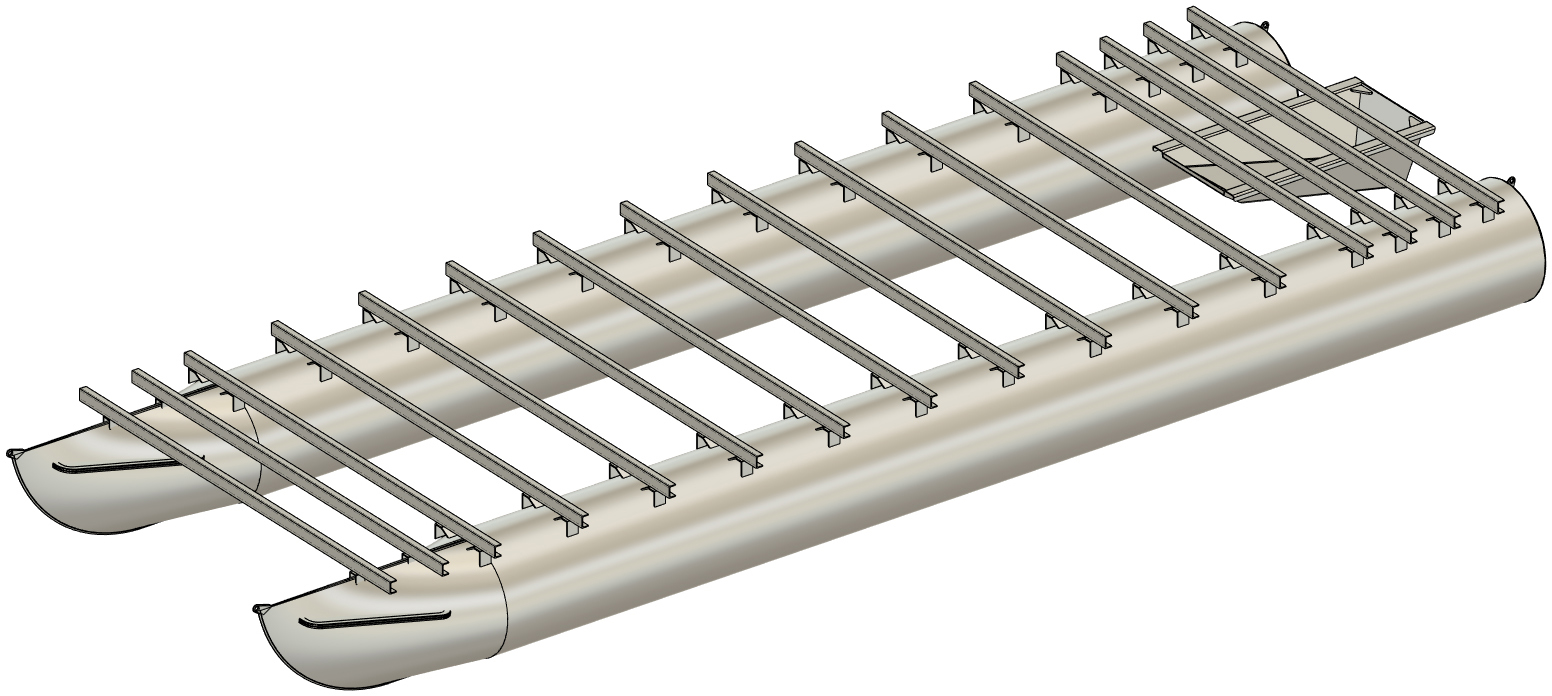
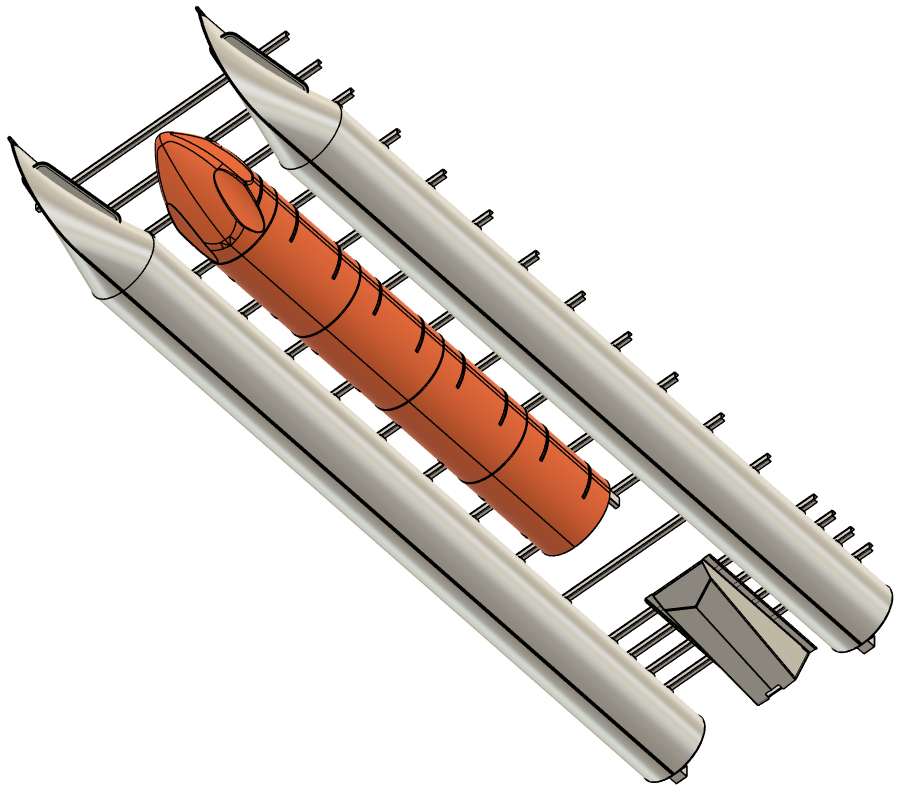
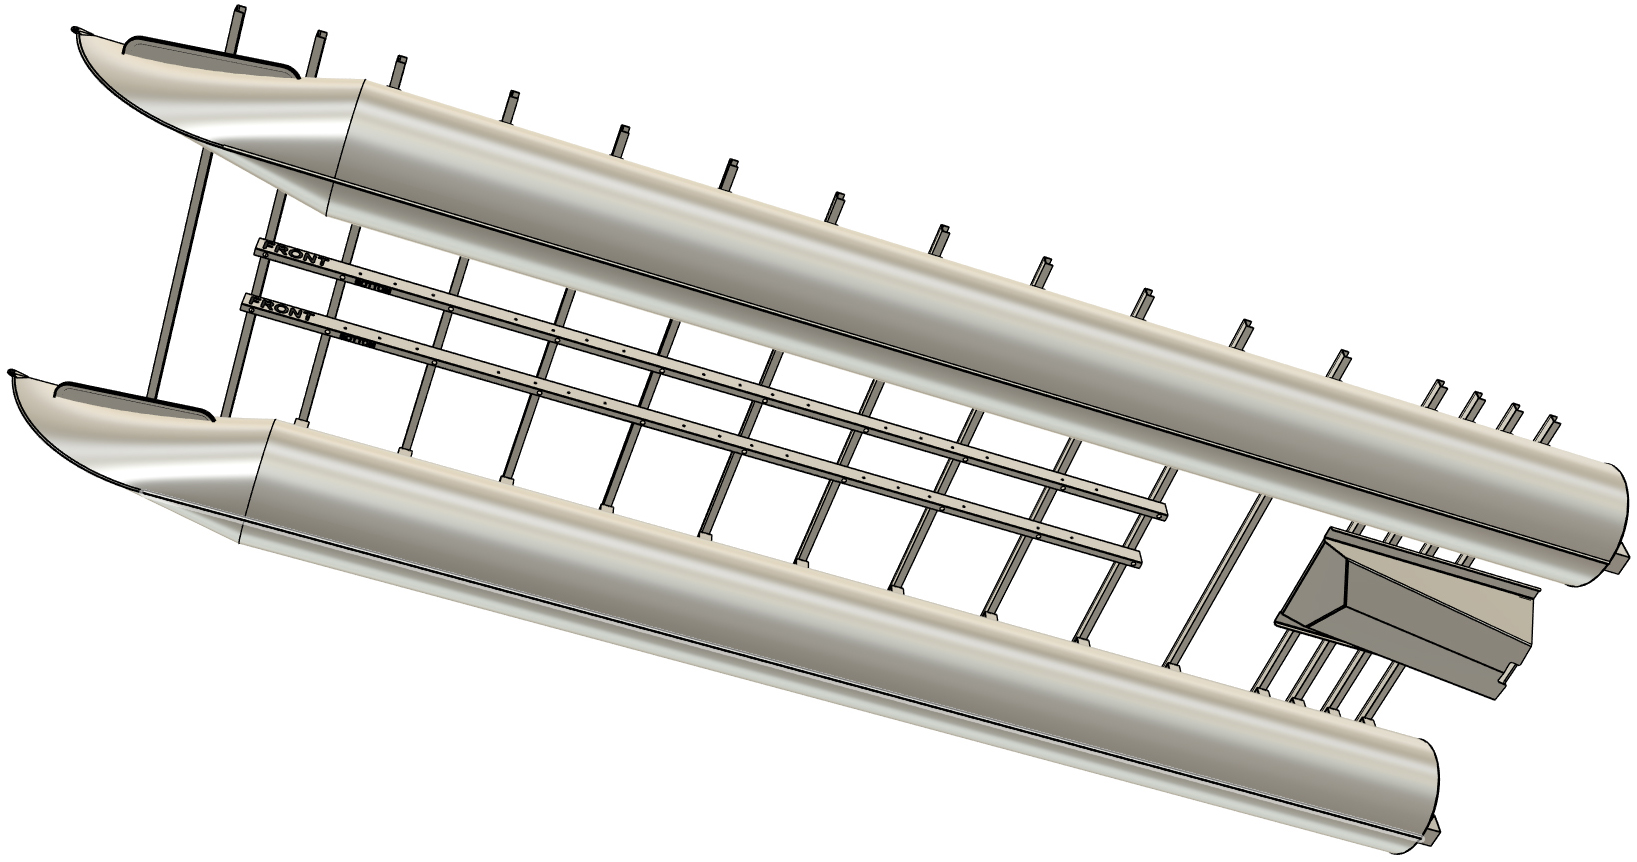
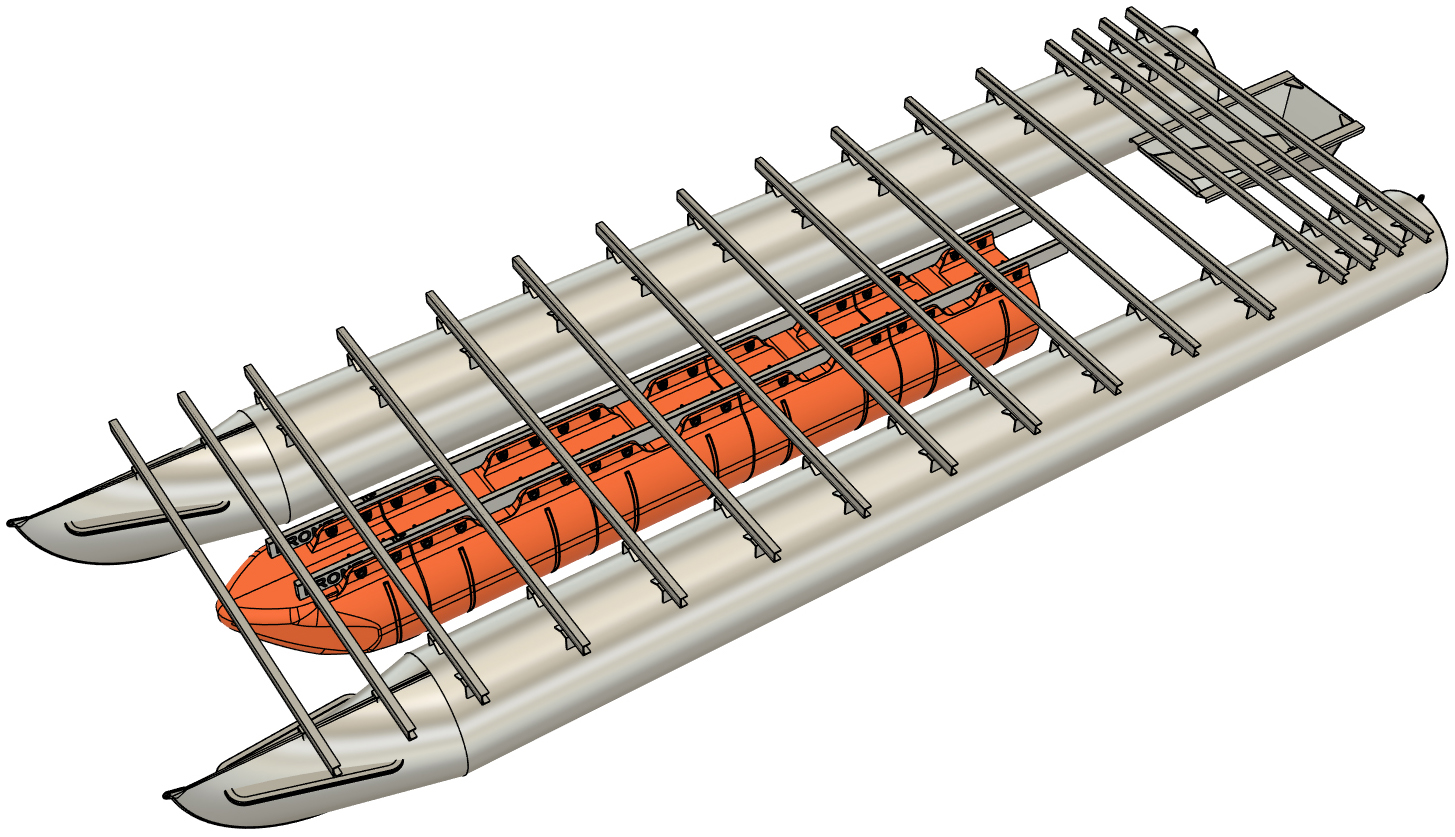
The intention of this page is to provide a general set of instructions for installing a third row of our 27" wide plastic pontoons on other brands of boats. The example boat that we show in these instructions is a 8' x 24' boat with 24" diameter aluminum pontoons and C-channel crossmembers. There are many different pontoon boat frame arrangements and we cover different crossmember styles below. The procedure we've laid out is not the only way to install a row of our floats under your existing boat, but it is what we've found to be the easiest way. Depending on your arrangement, you may have to space the pontoon assembly down from the frame, mount it in an alternate location, or modify your approach in any number of ways. We simply can't cover all pontoon boats that exist, so this set of instructions depicts a simple installation of a 15' row of 27" wide floats under our example boat. We show mounting the pontoon assembly in the most ideal way possible for the application that we're working with. The end user will need to adapt their approach to their particular boat, but everything included on this page will apply to most applications.
IMPORTANT NOTES: Installing a set of 27" wide floats under existing boats is a challenging, 2-person task. To be frank, our 27" wide floats were not designed specifically for this application and it's not pleasant to work under a built boat, especially when on a trailer (removing the trailer "tower" makes installation 100% easier). Please also bear in mind that our 27" wide pontoons are not ideal for high-speed, high horsepower recreational boats. If you're looking to go slow and add buoyancy, these work great, but if you need to go 25+ MPH with your boat, we have had customers state that our nose cone design starts to spray water forward and can get passengers wet, especially if your boat is heavily loaded at the front. Remember, our float design is intended to provide high buoyancy, not build speed boats! Only the frame and floats are shown for the installation on our example boat in these instructions. This is to provide as much clarity as possible. When working under your boat, special care is required to avoid injury. Please watch your head and keep the skin on your knuckles! |
|

|
REQUIRED MATERIALS, HARDWARE, & TOOLS
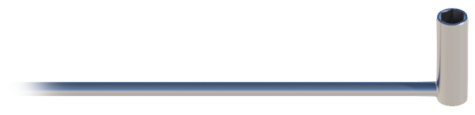
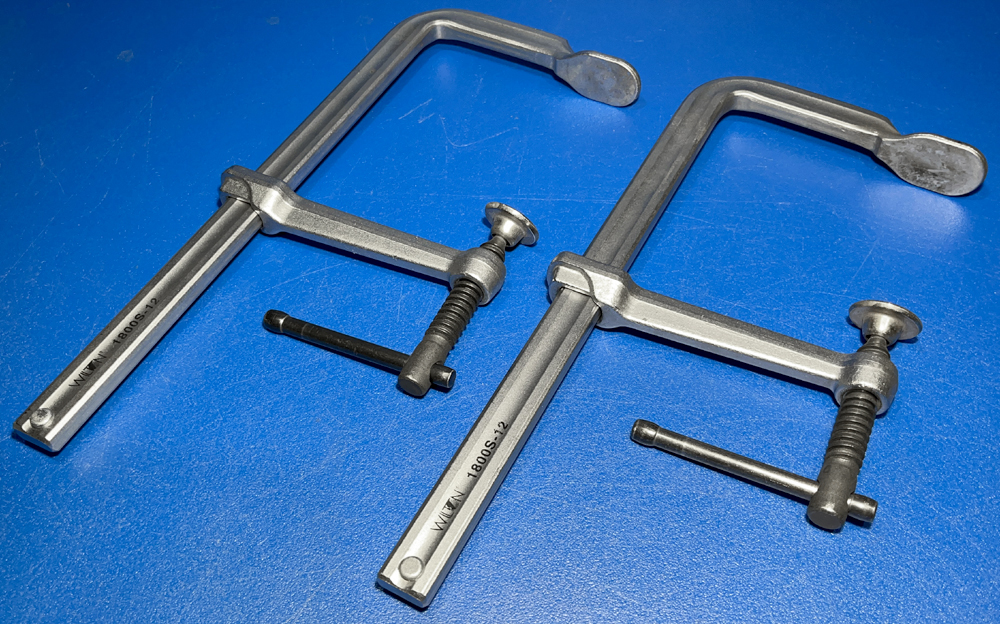
When only purchasing floats from Tiny Pontoon Boats, you will receive just that: floats. If you are mounting our 27" wide floats under your existing boat, you will require two lengths of rectangular aluminum tube (if mounting in a similar fashion as depicted) and certain hardware. Below is list of the recommended materials and hardware, as well as our favorite sources for them. We have also provided a list of tools required for the task with links to the somewhat specialized tools from McMaster (our favorite industrial supplier) and Amazon, but you will also require a special long-reach wrench for float bolt installation. To see the standard tools, click on the McMaster part number or Amazon link in the table below. Many customers will already have the majority of these tools, but please see
STEP 20 for info on the special long-reach socket wrench. These tools (other than the transer punch and custom long-reach wrench) should be stocked at your local home supply or hardware store as well.
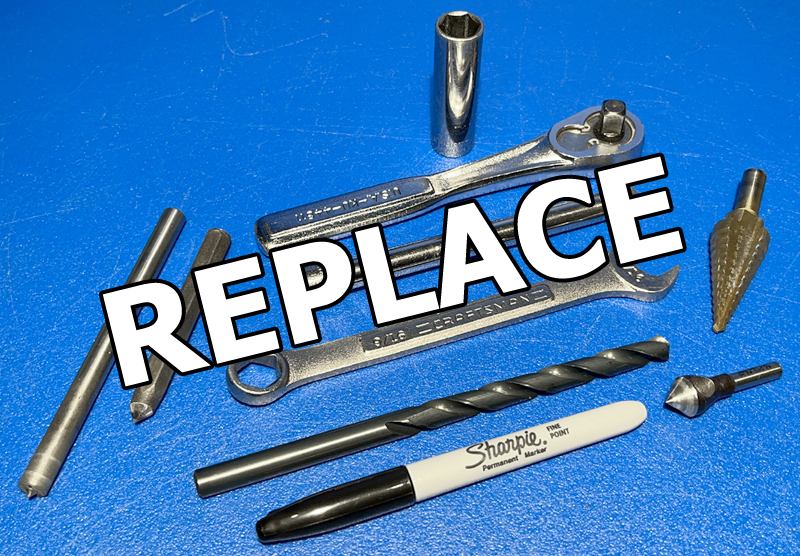
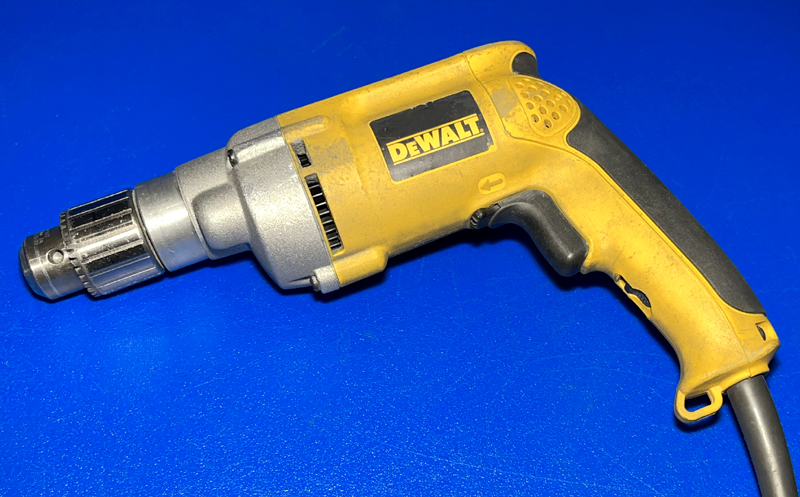
REQUIRED TOOLS:
MOUNTING TUBE & HARDWARE:
|
|

|
STEP 1
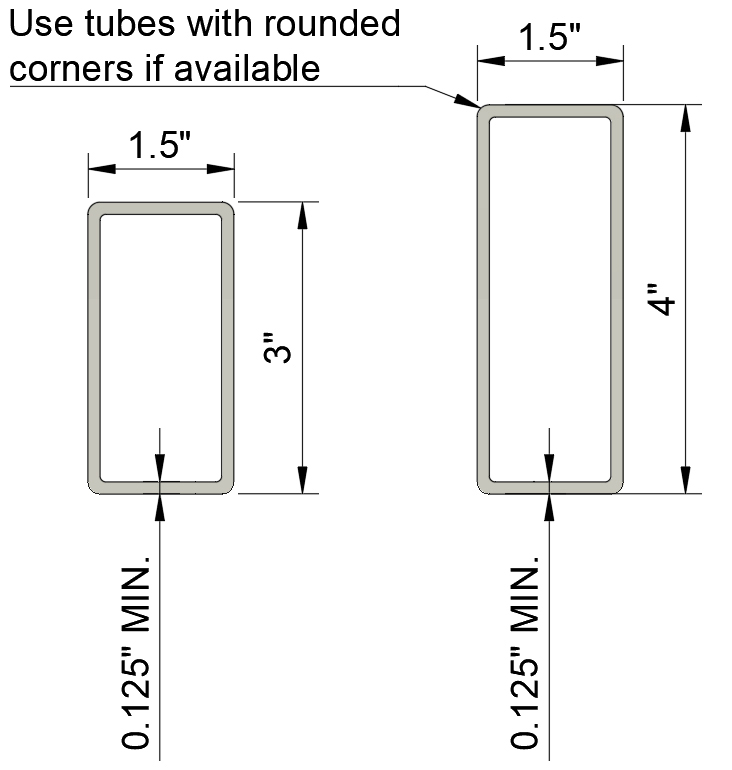
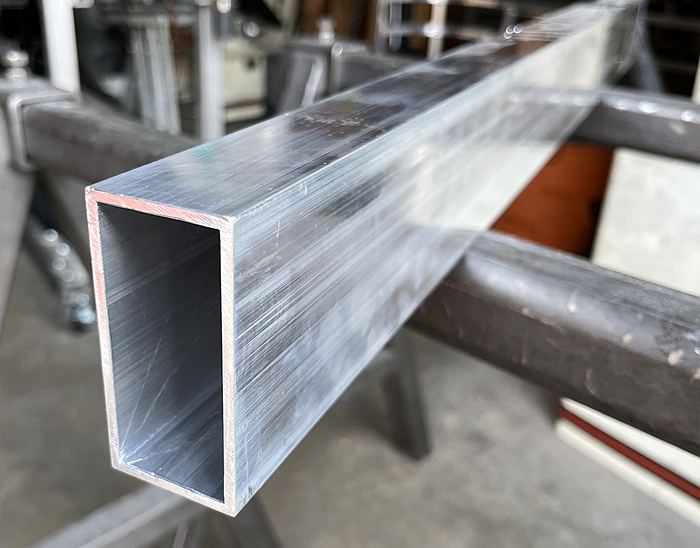
The aluminum mounting tubes required for installing our 27" wide plastic floats are either 1.5" x 4", 0.125" wall tube OR 1.5" x 3", 0.125" wall tube. The materials we recommend are available through OnlineMetals.com as listed in the table in the section above. If ordering locally, ask for "radius-corner" tube if it is available. As of yet, we have not been able to find the the 1.5" x 3" tall rounded corner tube, but have been able to source the 4" tall tube with the radius-corner (see link above). Before purchasing your mounting tubes, you'll need to know how long your tube needs to be. Below we have provided a table showing minimum tube length requirements for different float arrangements. We say minimum because your boat may require longer lengths to securely fasten the tube in place. We cover that below.
MINIMUM MOUNTING TUBE LENGTHS:
|
|
|
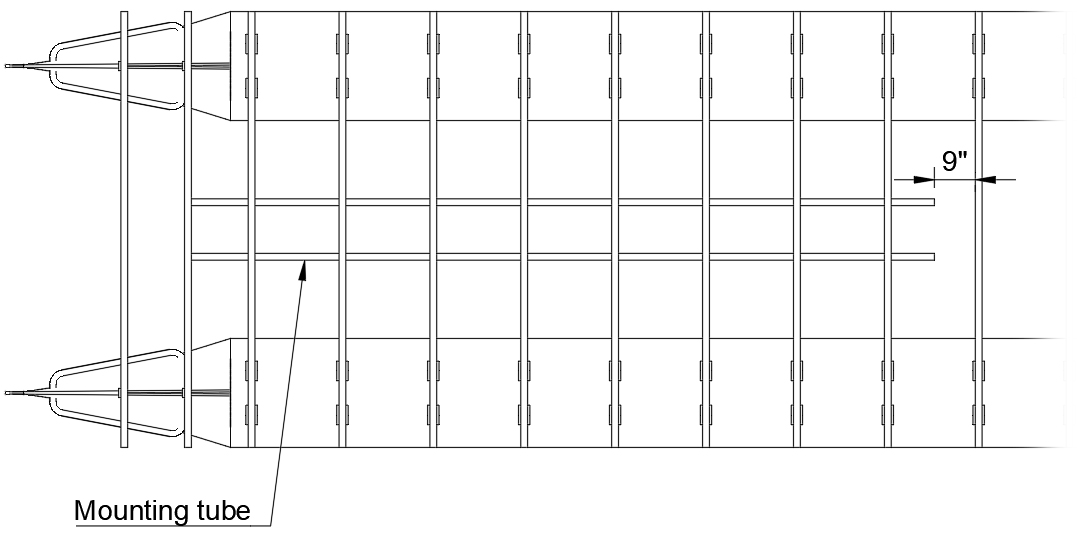
The length of the two required mounting tubes is determined both by the length that your floats require and where it must attach to your frame. We recommend having the mounting tube extend 1" beyond the edge of the crossmember beyond where the new pontoon assembly's minimum tube length ends. Our example is discussed and shown below for clarity.
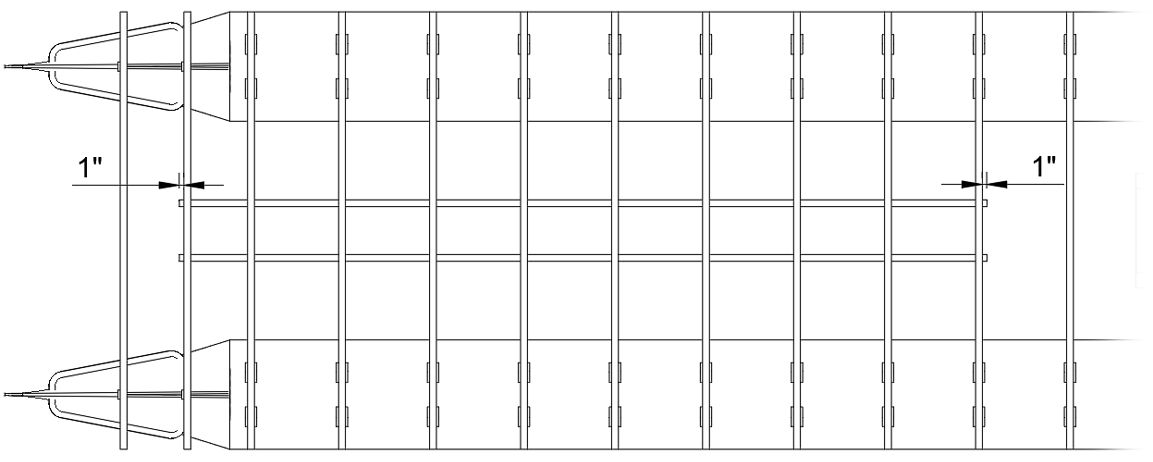
As mentioned above, in this set of instructions, we're showing installation of a 15' long single-nose set of floats under a 8' x 24' boat. With this installation, we're placing the nose cone just about even with the front of the boat's deck. As the minimum length of mounting tube for this set of floats is 165", and the set of floats are 15' overall (nose cone extends 15" beyond minimum tube length), we are attaching the mounting tube to the second crossmember in from the front of the boat and extending toward the stern. The diagram below to the left shows where the tube would land with the minimum length from the table above. With our boat, we have to add 1" to the front end and 11.5" to the rear end of our mounting tubes to extend 1" beyond the crossmembers we are attaching to. This means that our mounting tube must be 177.5" long overall (165" + 1" + 11.5"). The diagram to the lower right shows where our 177.5" long tube is to be mounted. |
|
|
|
FRAME CROSSMEMBER TYPES
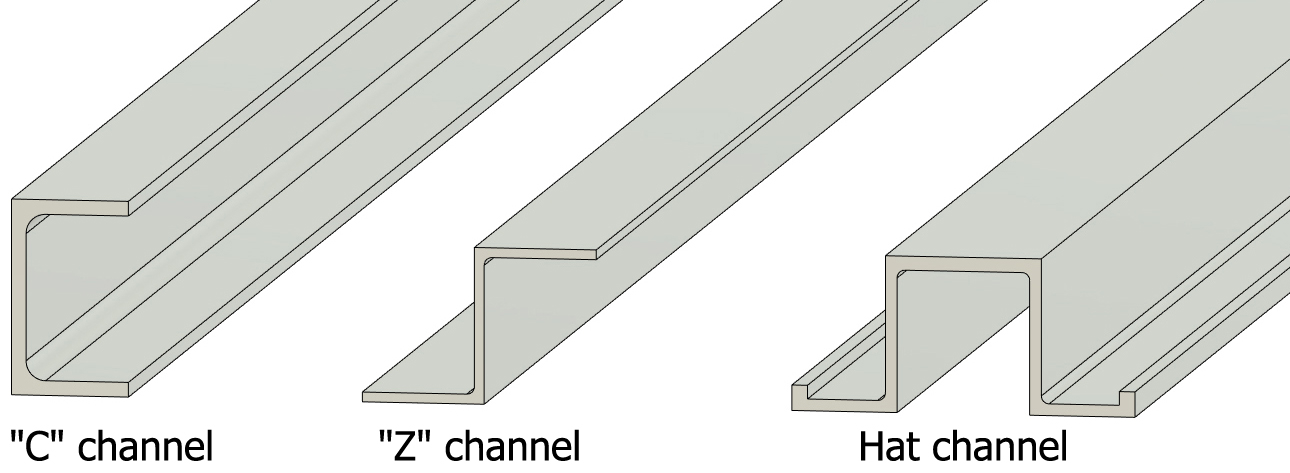
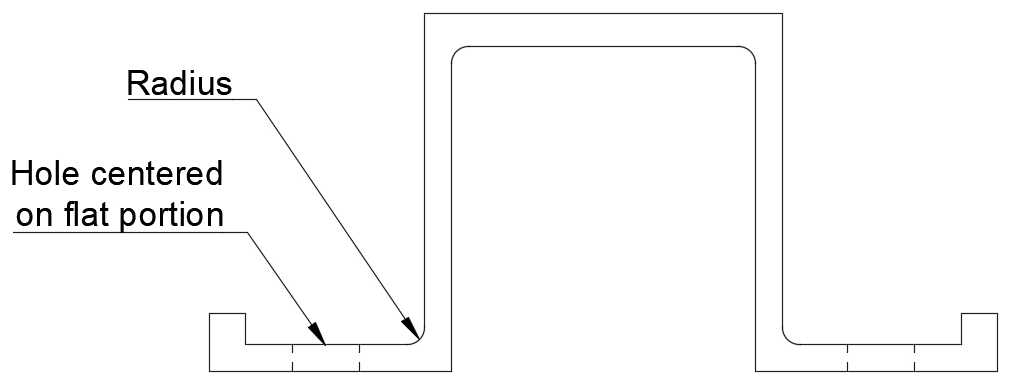
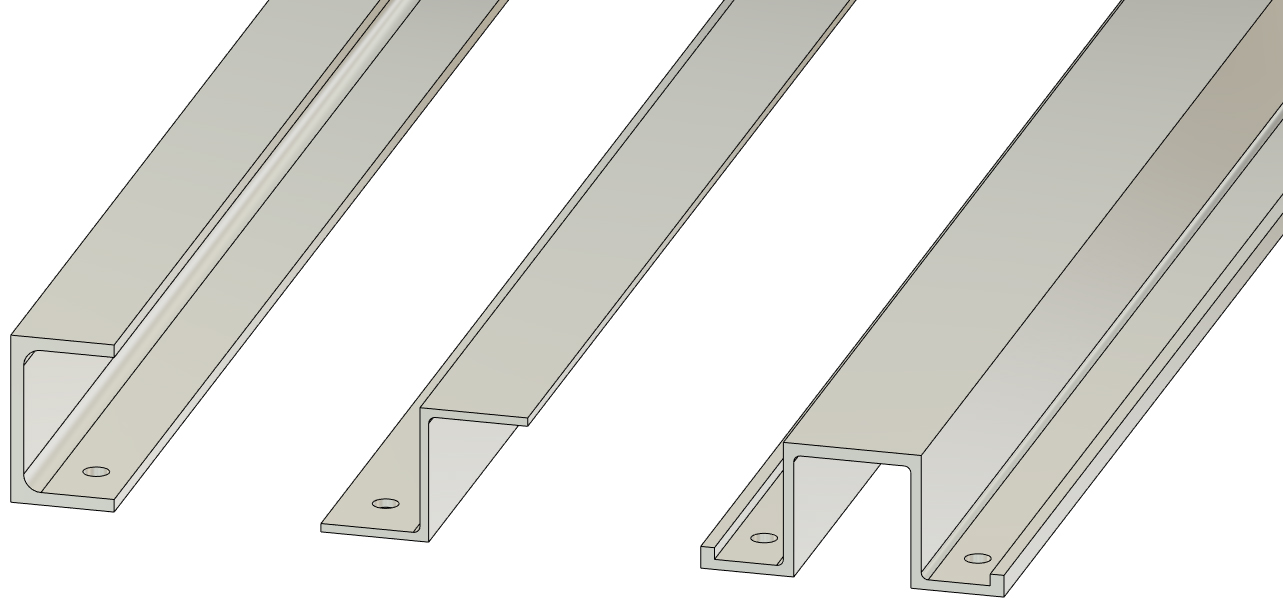
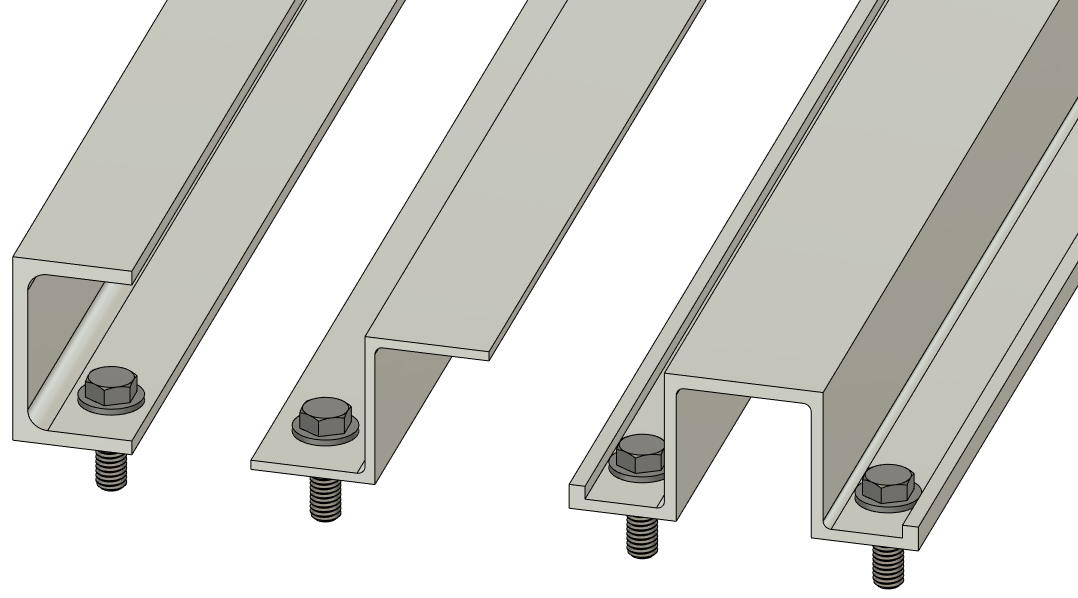
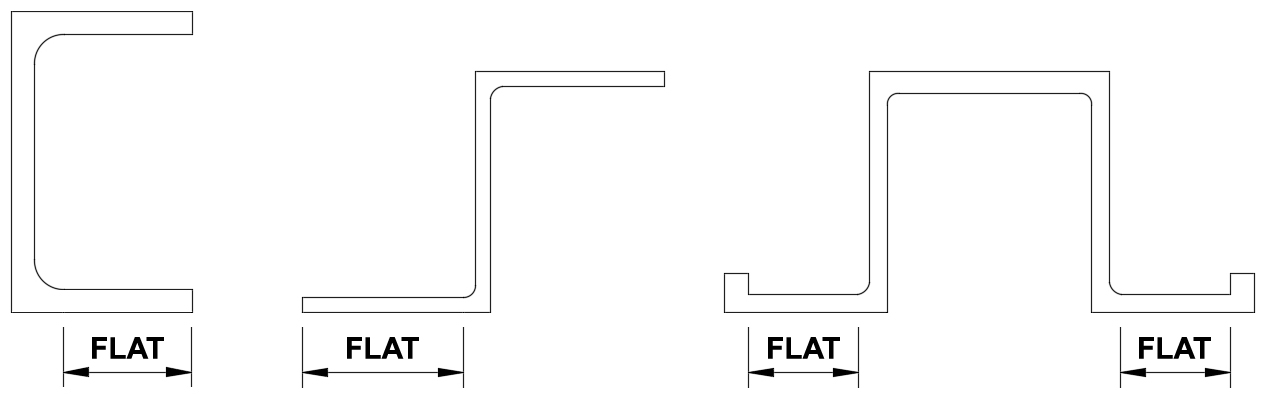
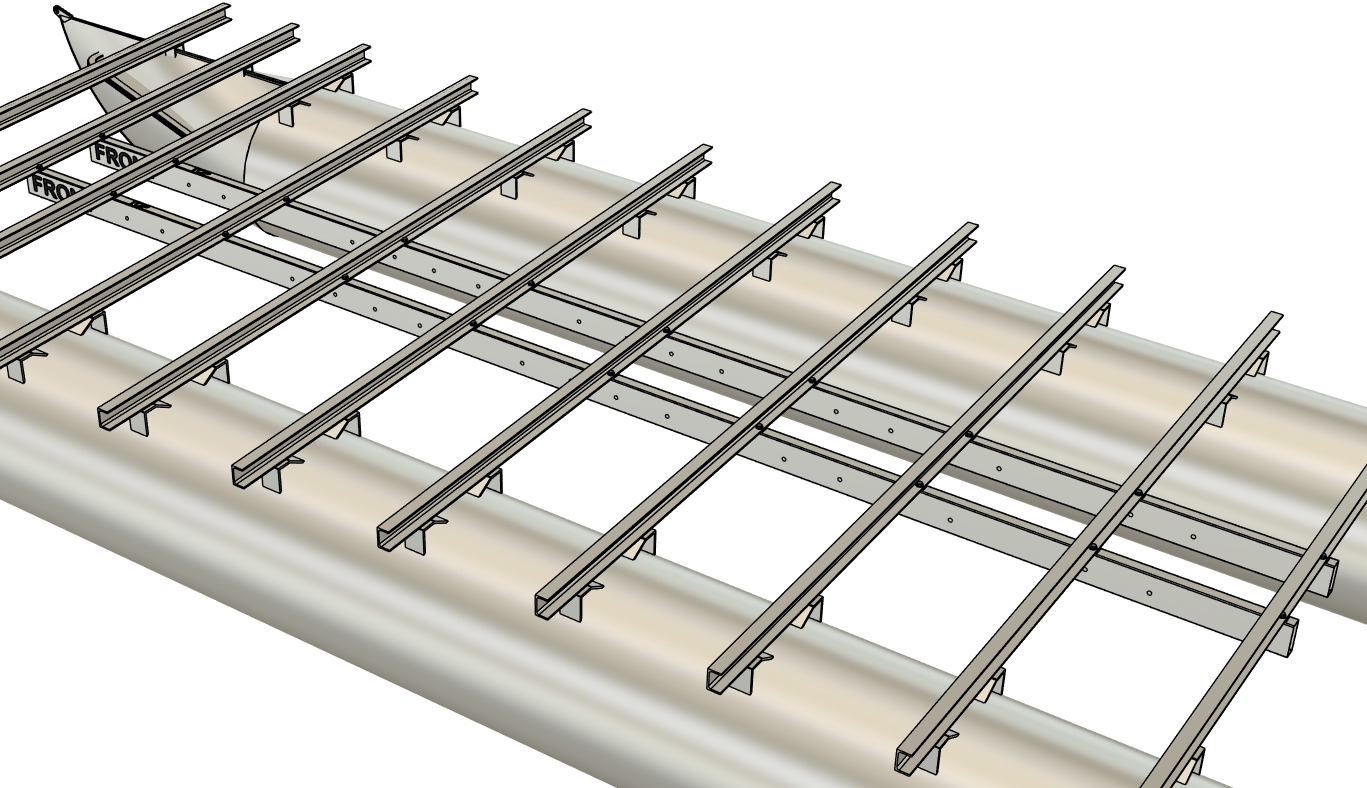
Each pontoon boat manufacturer uses their own style of frame crossmembers, but there are three basic profiles we usually see. Crossmembers are typically a "C" channel, "Z" channel, or hat channel. The frame systems for our boat kits use hat channel (provides the most rigid design, while allowing for ease of assembly). There are also a few boats that have fully enclosed rectangular tube crossmembers. If your boat has these, the only option is to weld the mounting tube under your boat unless you intend to replace your decking (plywood or otherwise). We will not cover this type of installation.
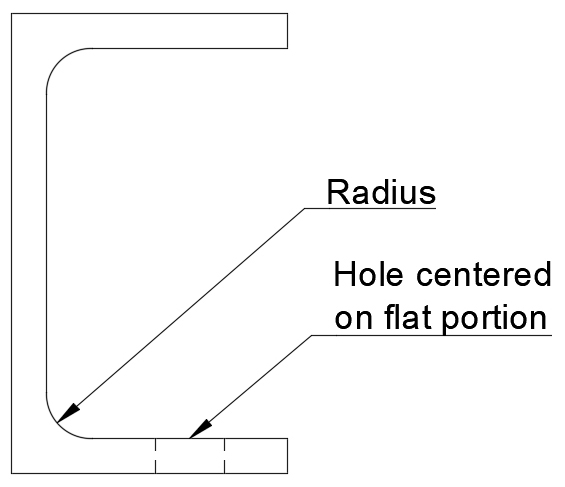
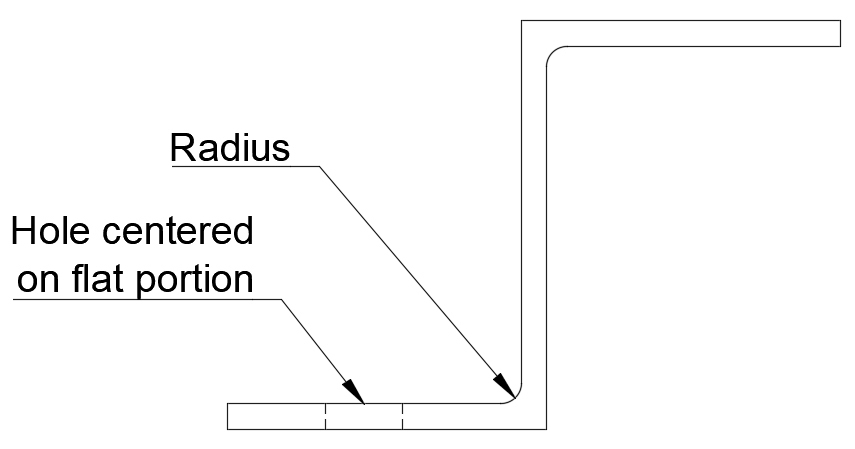
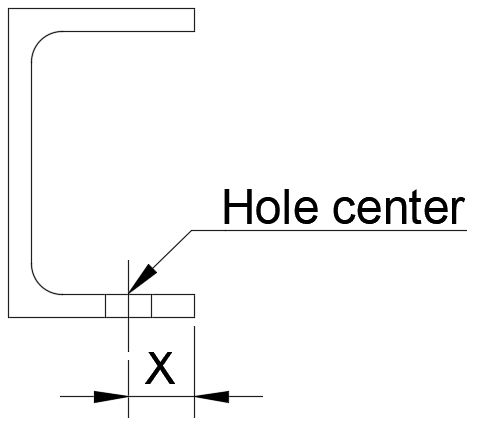
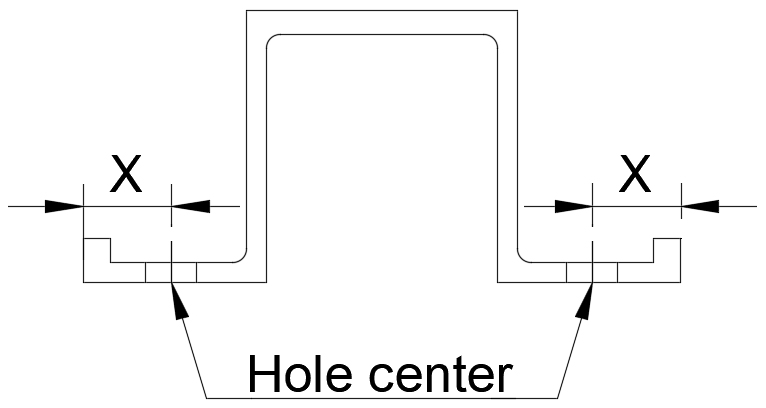
When working with any of the channel type crossmembers, the goal is to locate bolt holes in the center of the flat part of each channel's flange. Any aluminum extrusion will have a radius in the corners to enhance the parts strength (some radii will be larger than others), so you'll want to inspect your crossmembers' design to determine the location of the required bolt holes. Some crossmembers will be tougher to measure than others, but there is typically some wiggle room. This is one of the reasons that we recommend the smaller diameter SAE flat washers for the mounting tube bolts. Hat channels can be particularly tough to measure for this, but do your best to make your installation as easy as possible.
|
|
|
STEP 2
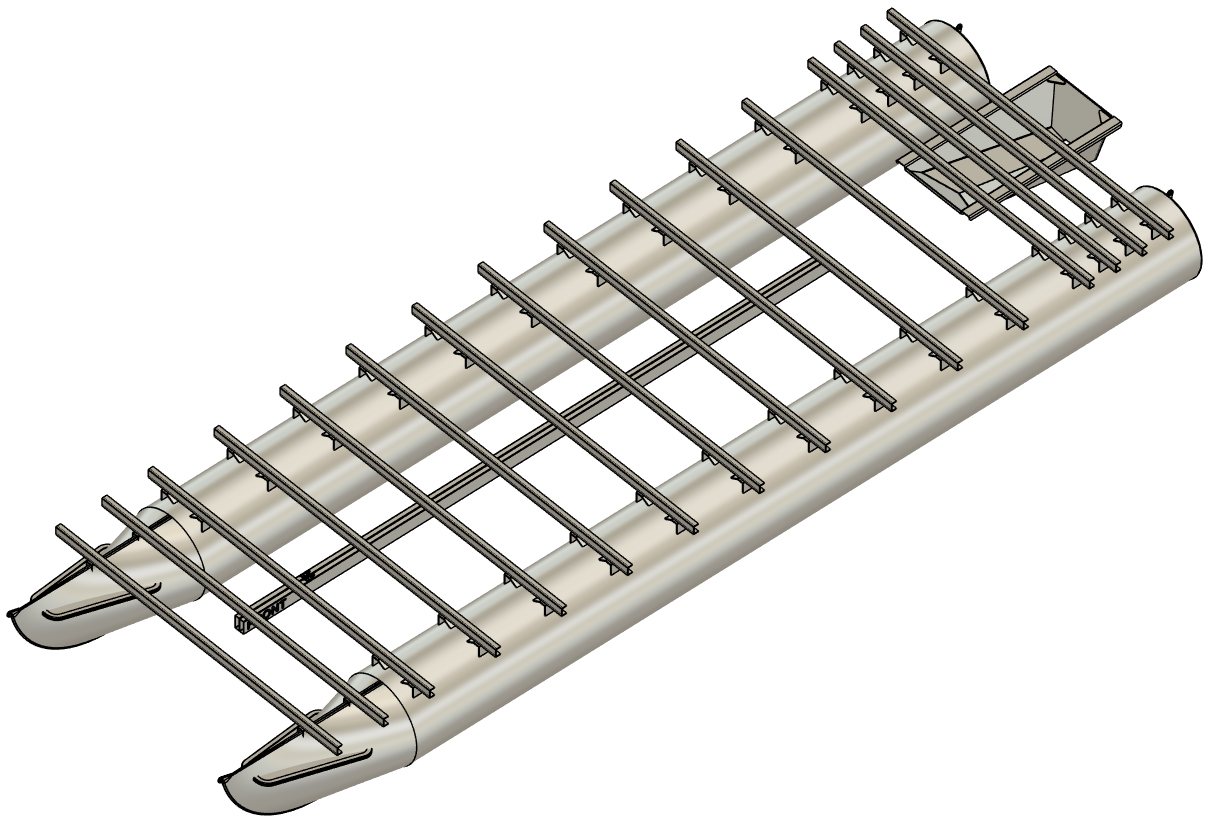
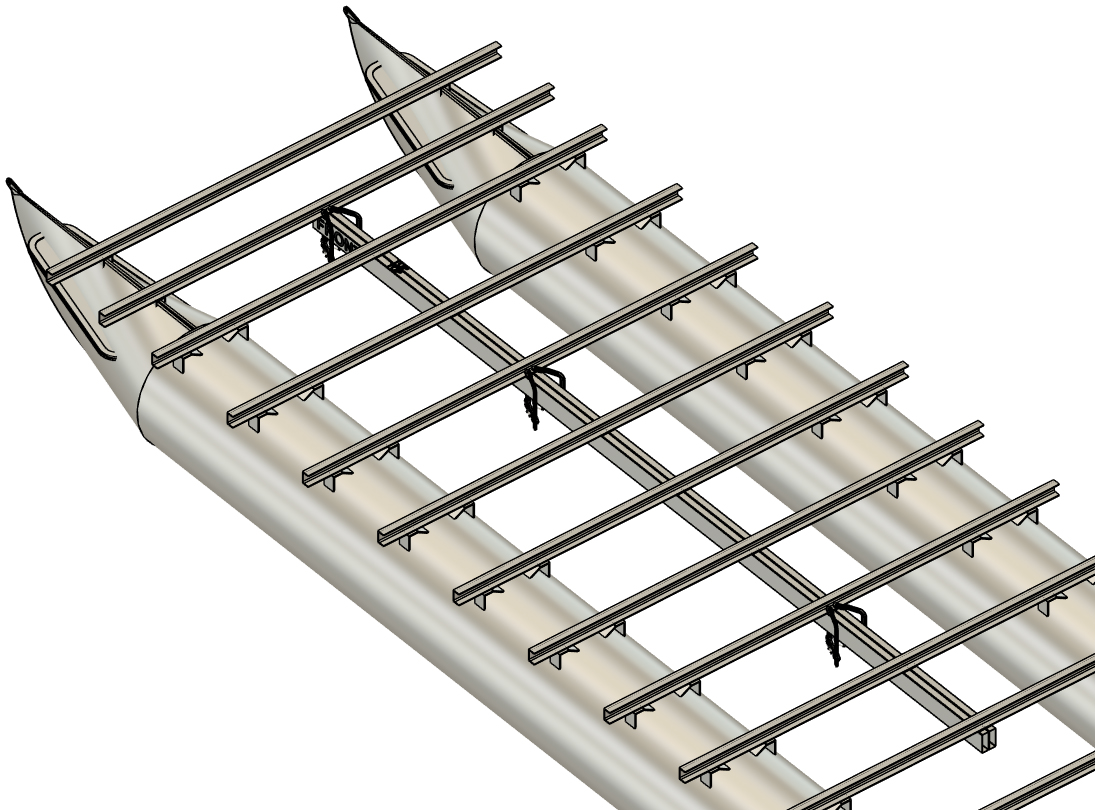
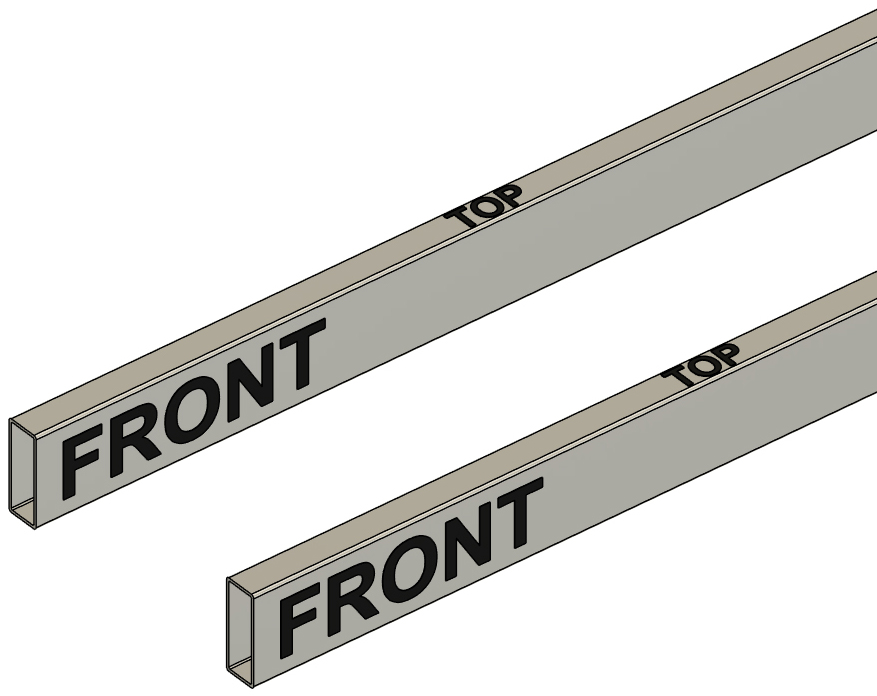
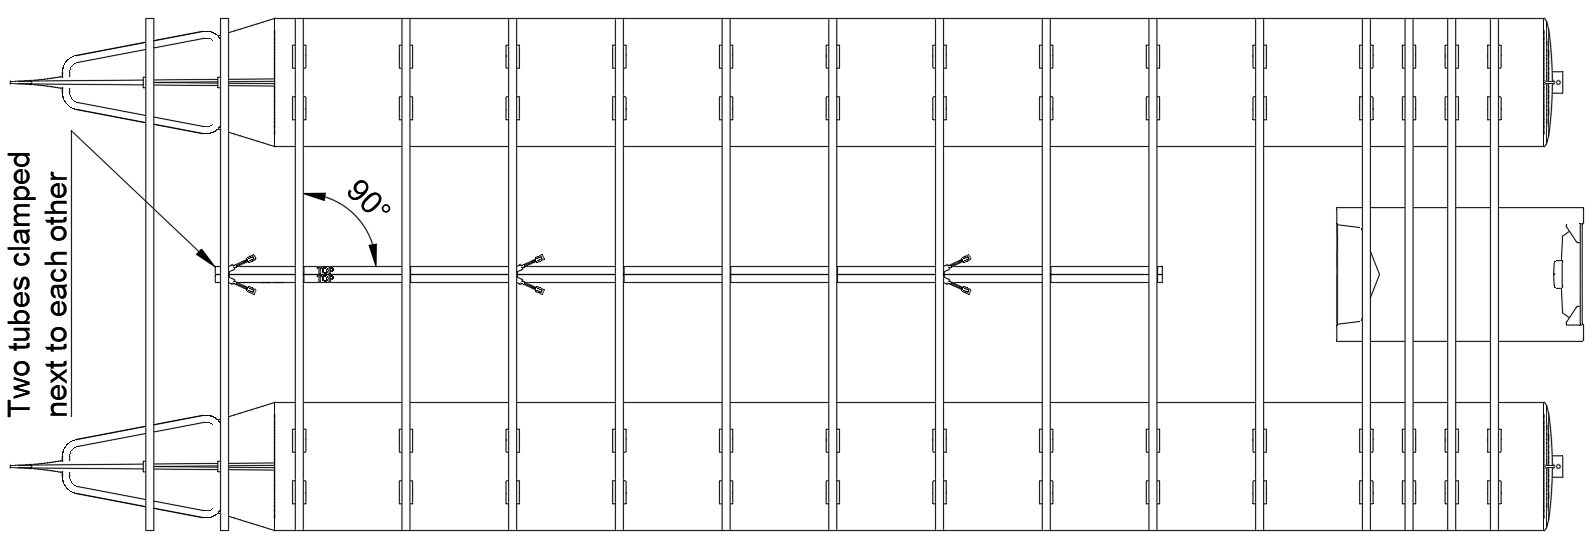
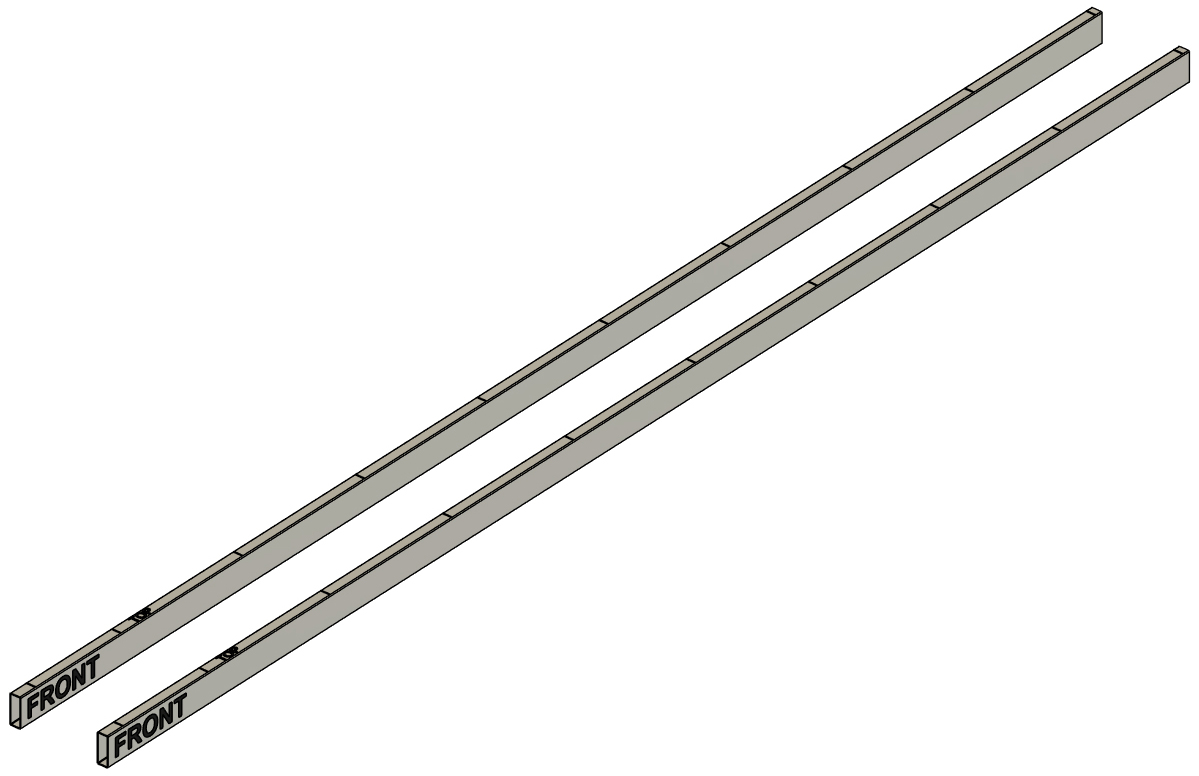
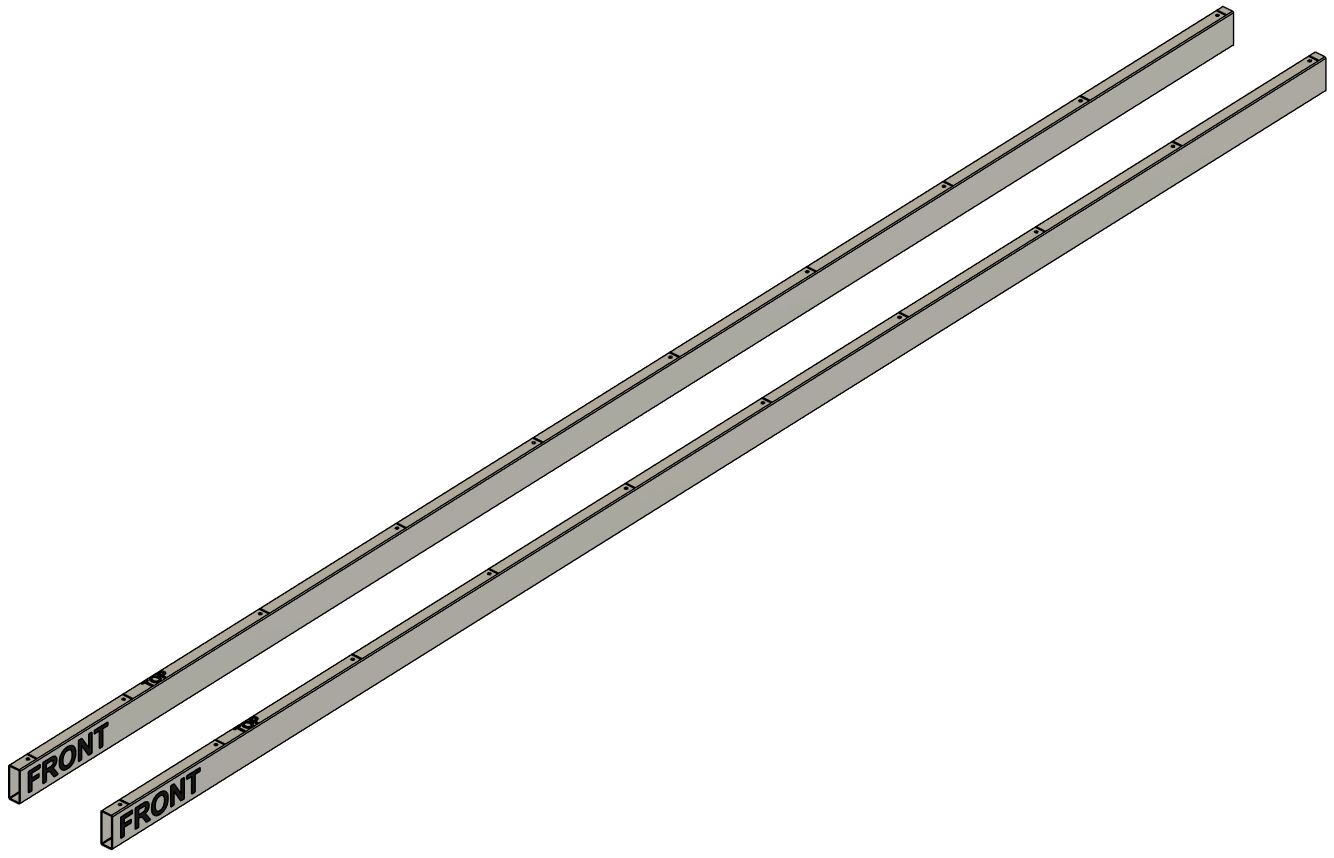
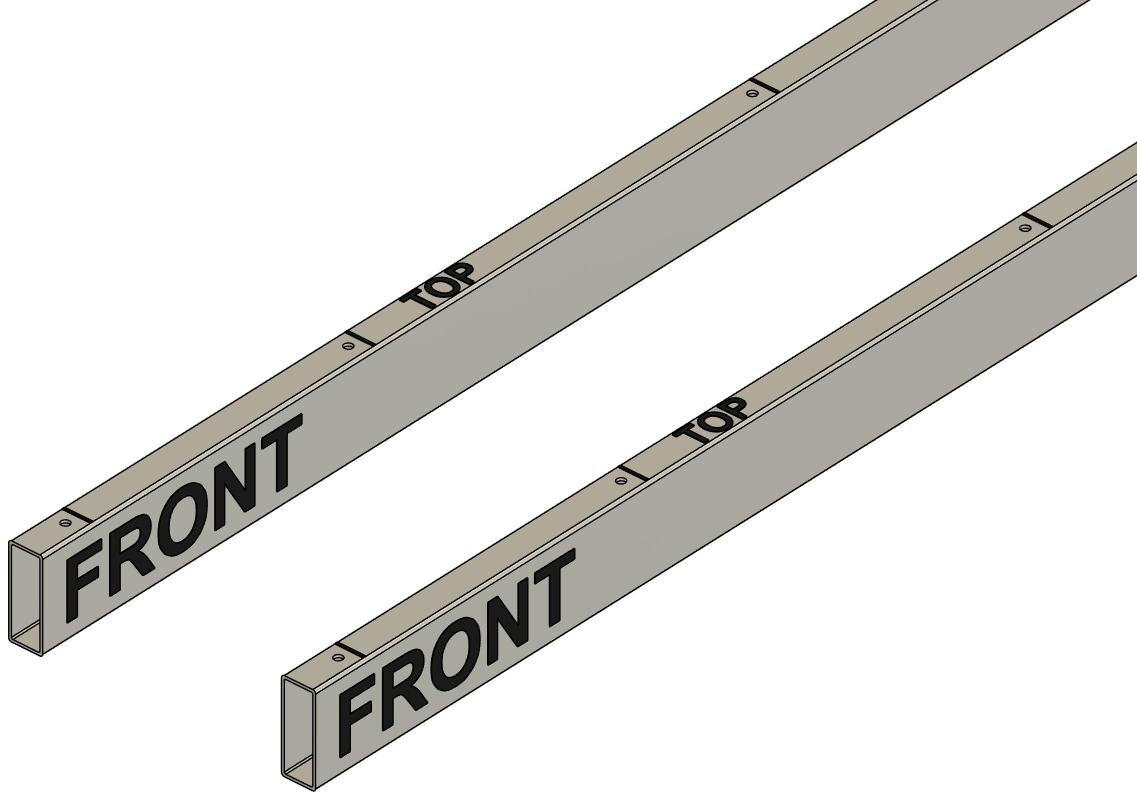
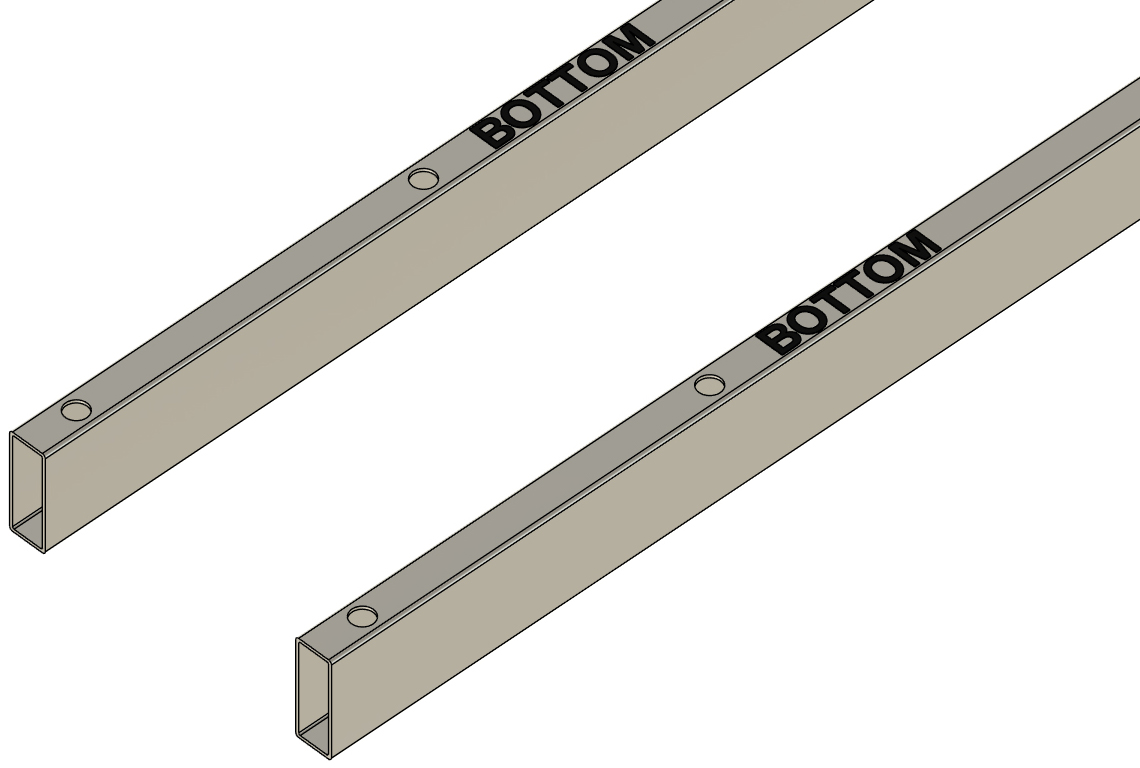
With your aluminum mounting tubes cut to length, write "TOP", "BOTTOM", and "FRONT" on each tube to ensure that the orientation remains correct for the entirety of the installation process. The 1.5" wide surfaces are the top and bottom of the tube. Write "FRONT" on both sides of the same end of the tube as the other labels. Clamp the tubes to the underside of your boat and ensure that the "TOP" labels point up. Clamp the tubes in place right next to each other, centered on your boat in their final mounting position (longitudinally on the boat; they will be spread apart for final mounting). Be sure that the ends of the two tubes are even, and remember that the end of each tube needs to extend 1" beyond the frontmost and rearmost crossmembers that you'll be bolting to.
|
|
|
STEP 3
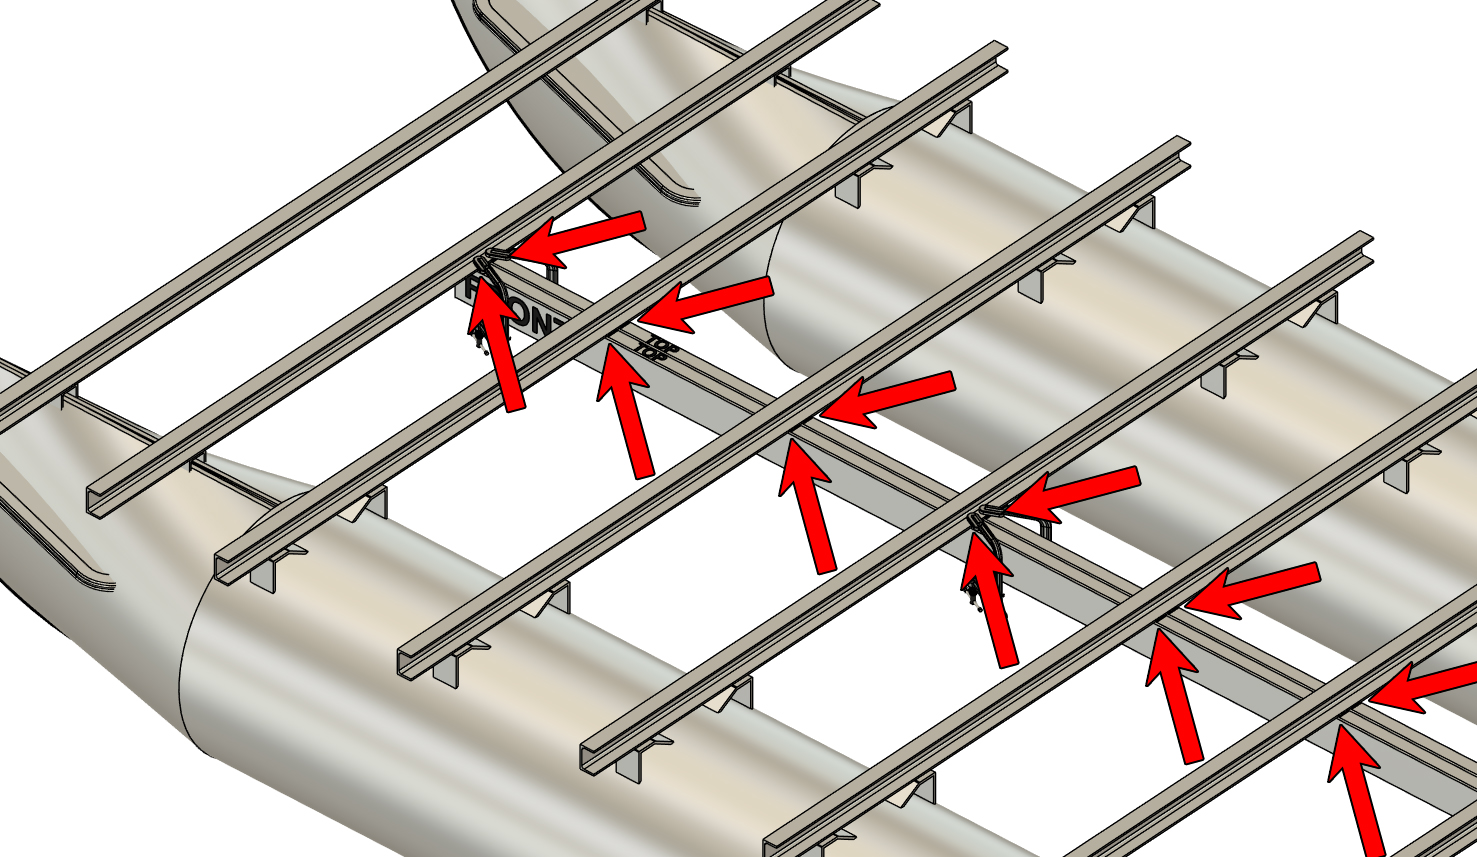
Use a marker to draw lines on the top of the mounting tubes where they contact the crossmembers. Do this from the side of your crossmembers from which you'll have access to the future bolt holes. In our example, we have to draw a total of 20 lines. If your boat has hat channels, you will want to draw a line on both sides of the crossmember. You may have to reposition your clamps to be able to draw all the lines.
Unclamp the mounting tubes and remove them from the boat.
|
|
|
STEP 4
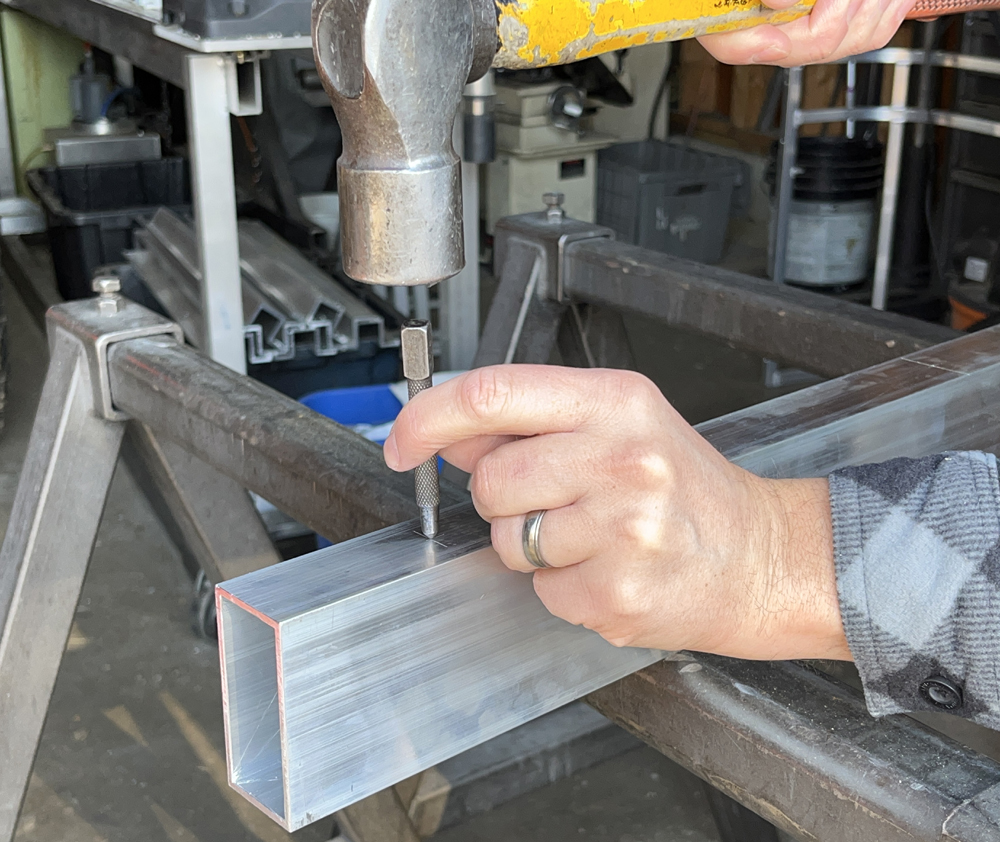
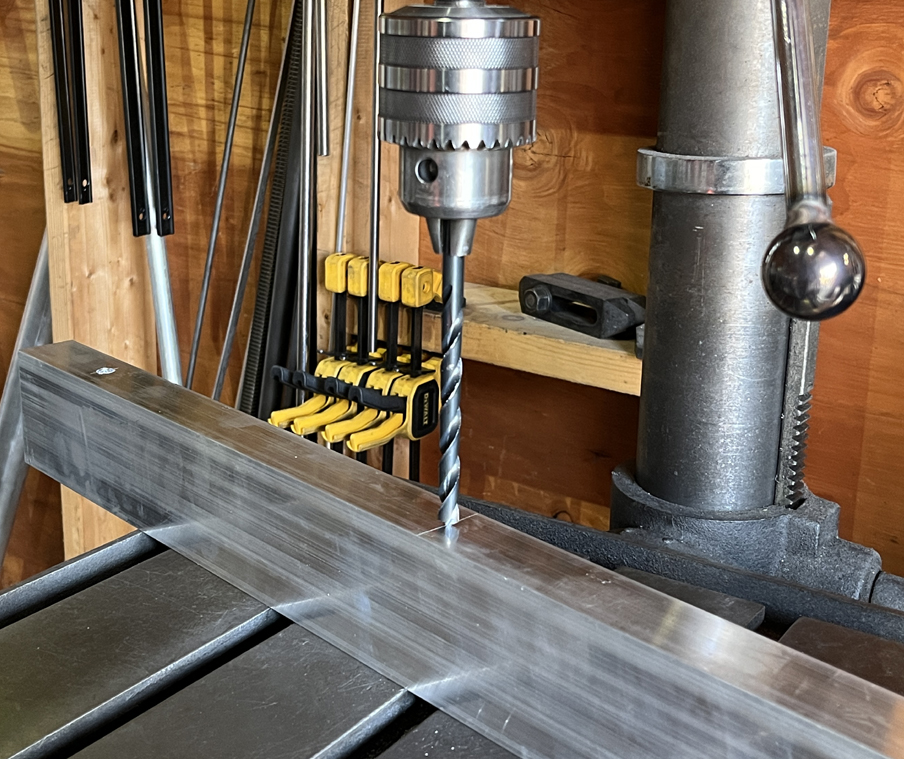
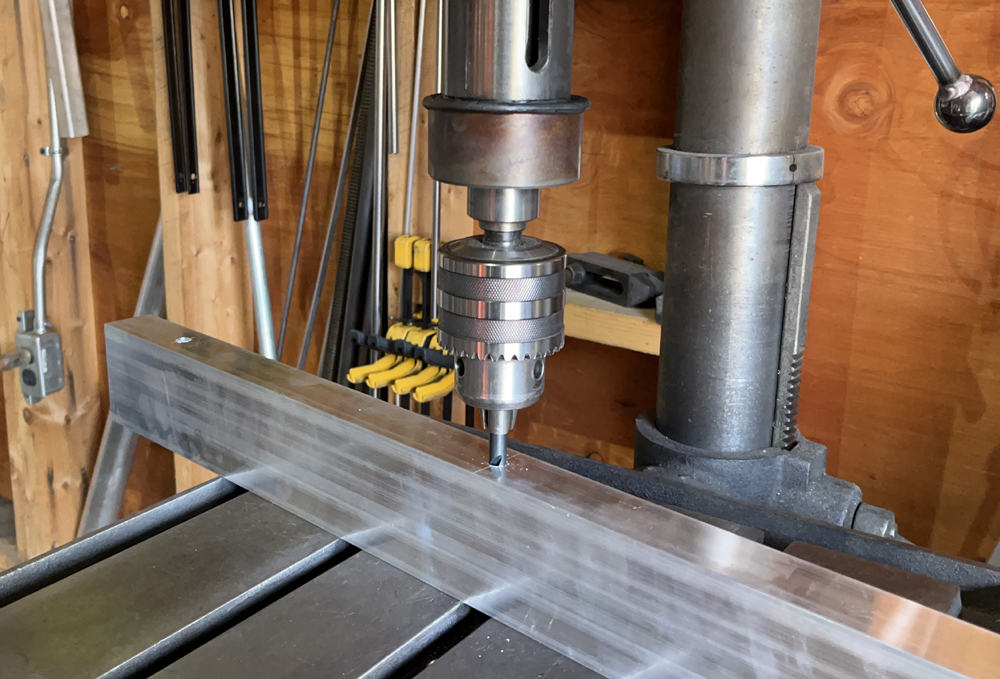
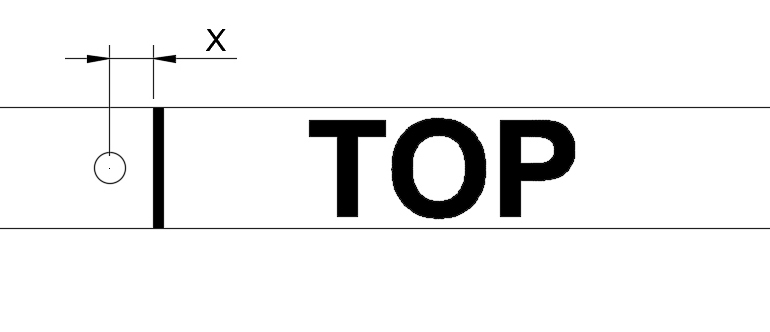
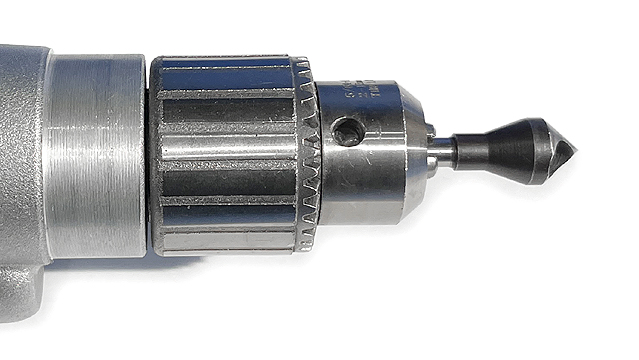
We mentioned prior that you'll need to measure for the center of the flat portion of the lower flange of your crossmembers (edge of flange to center of flat). With that measurement noted, measure the same distance ahead or behind the lines drawn on the top of the mounting tubes, depending on the orientation of your crossmembers. Our scenario requires that we measure ahead of the lines to mark the center position of the flat portion of our C-channels. Mark the center of that line (0.75" from the side edge of each tube) and use a center punch with a hammer to make a locating divot. Drill through that location and drill all the way through the top and bottom of the tube with a sharp (prohibits wandering) extended length 3/8" drill bit. We strongly recommend using a drill press for this as it's very easy to go askew with a hand drill.
All holes drilled are to be deburred before final assembly. Any 3/8" hole can be deburred using a countersink drill bit, but the larger holes in the next step will need to be deburred with sand paper or alternate deburring tool. We will not stress the importance of deburring again on this page.
 |
|

|
STEP 5
Using a 7/8" step drill bit, drill the 3/8" holes on the bottom of the mounting tubes out to 7/8" diameter. This is large enough to fit a 9/16" deep socket through.
|
|

|
STEP 6
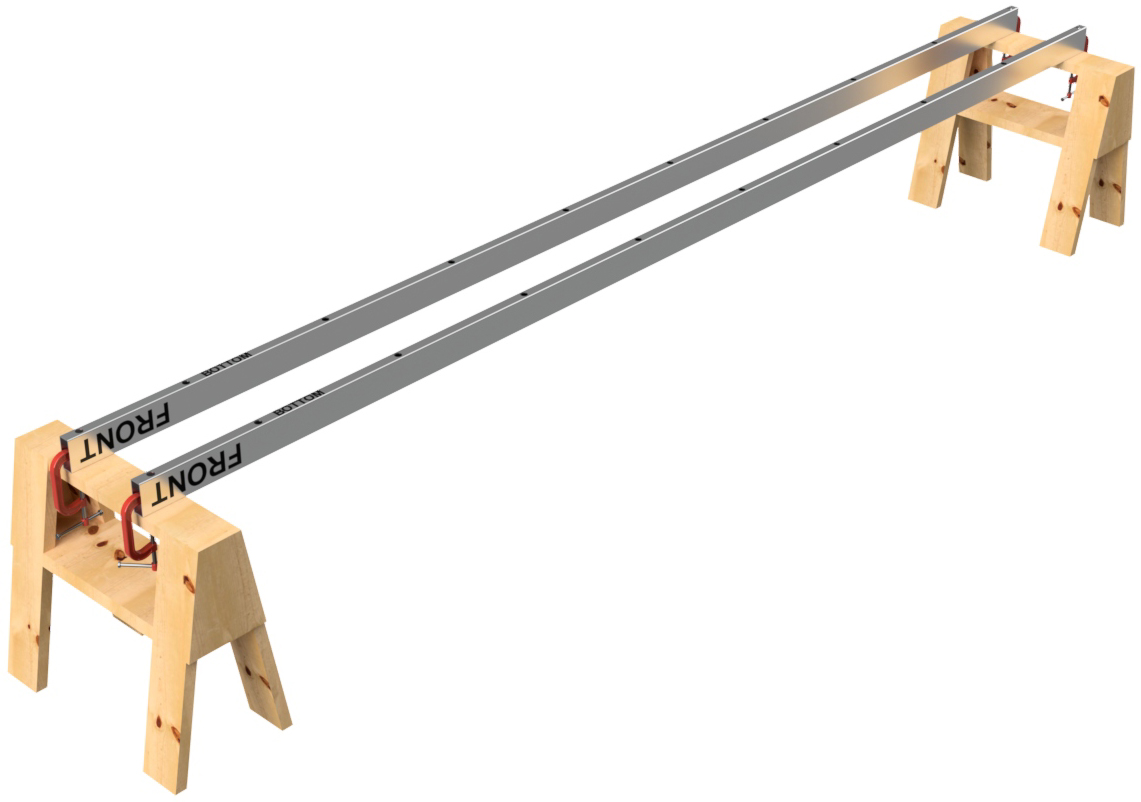
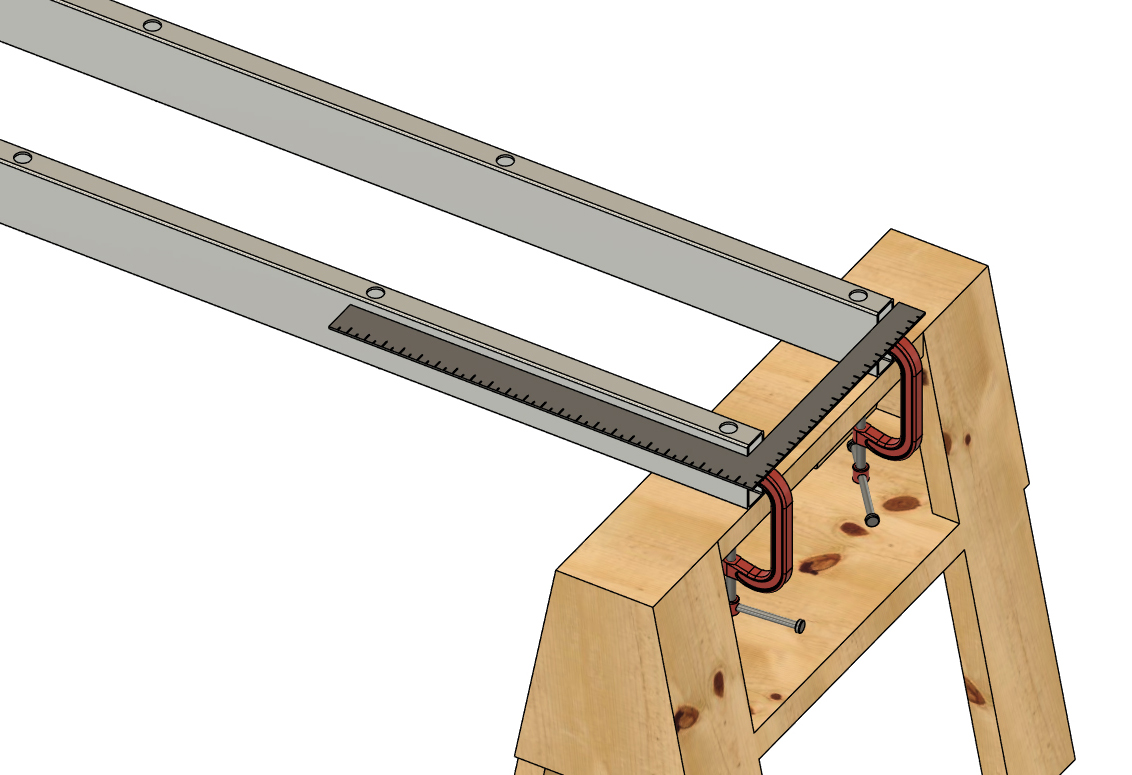
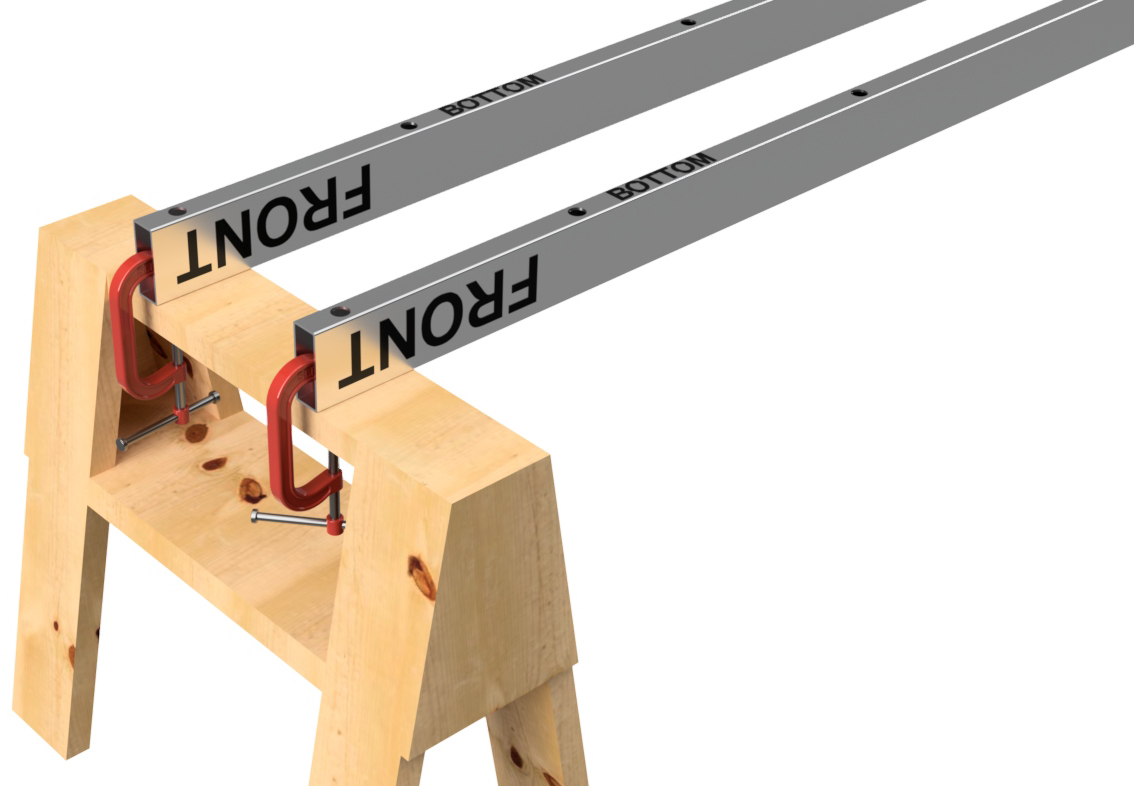
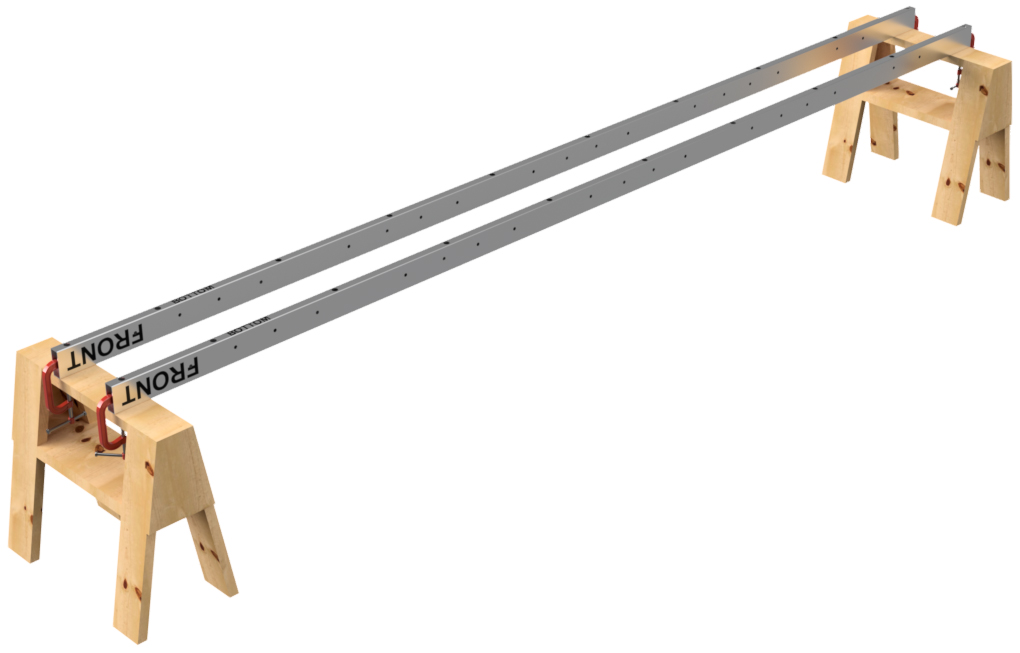
Place the mounting tubes across two saw horses so that the "BOTTOM" labels are upward and the "FRONT" labels are on the same saw horse as shown. Position the tubes so that they are about 12" apart on-center (10.5" between them). Use a square to ensure that the ends are even and clamp the two tubes to your saw horses.
|
|
|
STEP 7
If you are building a dual-nose (nose cone on both ends) pontoon assembly, please read the note in the section below before moving forward.
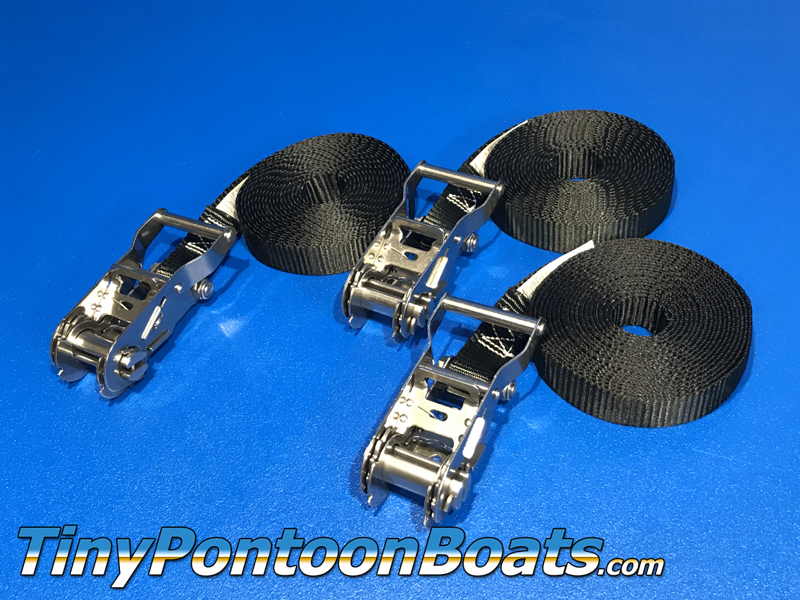
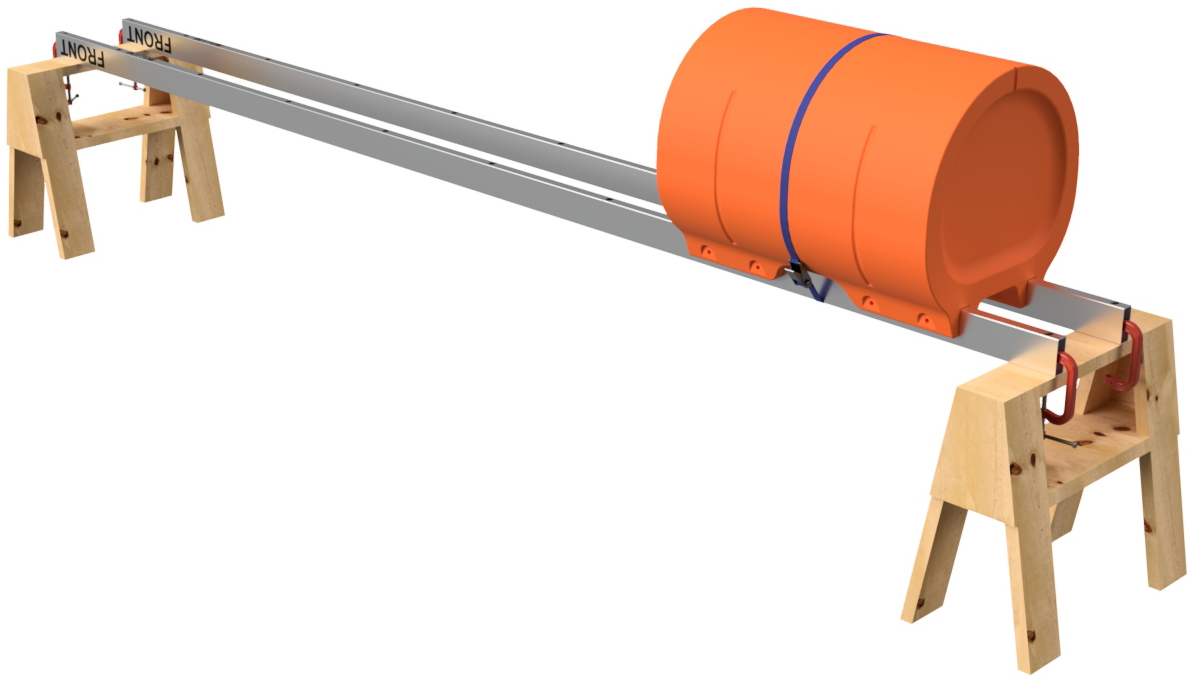
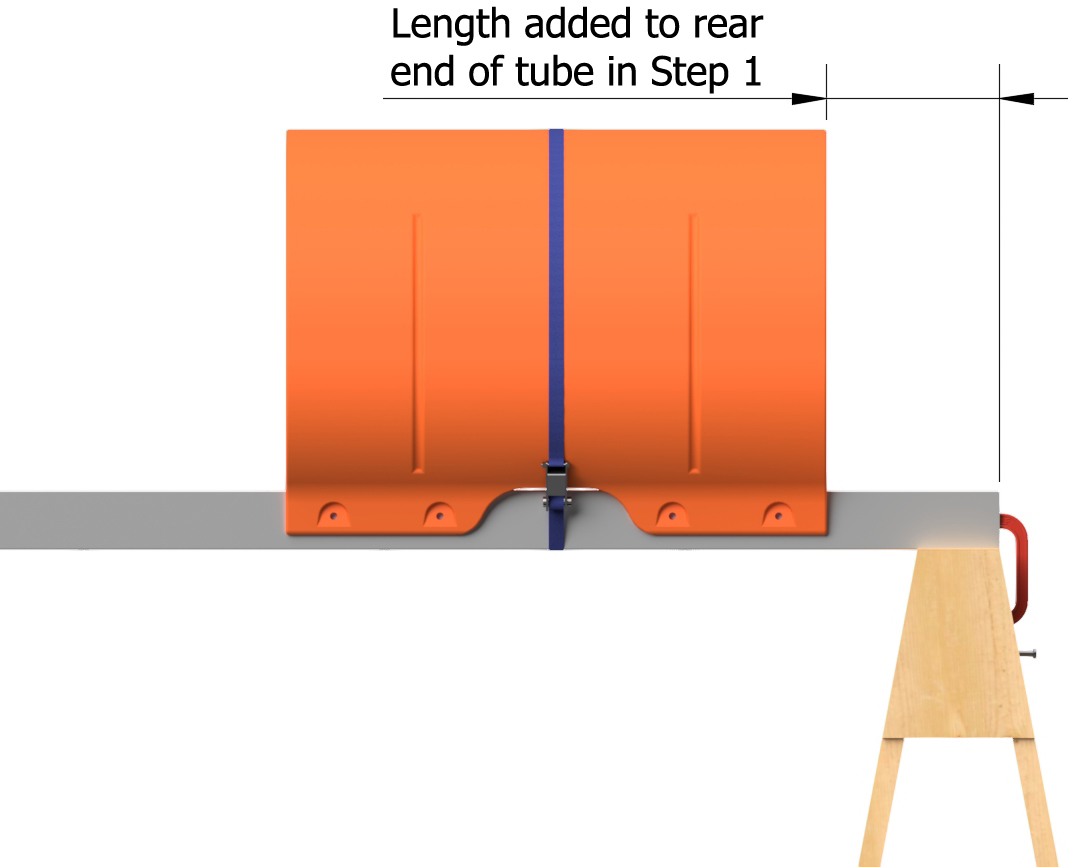
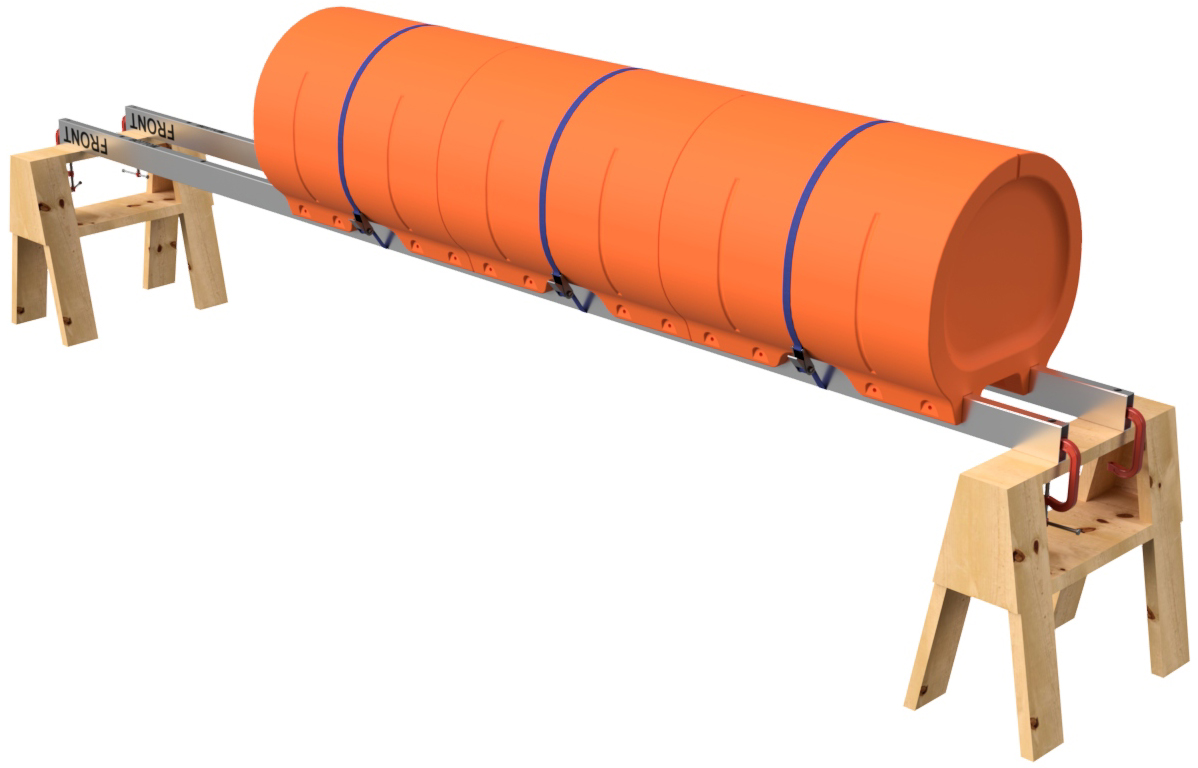
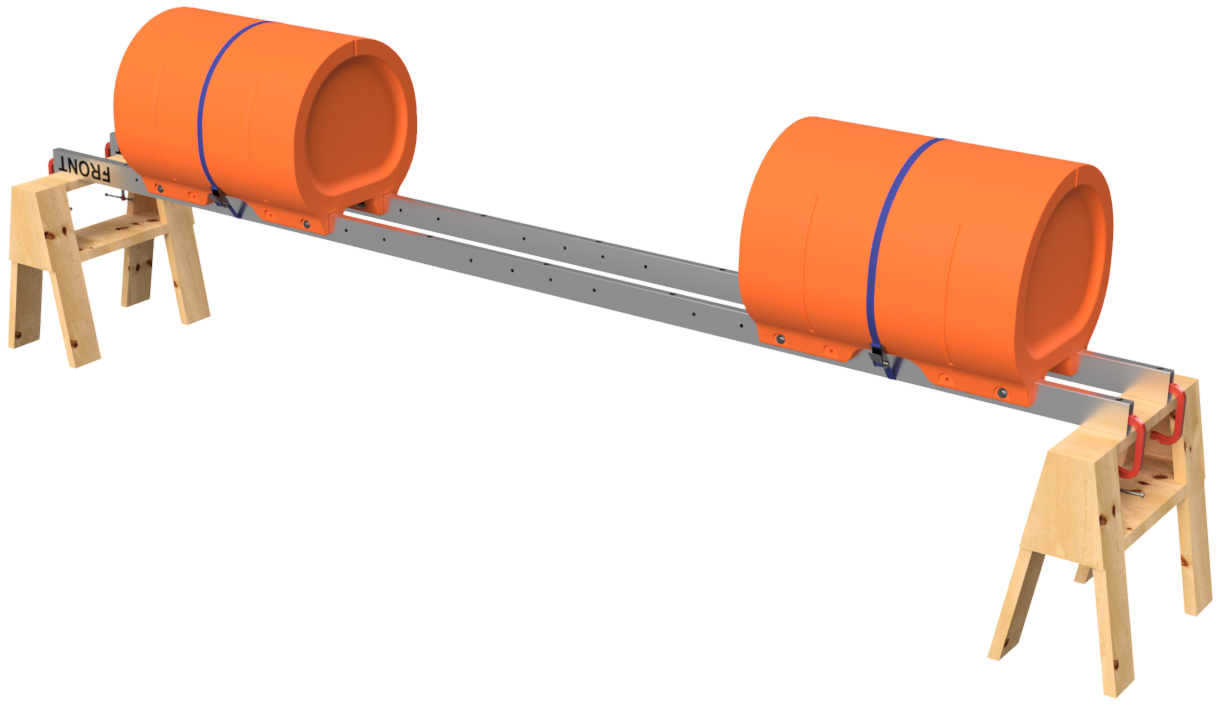
Place one of the straight floats (blunt end floats) on the rear end (opposite of "FRONT" labeled end) of the mounting tubes. You may have to loosen the clamps holding one of the tubes to your saw horses. If you had to add length to the rear end (nearest the stern of your boat) of the mounting tube in step 1, the float is to be placed that distance away from the end of the tubes. With the 8' x 24' boat that we're showing in these instructions, we had to extend the rear end of the tube by 11.5", so the end of the float is placed 11.5" from the rear end of the mounting tubes. With the float's position adjusted, verify that the tube ends remained even (as you did with your square in the prior step - adjust as necessary), verify that your C-clamps are tight, and place a ratchet strap around the float to hold it firmly in position. NOTE: If the fit of your float's mounting channels are a little bit tight on the aluminum tubes, a quick squirt of dish soap can help tremendously to get them to slip into position. Also, if the fit is tight, allow the float to warm up in the sunshine for a few minutes and they'll pop right on!
|
|
|
NOTE FOR DUAL-NOSE PONTOON ASSEMBLIES
If you purchased a set of floats with 2 nose cones (nose cones for both ends), your approach will be a bit different. With our typical dual-nose arrangement for 27" wide floats, each nose cone requires 21" of mounting tube (per mounting channel). That means that the flat end of the nose cone is placed 21" in from the ends of the minimum length mounting tubes. If your arrangement of floats has a nose cone pointing toward the stern of your boat (common when placing a pontoon assembly close to the transom), the length added to the rear of the mounting tubes in step 1 must be taken into account. For instance, if your tubes required an additional 6" in step 1, the flat portion of the nose cone must land 27" from the rear end of the tubes. We have provided diagrams showing what we mean. Depending on your placement requirements, you may also choose to just center the set of floats on the mounting tubes for simplicity.
With the nose cone in place, place a ratchet strap around it to secure the position, and adjust as necessary. Be sure to use your square to verify that the ends of the tubes are still even. If fitment of the float is difficult, see the note at the end of Step 7 above.
|
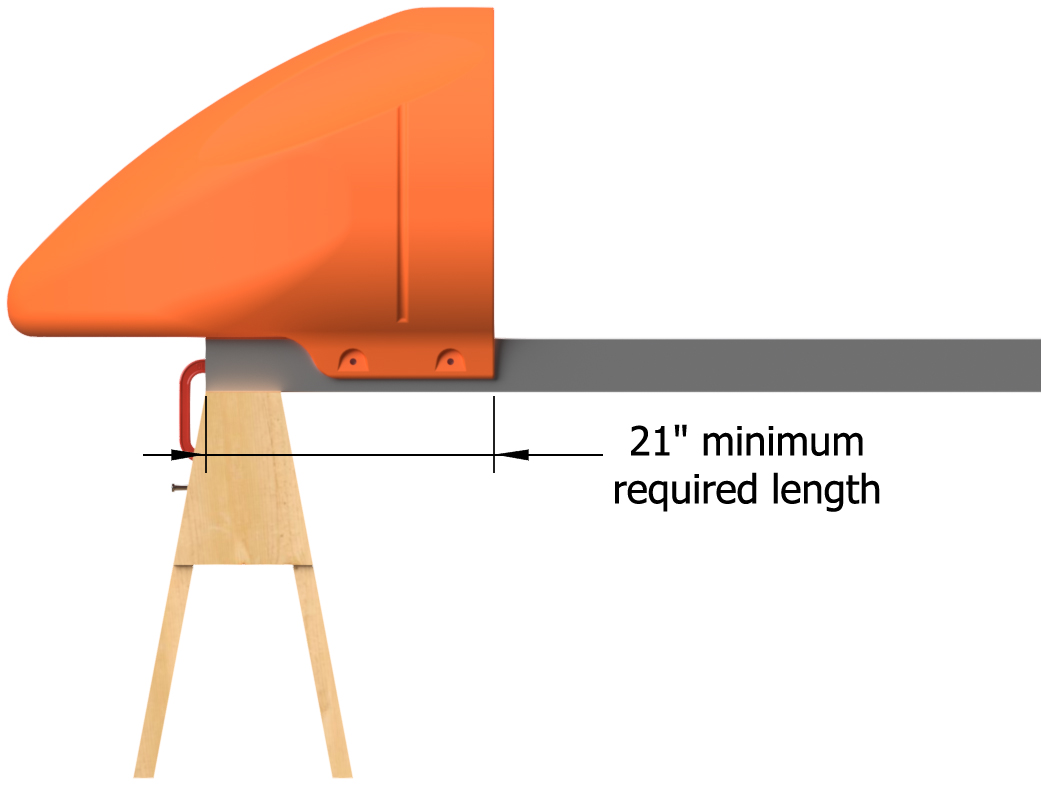
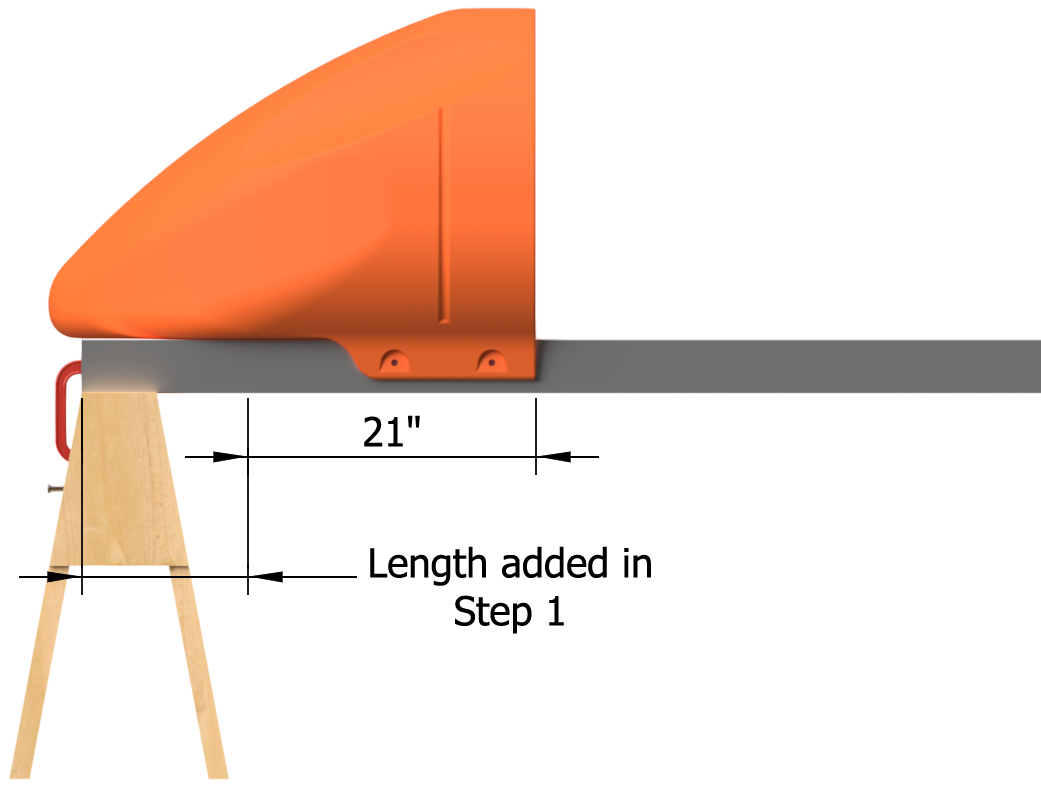
|
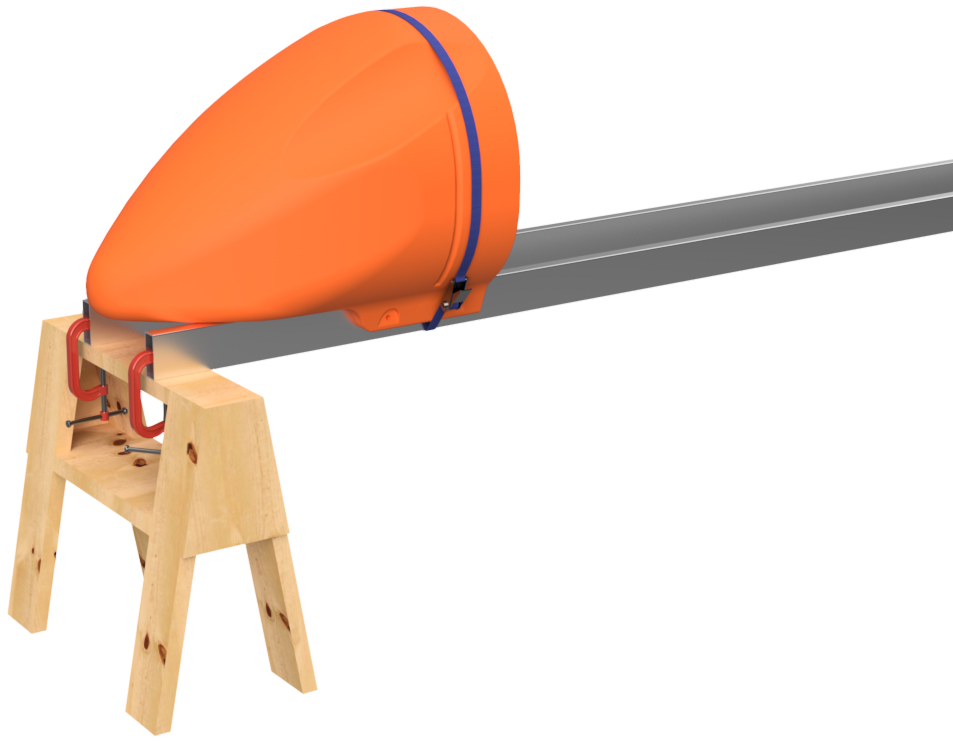
|
STEP 8
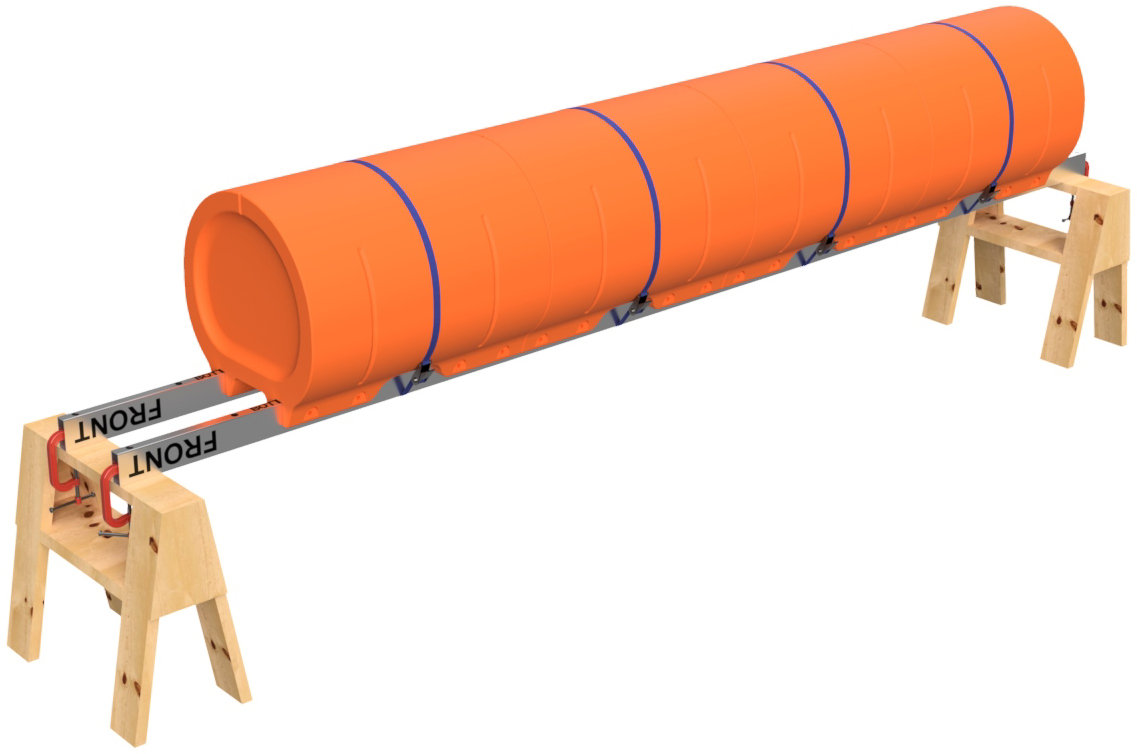
Place the remaining straight floats onto the mounting tubes and install ratchet straps around them to hold their positions. When placing the floats on the mounting tubes, tap them securely against the previously installed float. Verify the floats' overall positions and adjust as necessary.
|
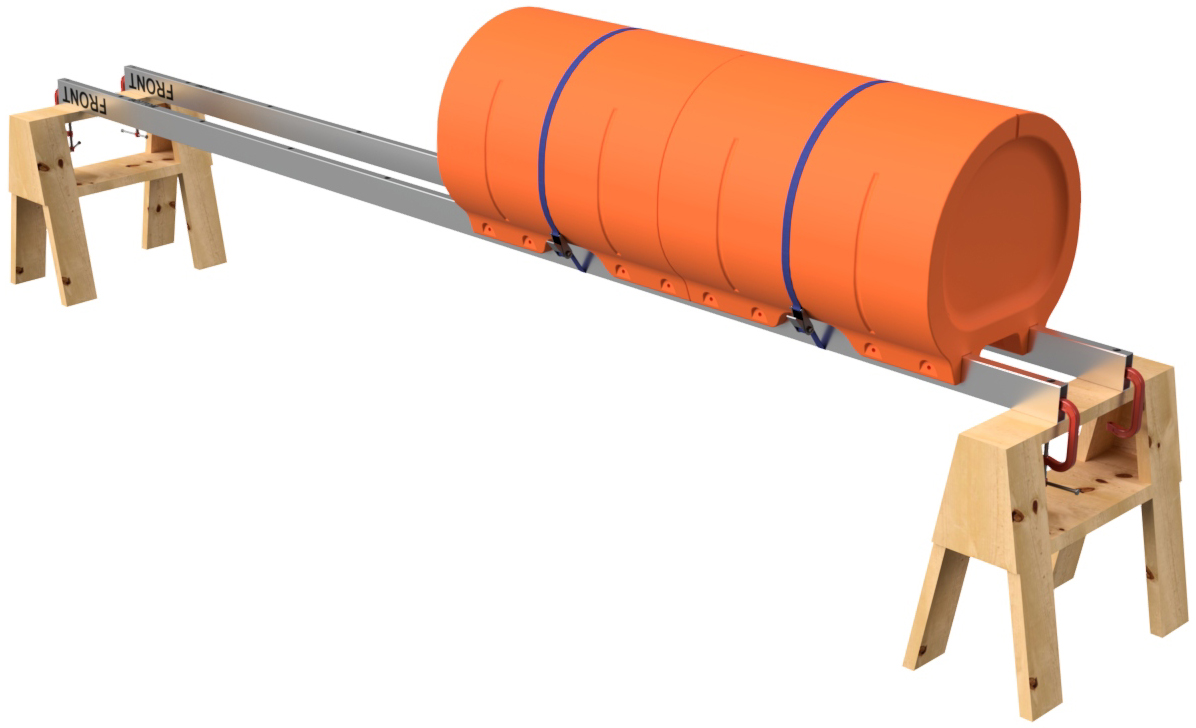
|
|
STEP 9
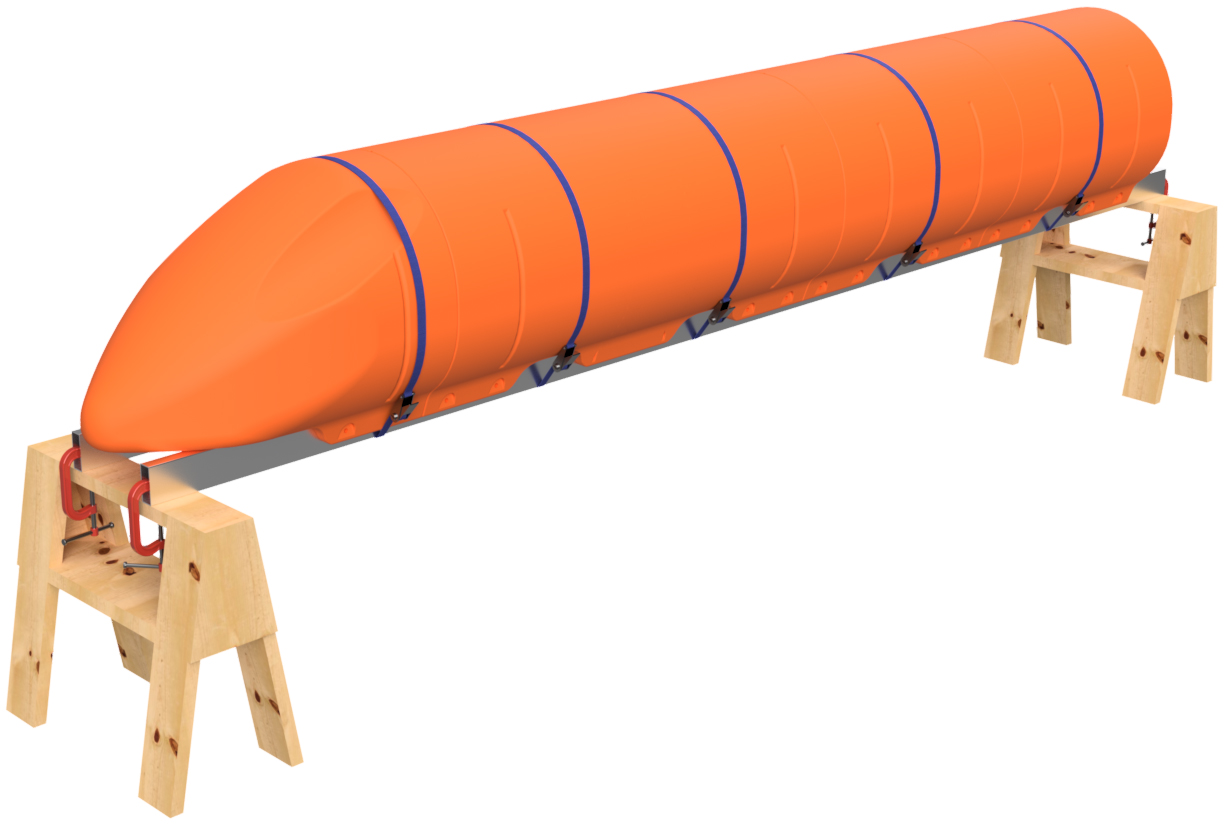
Place a nose cone float on the front of the pontoon assembly as shown. Install a ratchet strap to secure its position.
|
|
|
STEP 10
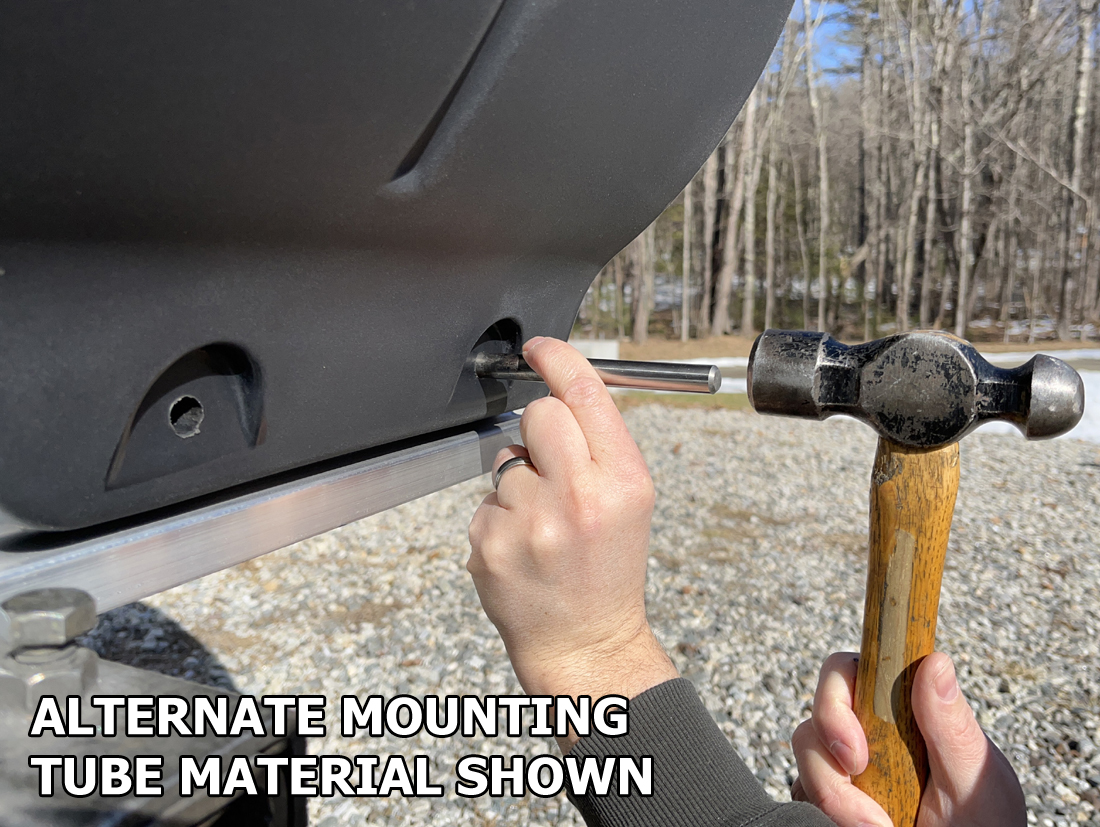
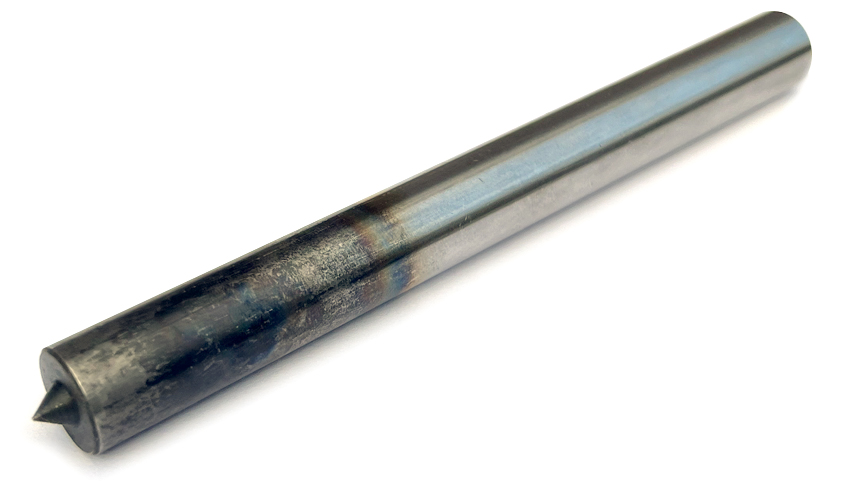
Using a 1/2" transfer punch, go down both sides of both sets of mounting tubes on the plastic floats and use the punch with a hammer to mark EVERY bolt hole position through the molded-in bolt holes in the floats. Don't smash it; just give the punch a solid tap. You will have to do this from both the outside set of holes and the inside set of holes. This means that you'll have to go under the pontoon assembly on your saw horses to mark the inner holes. It's inconvenient, but 100% necessary.
|
|
|
STEP 11
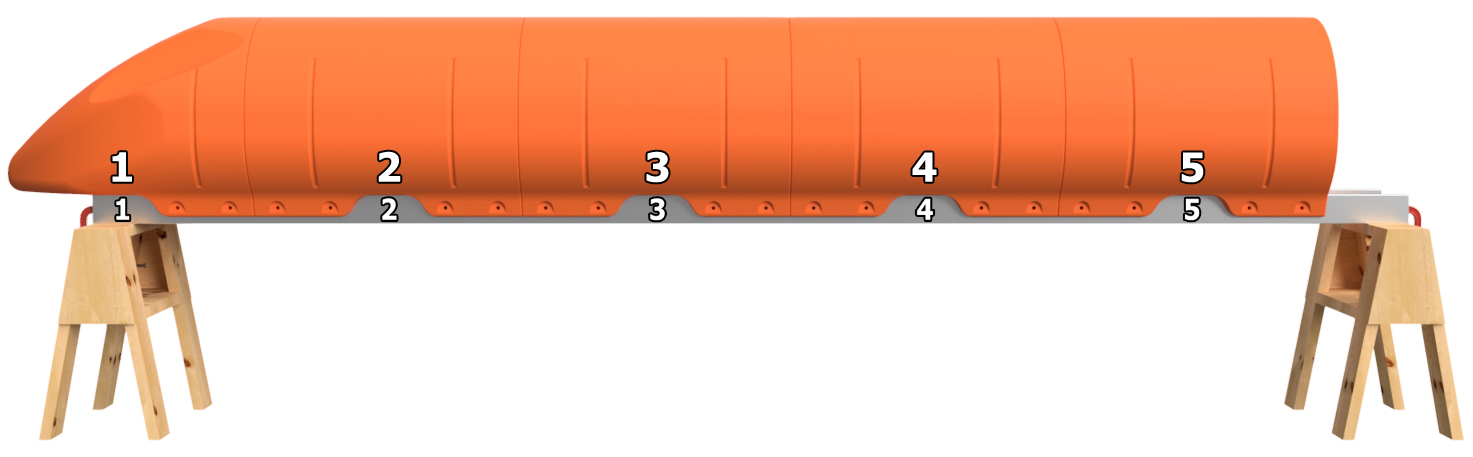
Remove the ratchet straps. Before removing the floats, number the positions of the floats on the aluminum tubes as shown. Number the floats and tubes on both sides of the pontoon assembly. For instance, if you're building a 15' long pontoon as we are showing here, you'll want to label position 1, 2, 3, 4, and 5 on one side and 6, 7, 8, 9, and 10 on the other. This ensures that you don't mix up the positions of the floats after you drill holes. You can use a piece of masking tape to write on or you can use a marker to write on the floats and mounting tubes. If using a marker, lacquer paint thinner will remove the ink after assembly, and the paint thinner will not hurt the plastic or the aluminum. Remove the floats and unclamp the tubes from the saw horses.
|
|
STEP 12
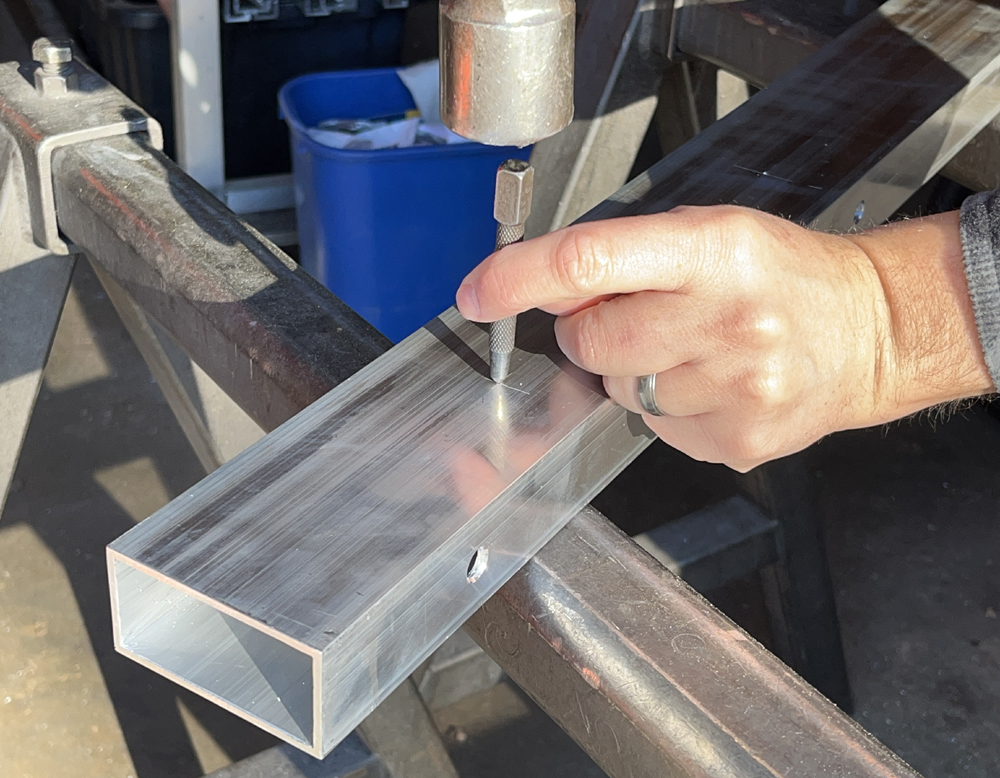
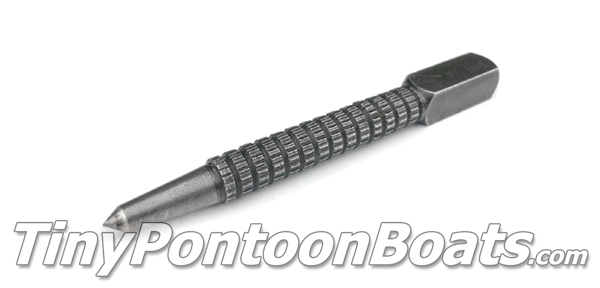
Using a standard center punch, make the marks you made with the transfer punch in step 10 more pronounce. This will make the holes easier to drill in the next step.
|
|
|
STEP 13
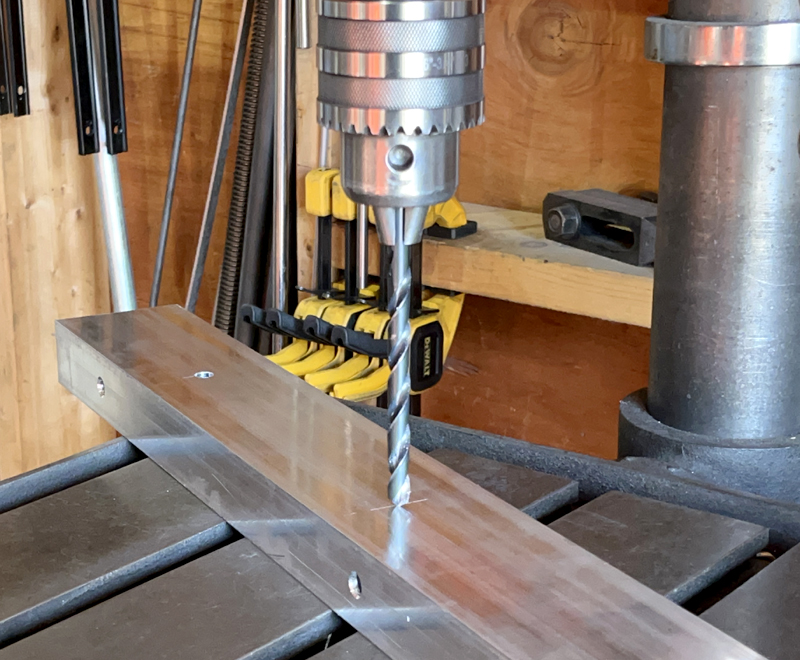
Using a SHARP (prohibits wandering of the bit) 1/4" diameter drill bit, drill through ONE WALL of each mounting tube at each marked position. DO NOT drill all the way through both sides of the tubes during this operation. Drill through every marked position on one side of each part, flip it, and drill through every marked position on the other side. After drilling all the 1/4" holes in each mounting tube, use a 1/2" diameter drill bit to drill through every 1/4" hole. Once again, only drill through one wall at a time for each hole position.
For this operation, you can use a hand-held drill, but we find it much easier and quicker to use a drill press. If using a hand-held drill, be careful to keep the drill bit perpendicular to the surface you are drilling through. You can't undrill holes, so take your time. Also, be sure to debur your new holes.
|
|
|
STEP 14
From this point forward, your approach may be different than ours depending on how tough it is to get under your boat with floats or a pontoon assembly. As mentioned at the start of our instructions, the steps moving forward can be quite difficult, uncomfortable, and even dangerous, so please use your best judgment to ensure that you do not harm yourself during the remaining assembly and installation.
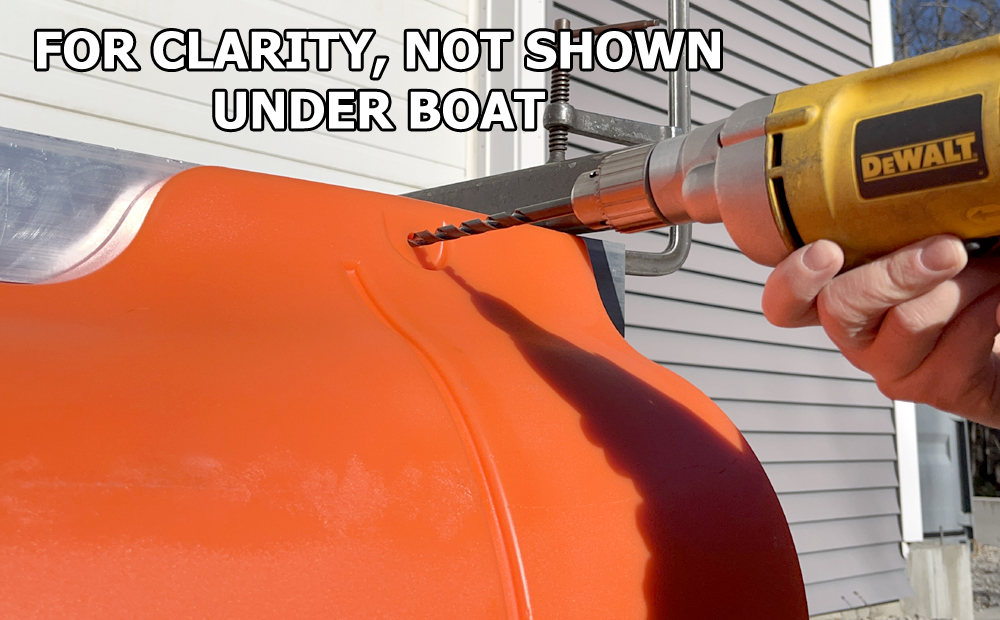
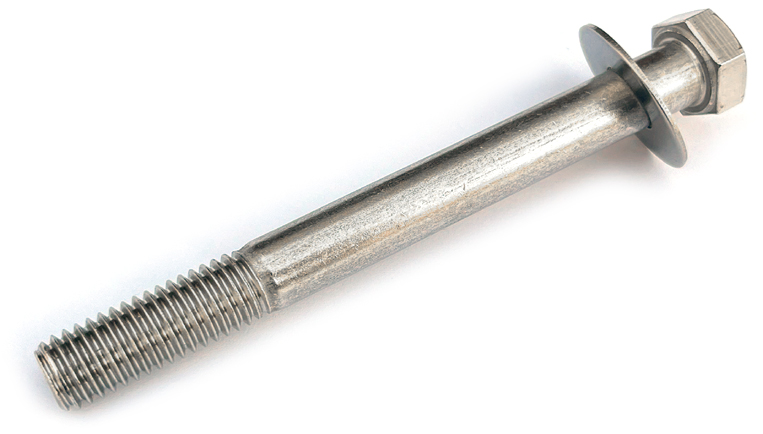
Clamp the aluminum tubes back onto the saw horses in the same orientation as before and place just two of your float sections back onto the mounting tubes, matching up the numbers you marked in step 6. Place the ratchet straps back over the floats and tap the floats into position so that the holes line up. For our 15' pontoon assembly, we are installing the rearmost float and the float that goes against the front nose cone. Do the following at each of the four corner bolt holes in the floats currently on your mounting tubes. With a 1/2" drill bit mounted in your hand-held drill, drill through one of the corner bolt holes. Drill all the way through both sides of the mounting tube on that side of the float. You will be drilling inward from the side of the float. When doing this, go slowly, as your drill bit should only be clearing chips and verifying hole alignment, not drilling a new hole. Insert one of the 1/2" x 5" hex bolts with a 1/2" flat washer from the outside position, and tap it through the hole with a hammer. We prefer to use a plastic hammer for this. Drill through the hole on the opposite end of the float and insert a bolt with washer. Do the same on the other side of the float. Remember, we are NOT installing all 8 bolts on the two floats at this point, but only 4 bolts per float. DO NOT INSTALL THE NUTS YET AND DO NOT REMOVE THE RATCHET STRAPS. Unclamp the aluminum tubes and remove the pontoon assembly from your saw horses. Use caution as the assembly can be heavy. |
|
|
STEP 15
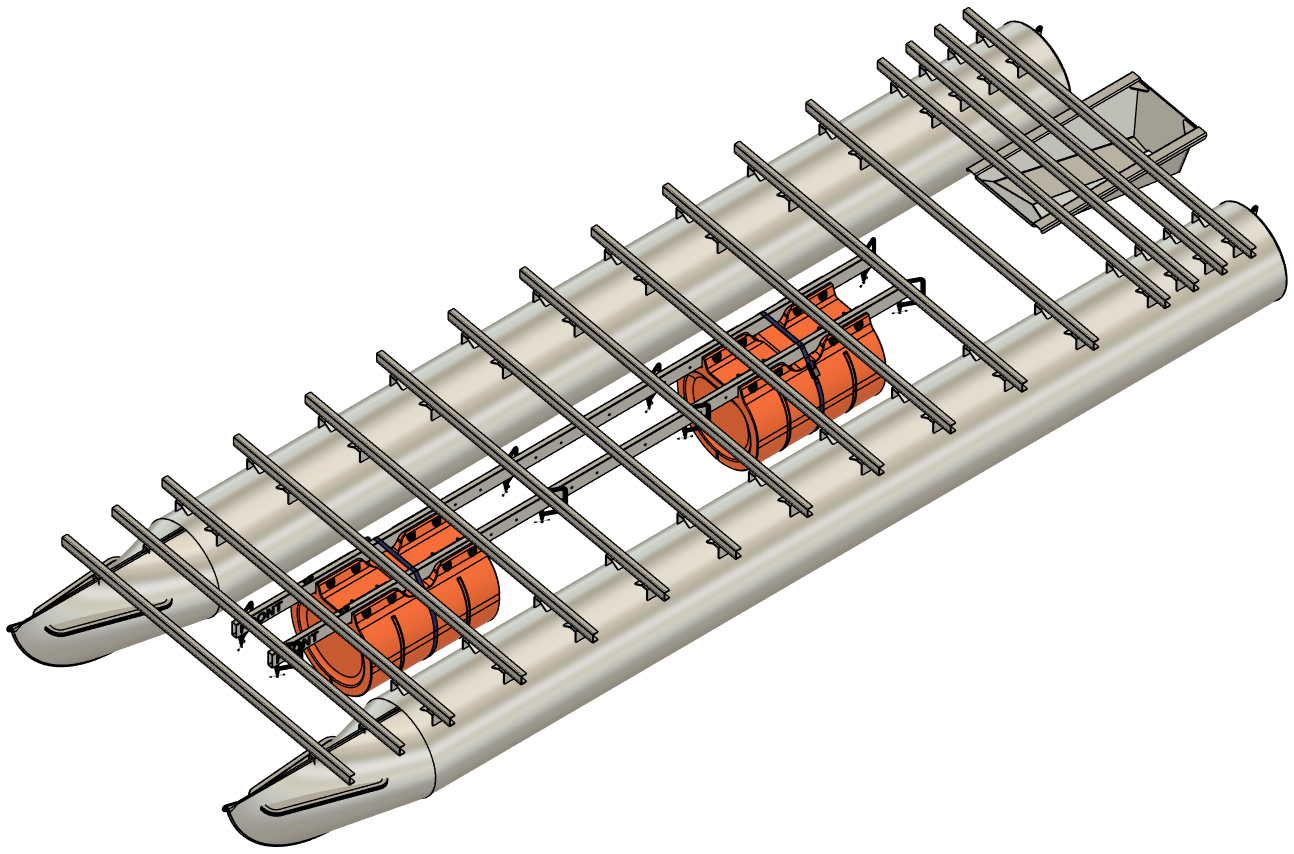
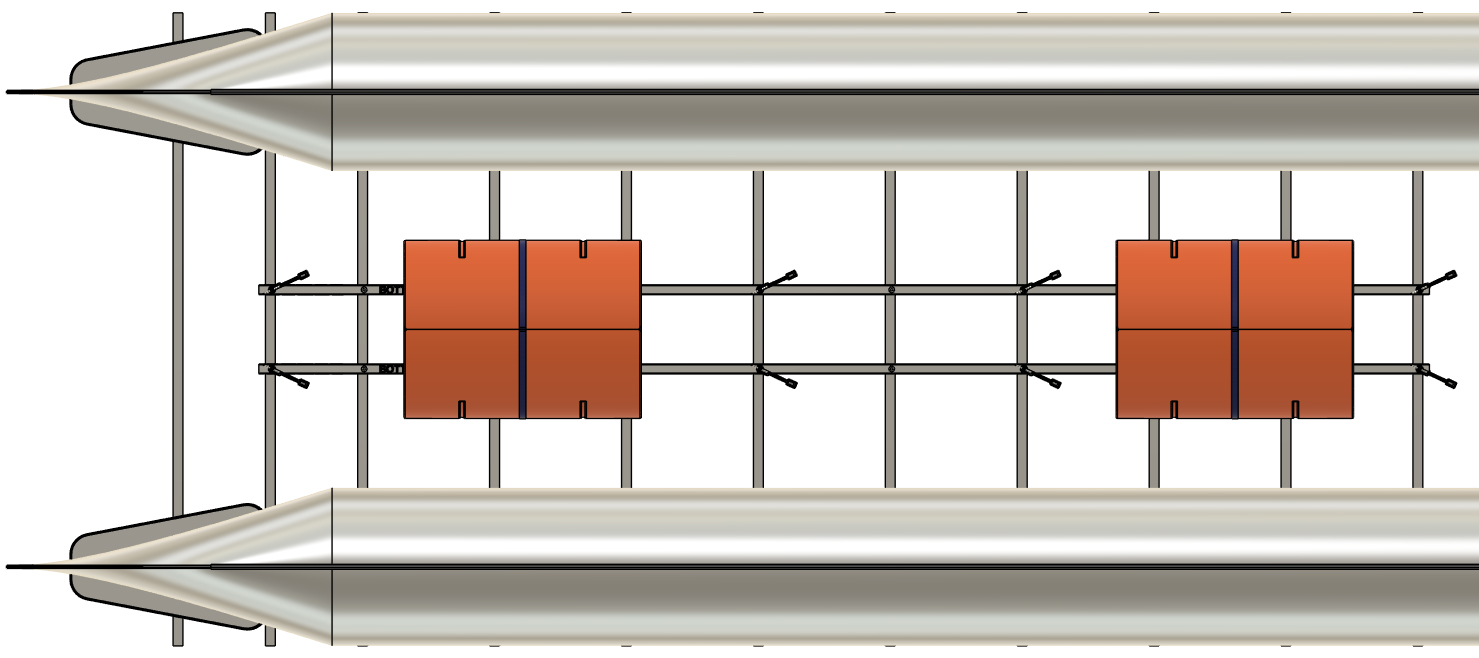
Position your pontoon assembly under your boat. Lift it up against the bottom of your frame and clamp it into the final location. Ratchet straps work great for pulling the pontoon assembly up against your frame. Remember that the mounting tubes extend 1" beyond the frontmost and rearmost crossmembers that you are bolting to. Center the pontoon assembly from left to right, double check that it is located properly front-to-back, and clamp the mounting tubes up against your frame. For the 15' example we are working with, we end up using 8 clamps to secure the pontoon assembly.
The placement of your pontoon assembly will determine the location of the holes you drill next and you can't undrill those holes. If your mounting tubes are not placed properly, you will cause permanent damage to your boat in the next step. |
|
|
STEP 16
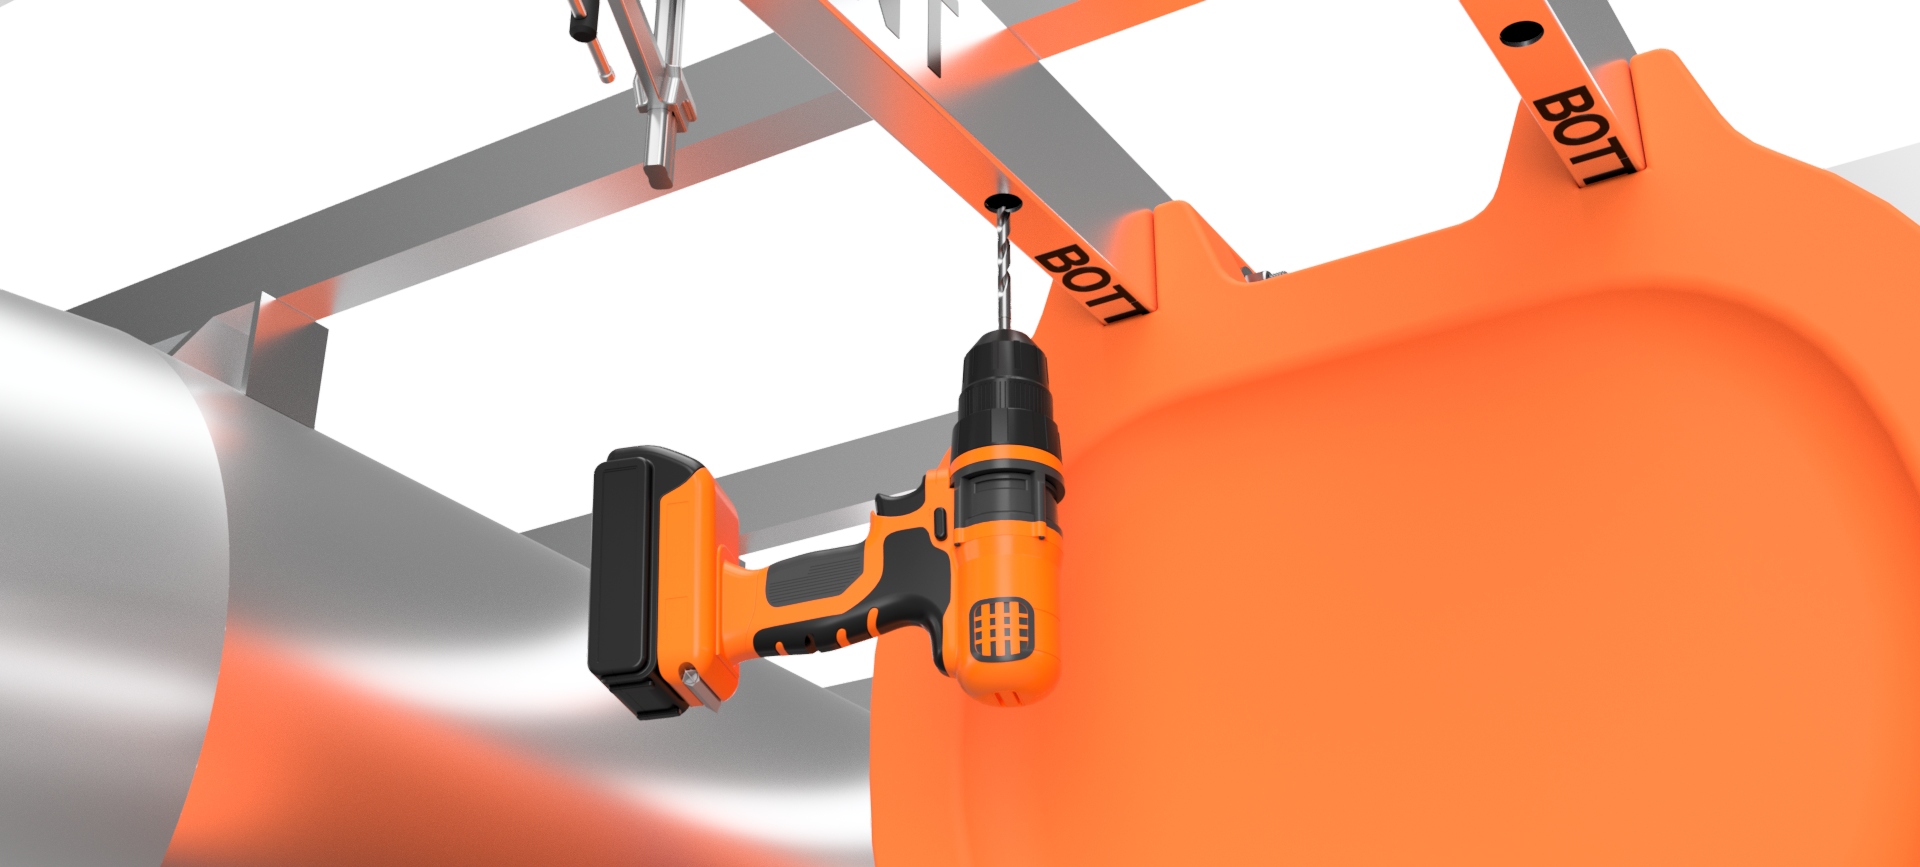
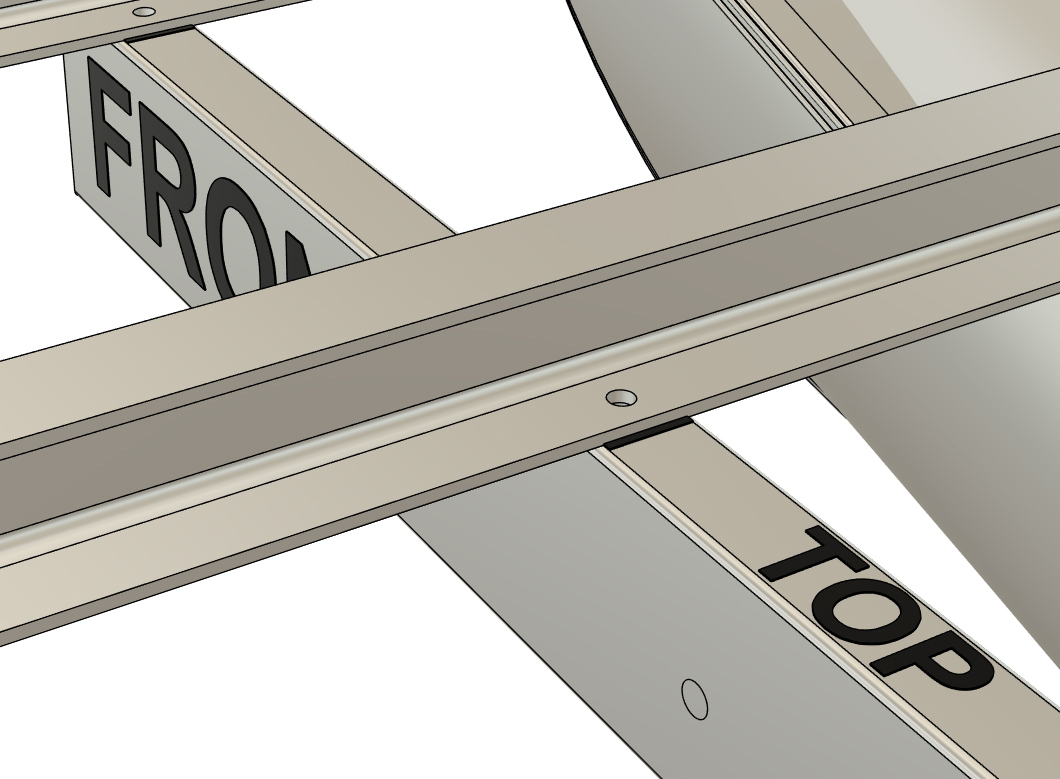
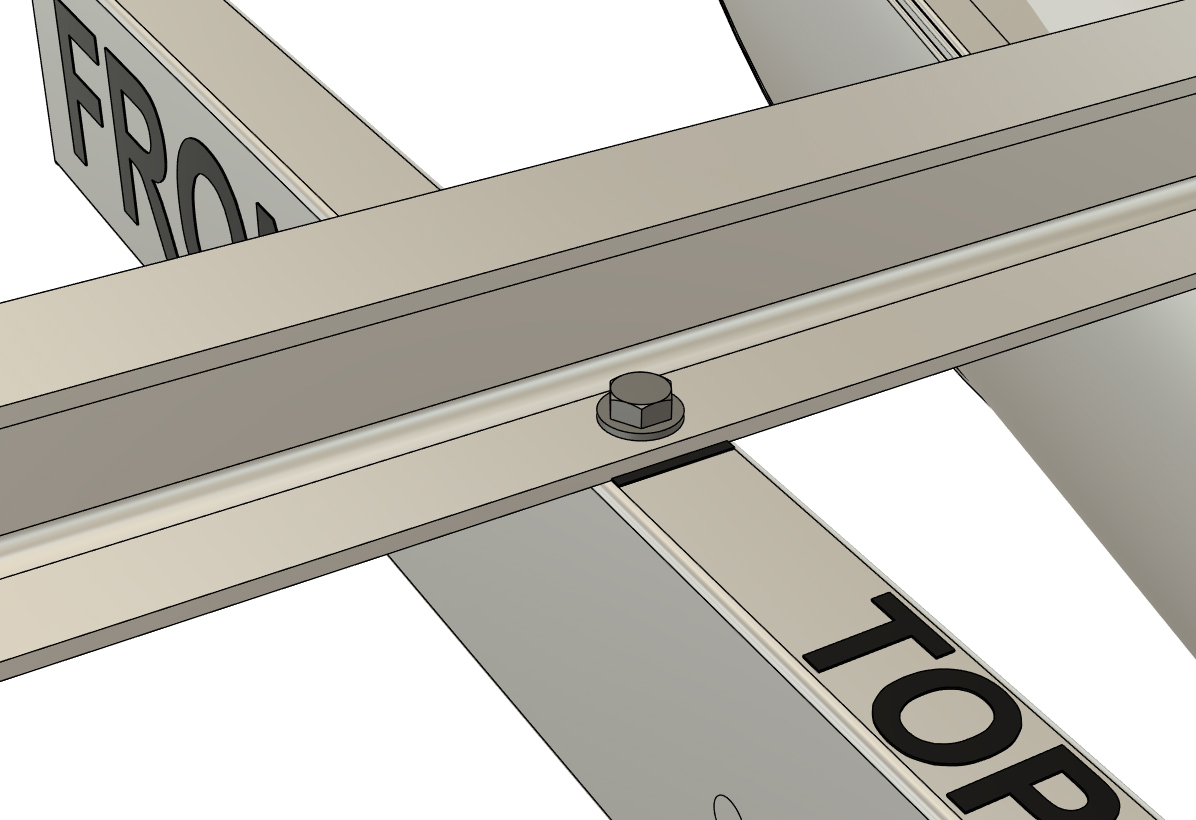
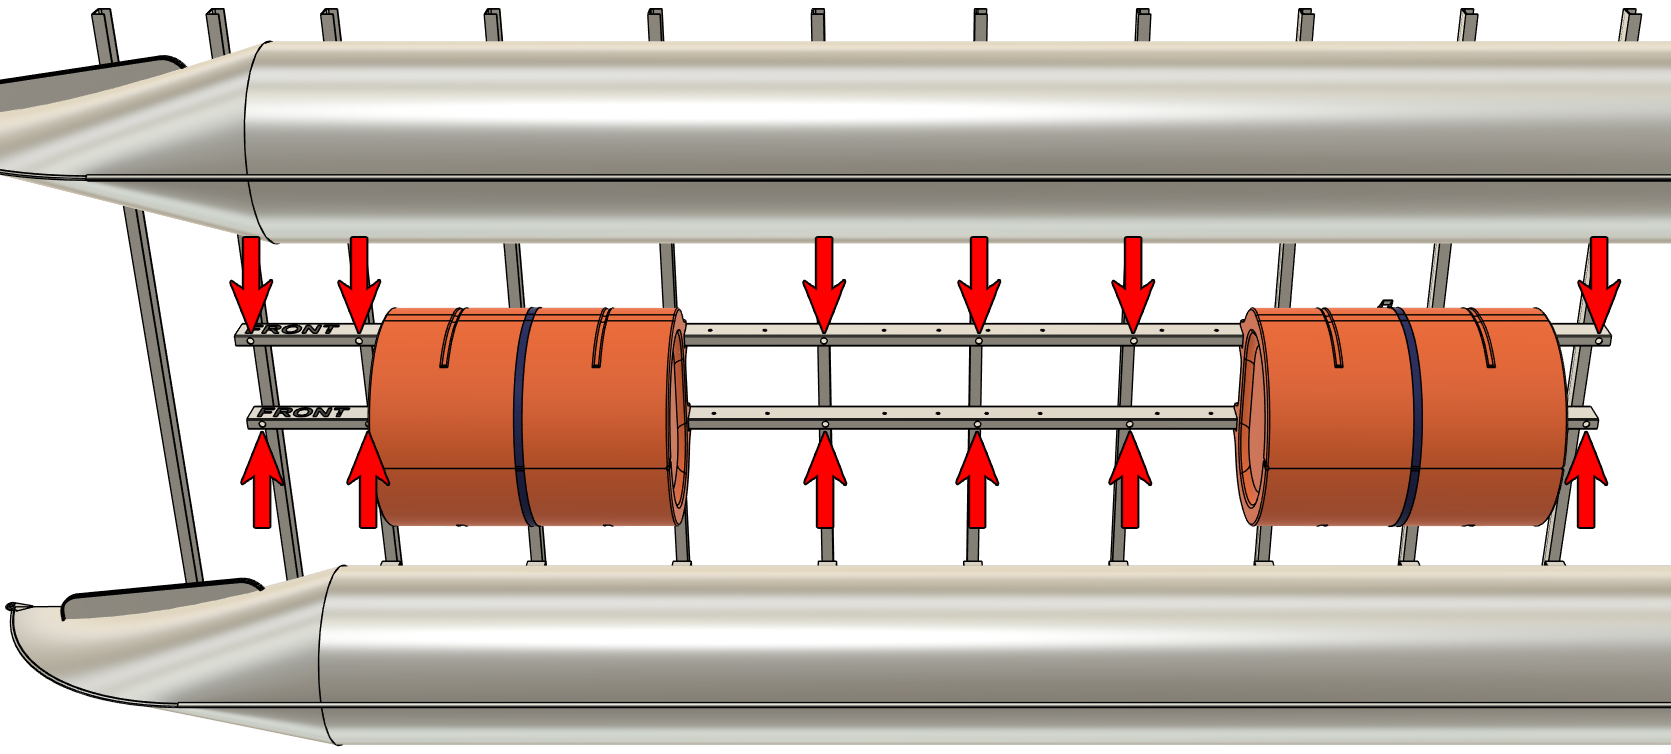
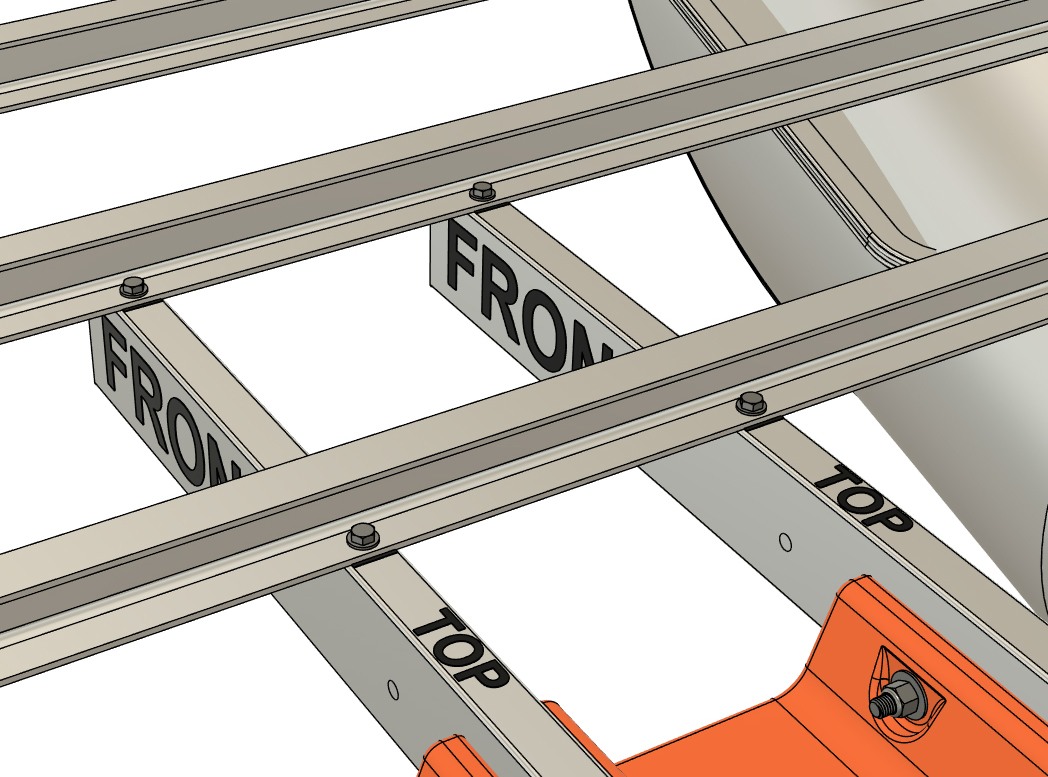
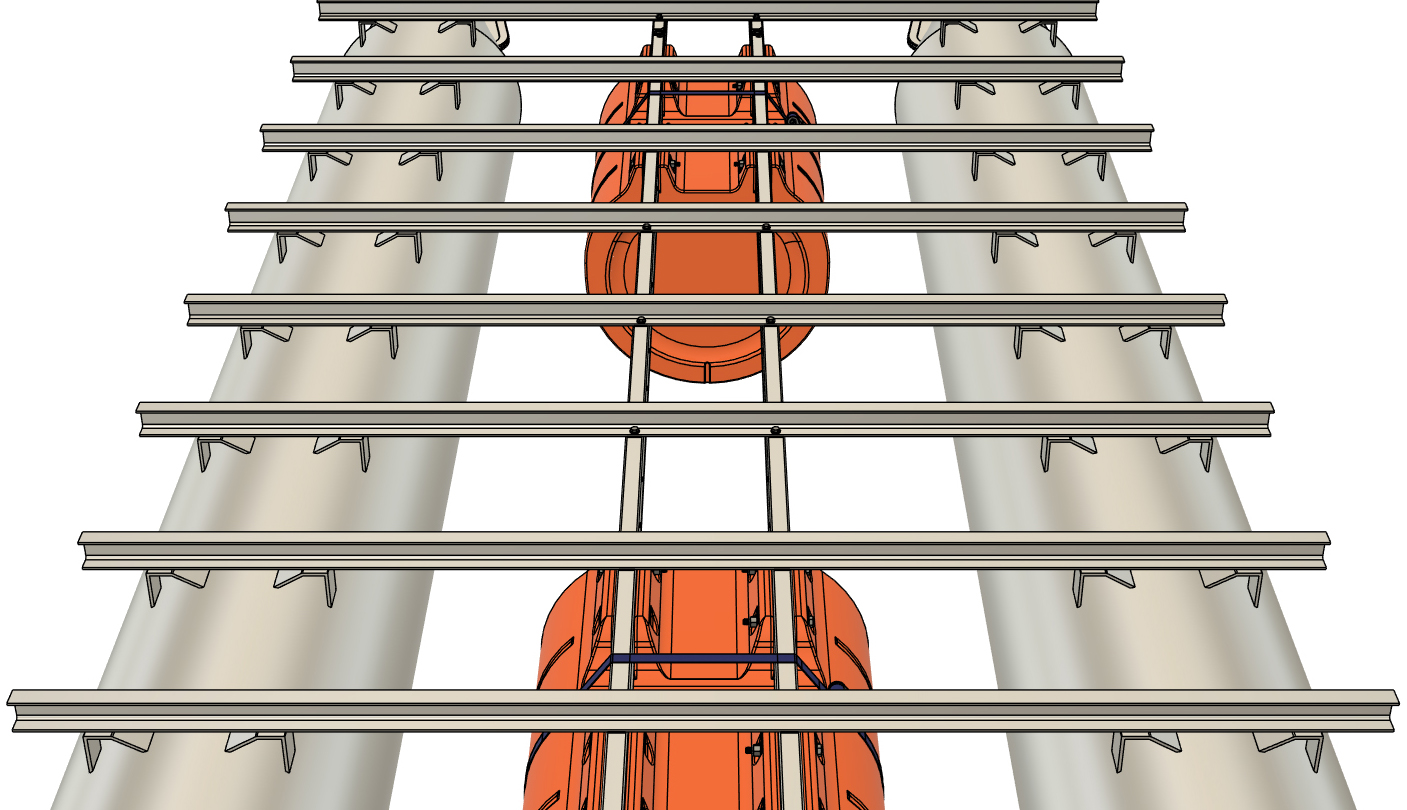
With the mounting tubes (i.e. pontoon assembly) clamped into position, mount your extended-length 3/8" drill bit in your hand drill. Insert the drill bit through each of the accessible 7/8" holes in your mounting tubes and drill upward through the 3/8" holes and through the bottom flange of your crossmembers that you currently have access to. Some holes may require that a clamp be removed and then reinstalled. The hole locations covered by the currently mounted floats will be drilled through later.
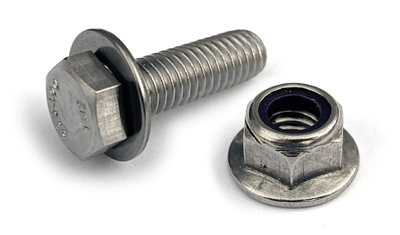
After drilling each hole, place a 3/8" x 1 1/4" hex bolt into the hole from the top of the flange. This will cause the holes to stay aligned as you continue. Do this for every hole you drill in this step. DO NOT INSTALL THE NUTS YET 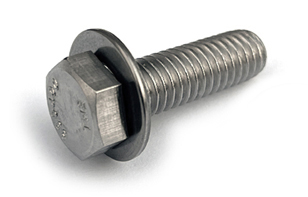
|
|
|
STEP 17
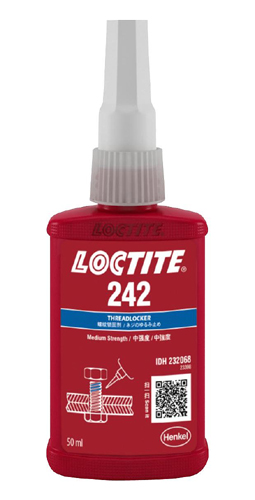
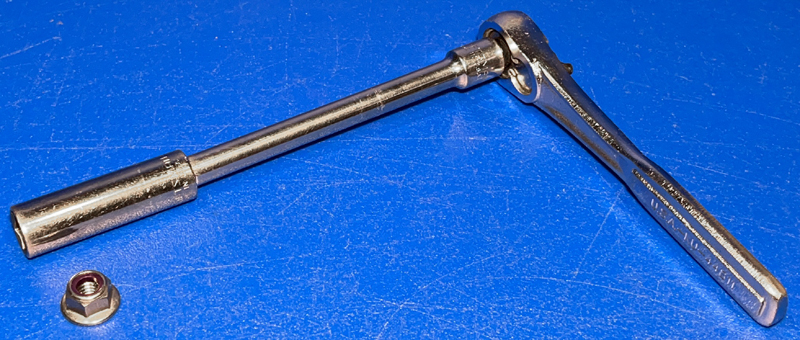
We will next be installing the nuts up through the 7/8" diameter holes in the bottom of the mounting tubes of the pontoon assembly. For each bolt that was just installed, take and apply LocTite (type 242 - see note below) to a 3/8" flange nut and install it using a 3/8" drive ratchet, extension, and 9/16" deep-well socket. This allows you to reach into the hole to reach the bolt. You will require a 9/16" box wrench to hold the bolt from the top. We suggest torqing these nuts and bolts to 55 foot pounds. After installing nuts on every bolt, double check that you didn't miss any, and remove any clamps remaining on the pontoon assembly.
NOTE: The LocTite lubricates the threads, makes the nuts more secure, and is 100% required. DO NOT SKIP THIS STEP as stainless steel threads have a tendency to jam without lubrication. |
 |
|
STEP 18
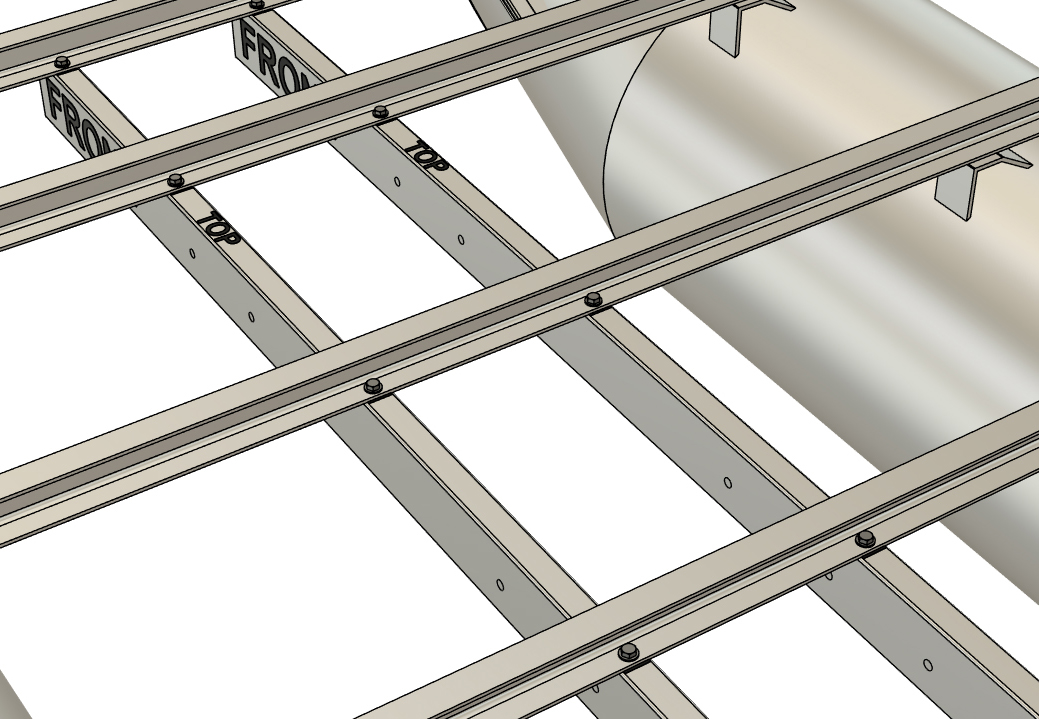
Remove the floats installed in step 14 and repeat the procedure described in step 16 and 17 for the remaining mounting tube holes that were blocked by the floats. Drill and install the 3/8" nuts and bolts as we did before. Double check that all the mounting tube holes have bolts installed and move onto the next step.
|
|
|
STEP 19
What remains for the installation procedure is tricky at best, and we'd like to remind you that retrofitting other boats is not what our float design was initially intended for; these instructions are provided per request of customers choosing to add our floats to their boats. If you're working on a stripped boat without decking on the floor yet, the remainder of this is easy. If you are adding floats to a fully built boat, what remains is hard. Make peace with that as you're elbows-deep already! What remains is still a 2-person task and is quite difficult if you are working alone.
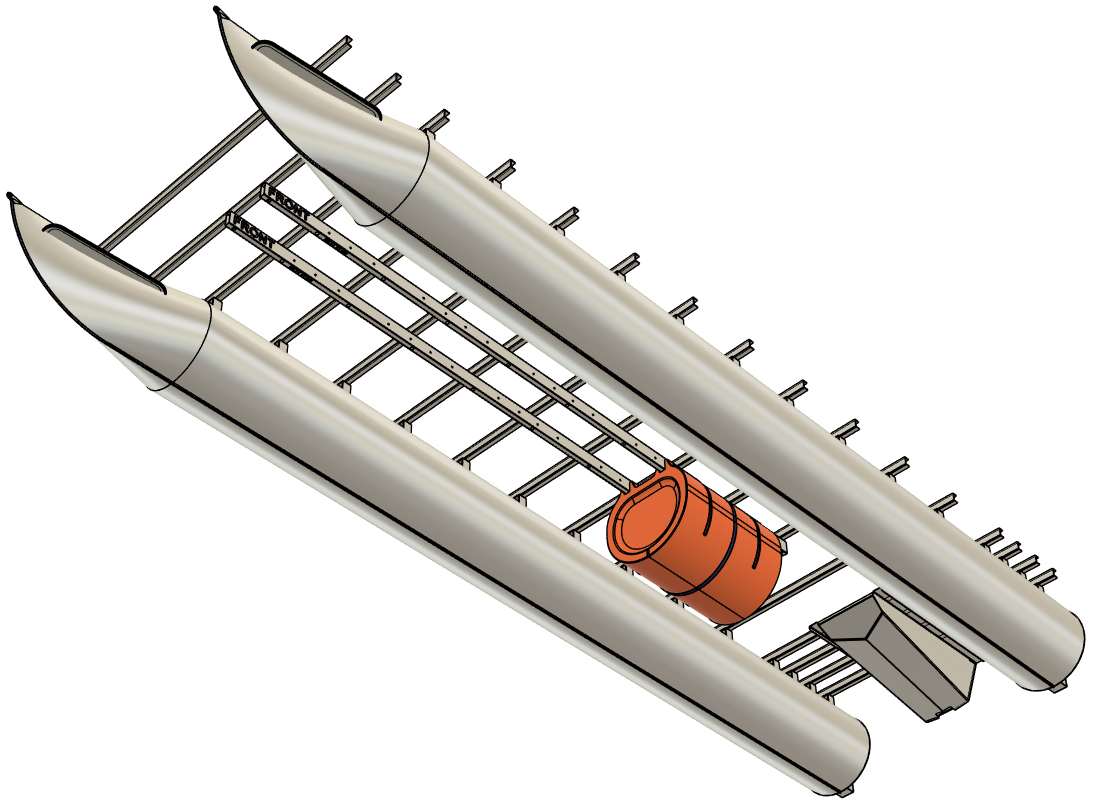
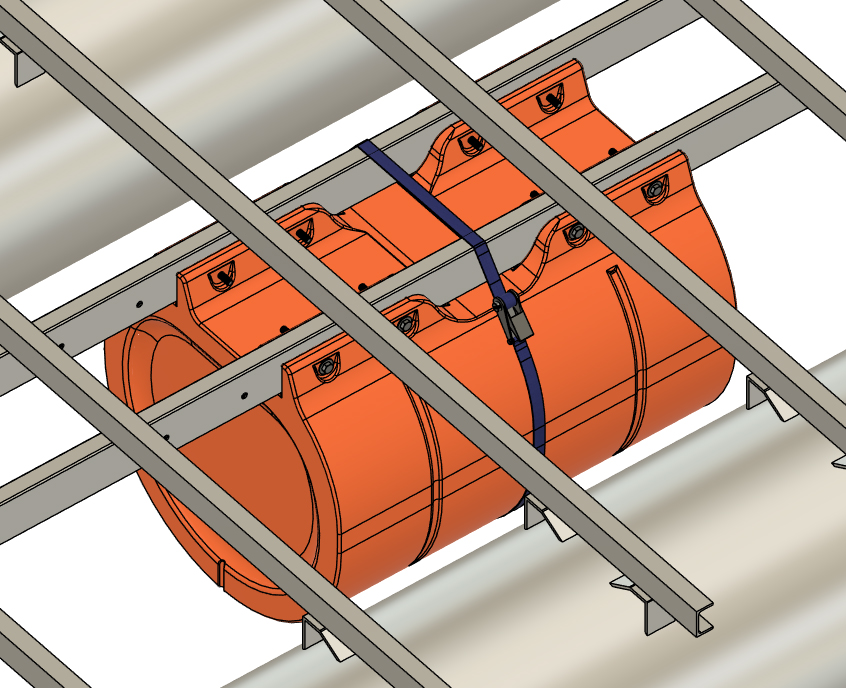
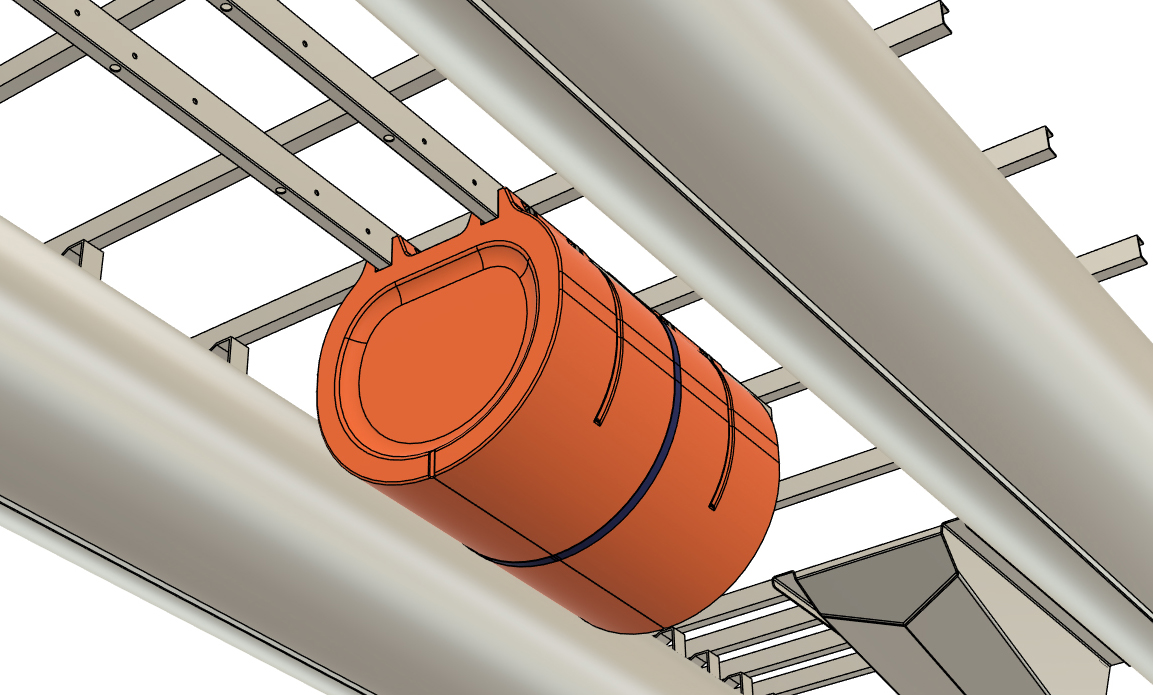
Matching up the numbers you wrote on your mounting tubes in step 11, use a ratchet strap to mount the rearmost float onto your mounting tubes. Tap the float into position so that the bolt holes line up. Insert a 1/2" x 5" bolt with washer into the four outer bolt holes. Just as you did in step 14, use a 1/2" drill bit and drill throught the remaining bolt hole locations and then insert bolts through the remaining float bolt holes. Insert bolts with washers through these holes as well. All 8 bolt holes now have bolts with washers ("dual-nose" pontoon assemblies will have 4 bolts inserted). Remove the ratchet strap from the float, but DO NOT INSTALL THE NUTS YET.
|
|

|
STEP 20
Here's where it gets tricky, and the ease of what remains for the installation process depends on what's in your toolbox (literal and experience). Buckle up as there will be cursing if you don't make or obtain one specific simple tool. We discuss that below.
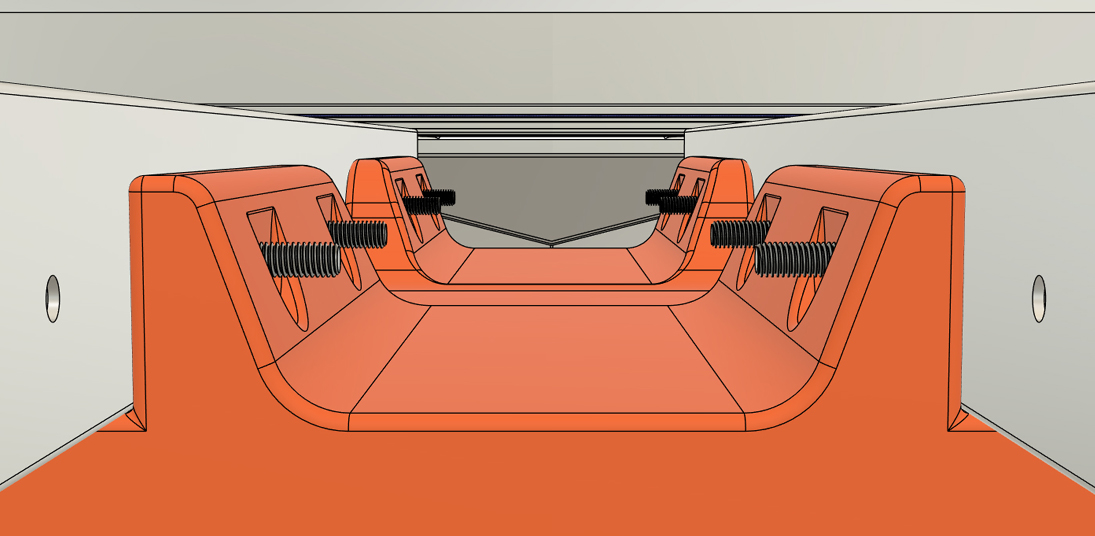
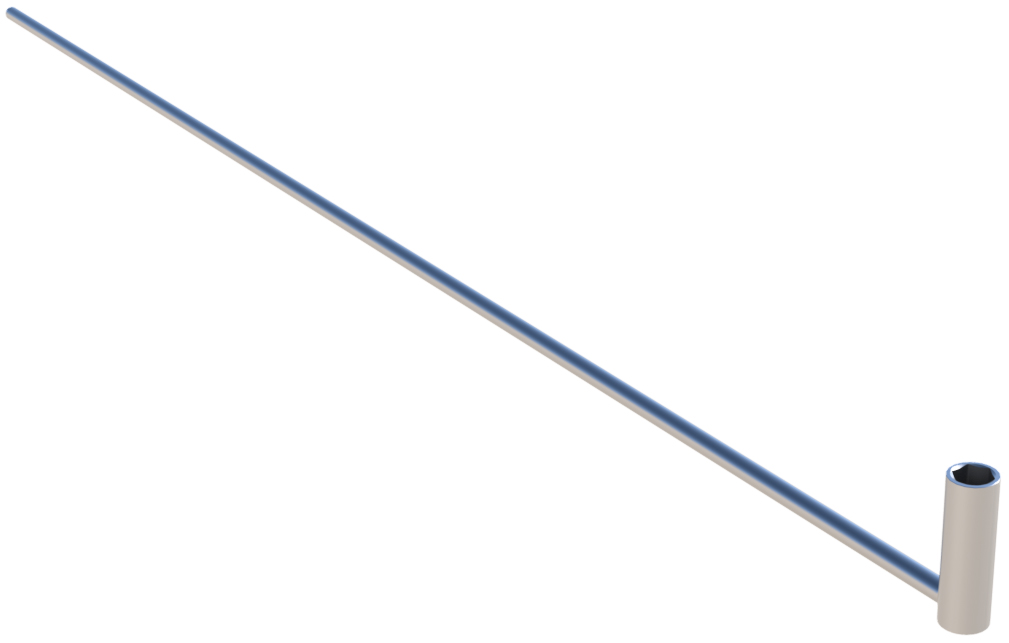
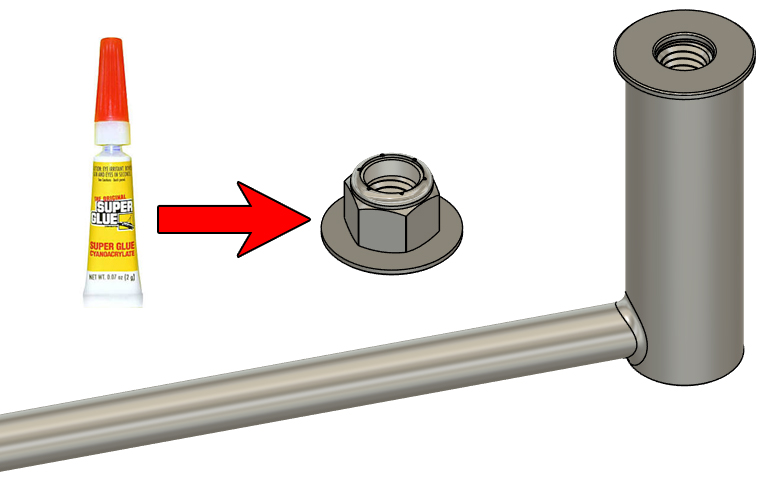
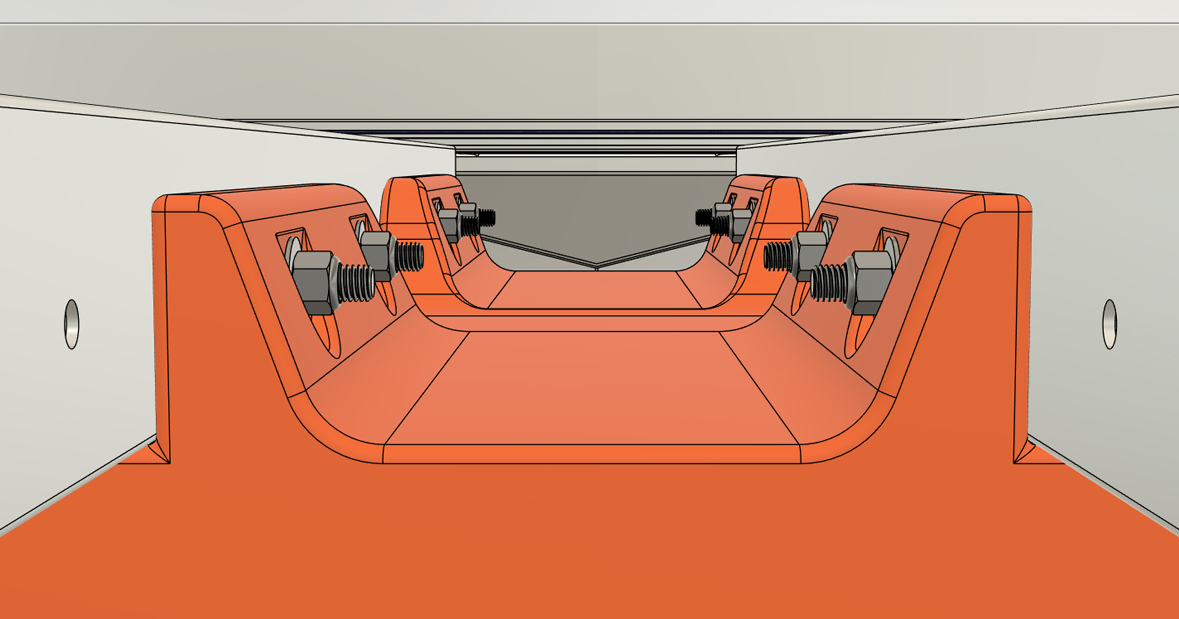
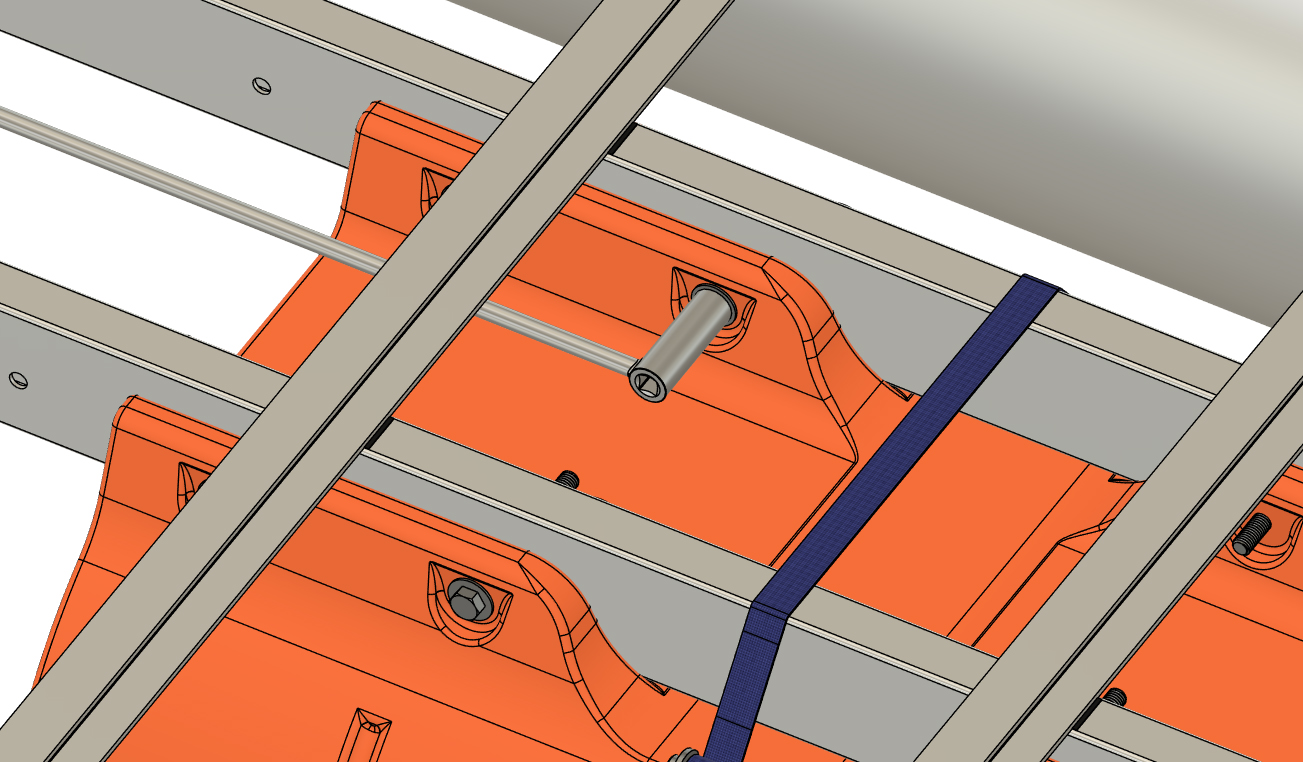
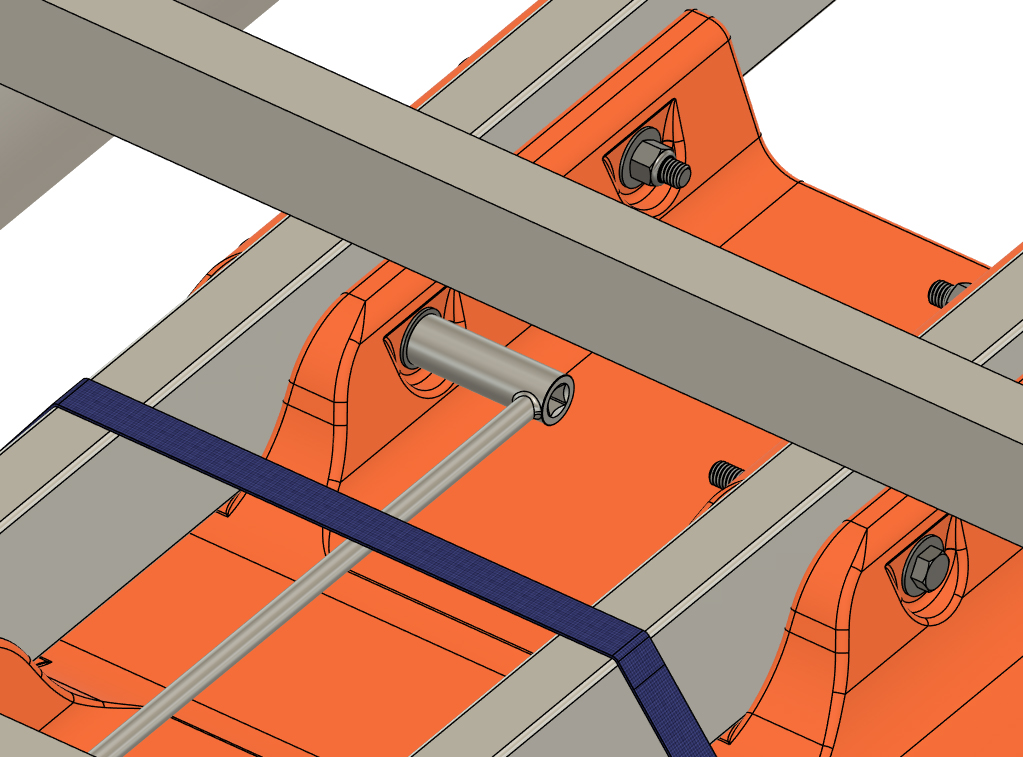
To the best of your ability, use a rag to remove any chips from the threads of the bolts protruding through the inside flanges of your floats. You now need a way to install nuts and washers onto the bolts that are holding your float. For the rearmost float, you may be able to reach in and install washers and nuts onto the bolts, but moving forward, that will become impossible, so here's the best solution we have for this: For each of the nuts that you need to install, place 4 drops of Super Glue onto the washer, and then place a nut centered on top of it to. Yes, you're gluing the washers to the nuts, you know, like NASCAR does with lug nuts on their wheels! Glue enough washers to nuts for each float bolt (we recommend 8 at a time). You now need to reach in and align the nut/washers over the bolts with a long-reach socket wrench, and that's simply not something sitting on a store shelf! As you move forward, you're going to need to be able to reach in as far as 36" to get this done, which is impossible with a standard ratchet, so here's our solution for that: Weld a 3/4" deep-well socket to a 48" length of 1/2" steel round bar (or other slim piece of material) to use as a very long-reach wrench. This is the best solution that we have for this, and if you ask nicely, we can provide you with such a tool. With this specialty tool, you can place the nut and washer assembly into the socket, and reach into the area above the float/between the bolt flanges and align the nut and washer with each bolt, rotate the bolt so that it engages with the nut, and then tighten the bolt completely. This task is 1,000,000% easier with a helper. Complete this super fun operation with every 1/2" float bolt. NOTES: APPLY A LIBERAL AMOUNT OF LOCTITE 242 TO EACH NUT BEFORE INSTALLING IT ONTO THE BOLTS. IF YOU FAIL TO DO THIS, YOU WILL HAVE A BAD TIME! We do not have a torque specification for the 1/2" nuts and bolts that hold our floats. Tighten the bolts until the mounting flanges on the floats start to flex inward and then stop. That's it as the floats are being "pinned" into place with the bolts (not heald in place by compression). 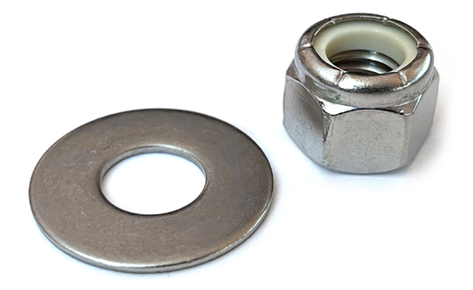
|
|
|
STEP 21
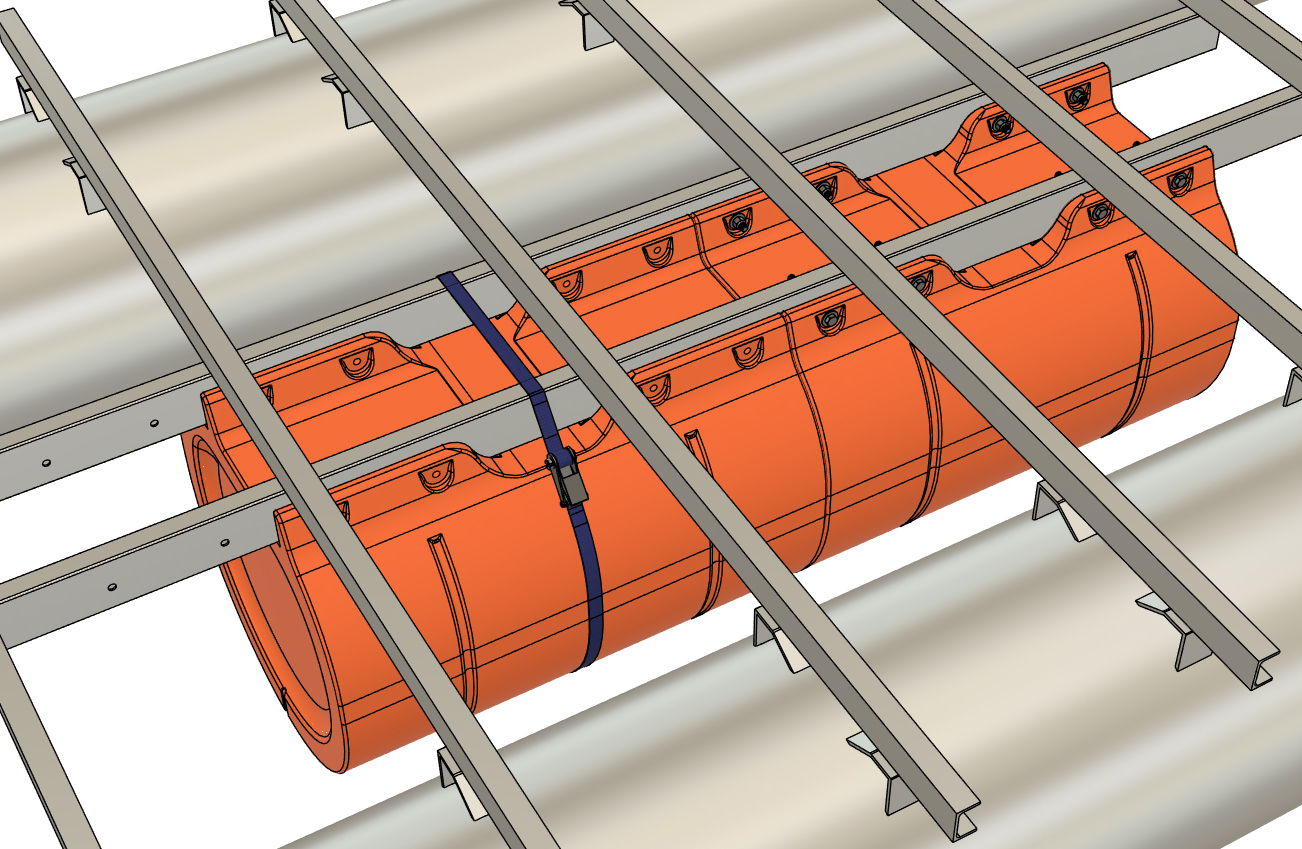
Repeat step 19 and 20 with the next float forward, and remember to match the numbers you wrote in step 11. Don't forget to wipe off any chips on the bolt threads, and for the love of Pete, remember that blue LocTite for the nuts!
|
|
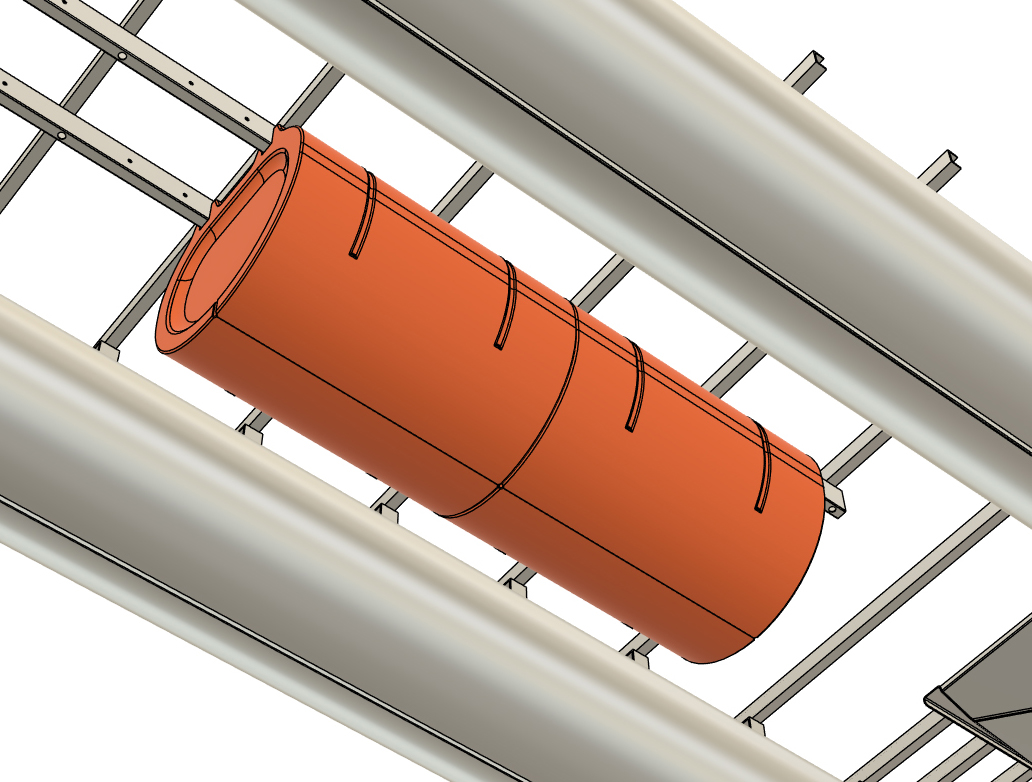
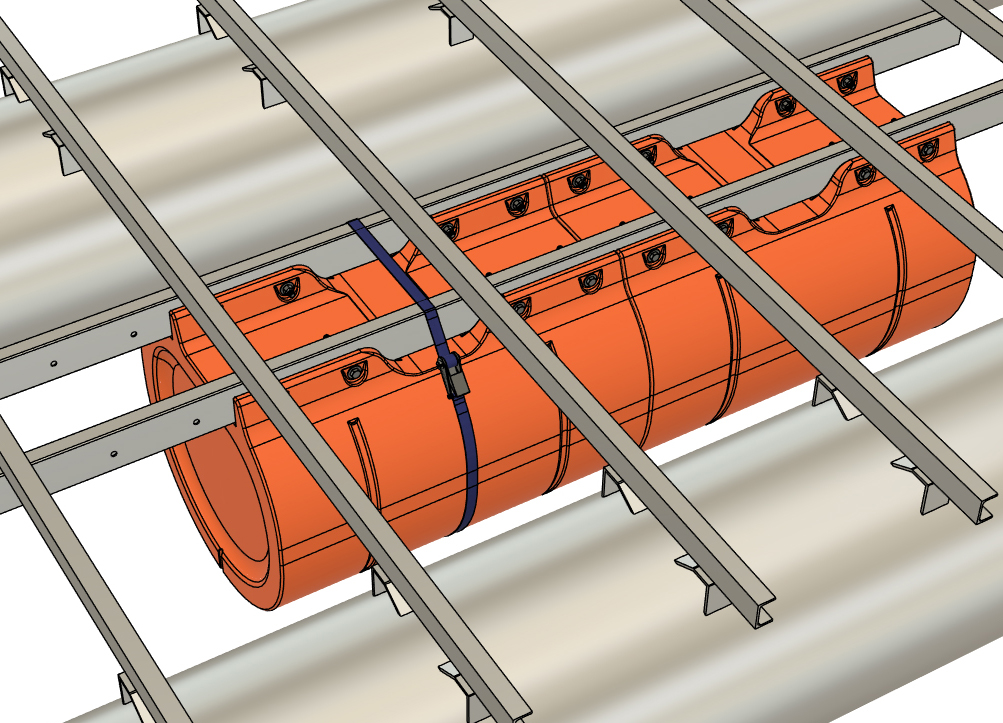
|
STEP 22
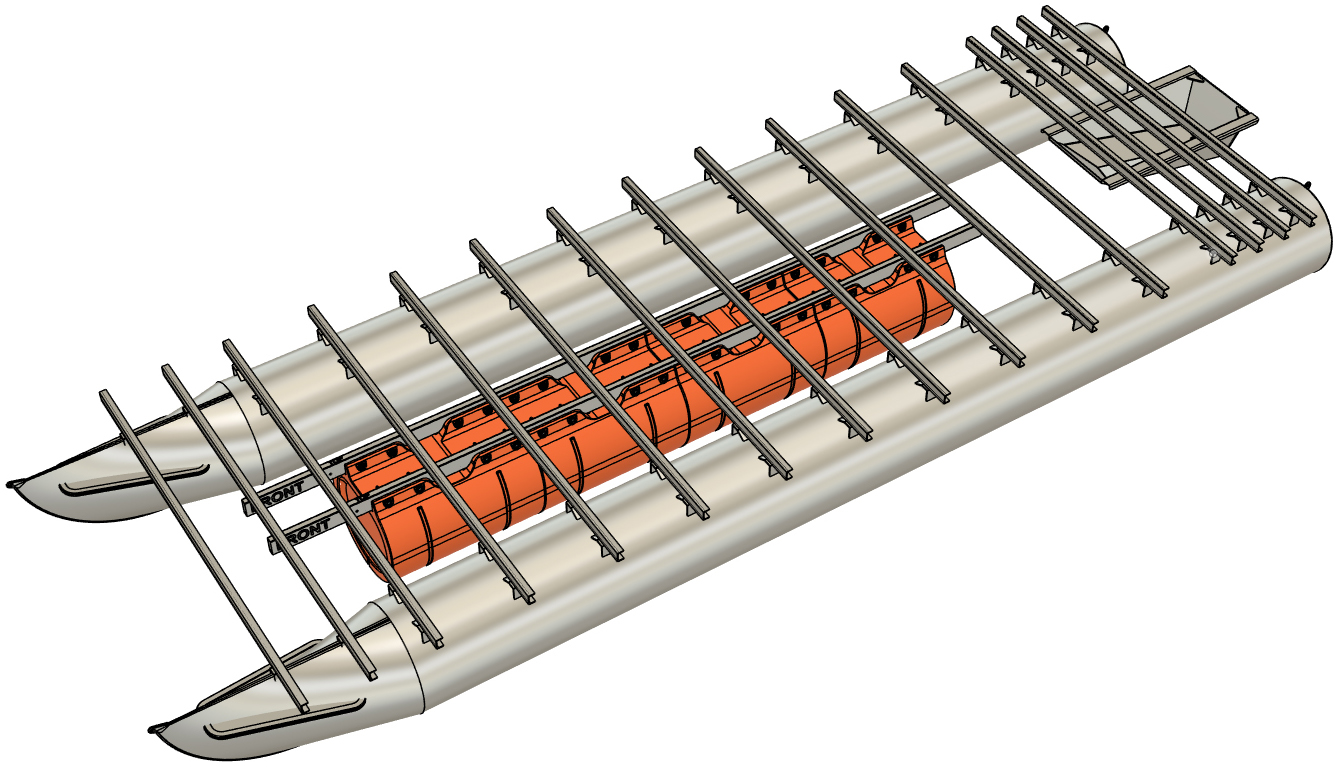
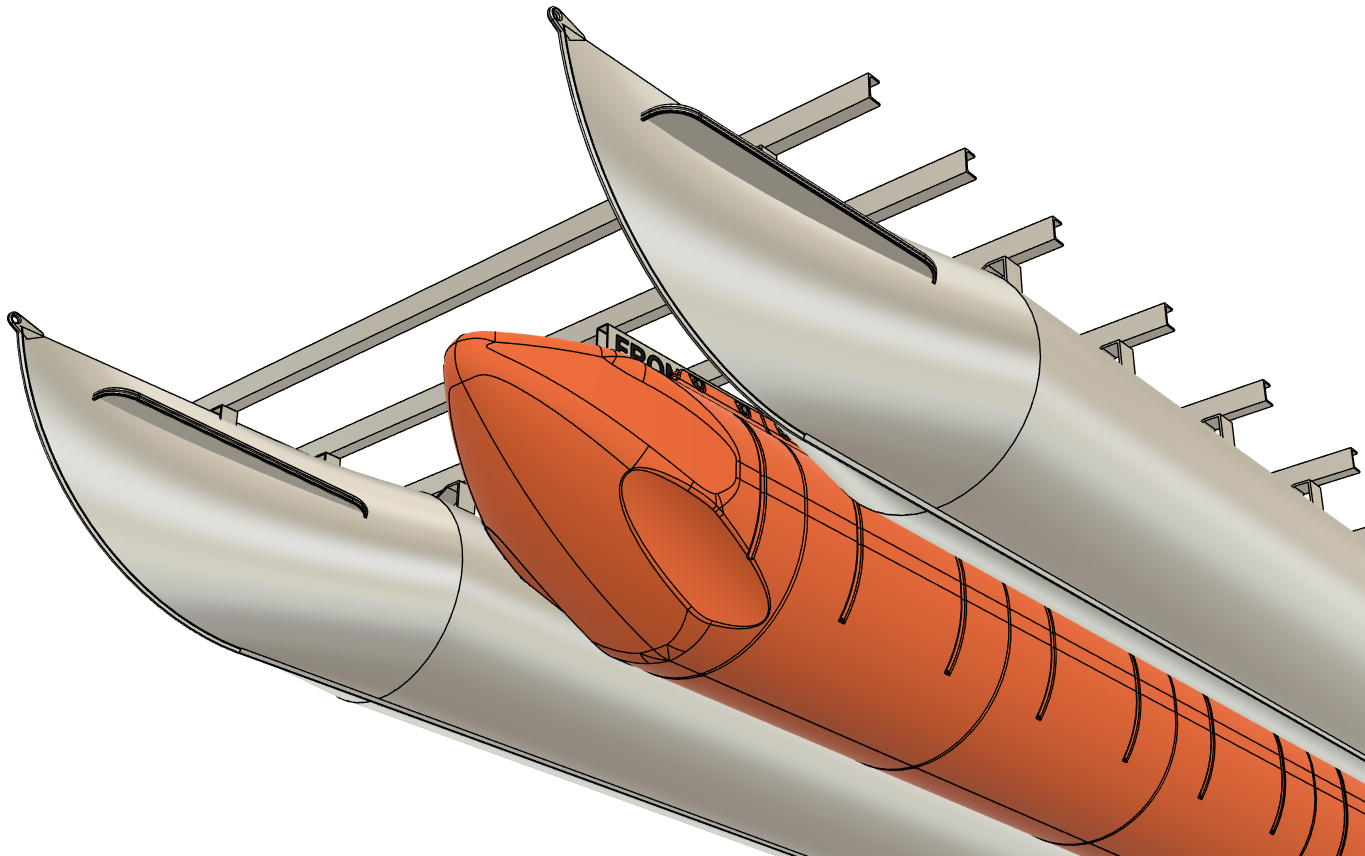
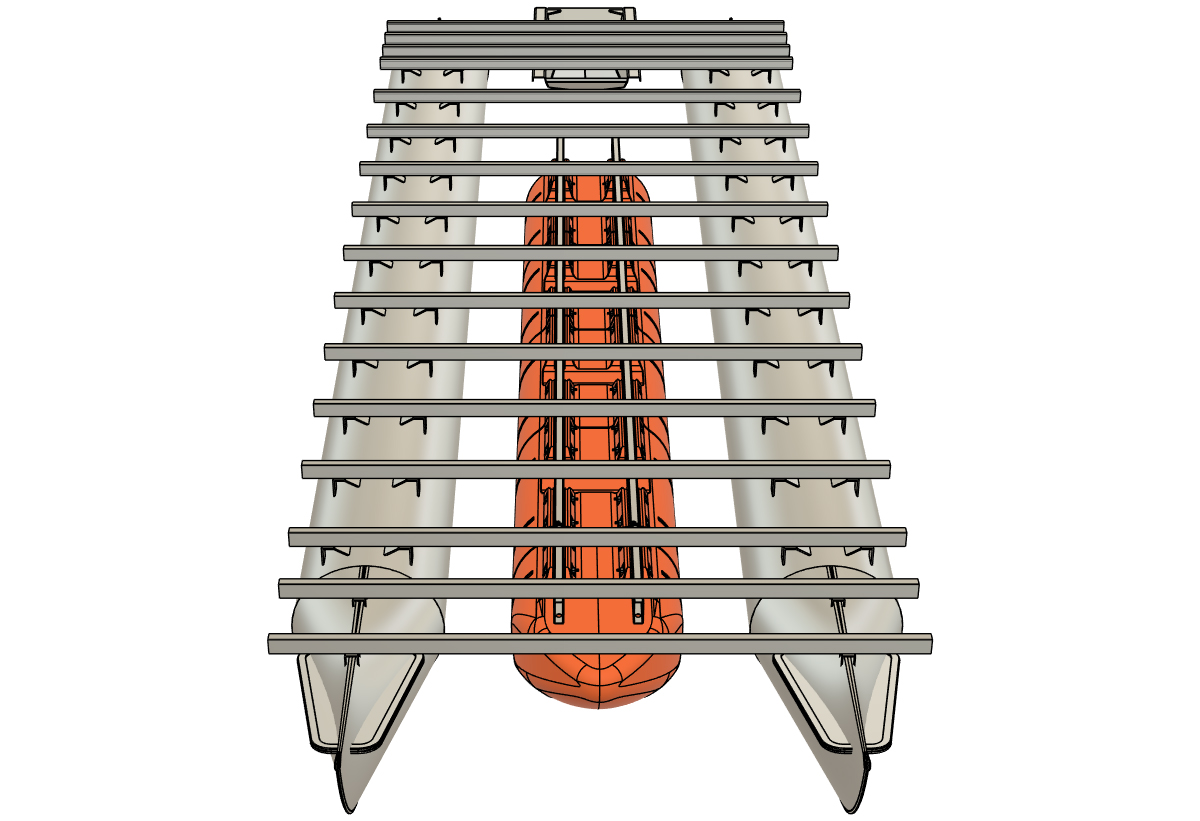
Continue installing the next floats forward until all of your floats are installed. This includes the front nose cone for your pontoon assembly. At this point, you're a pro at the mounting procedure! As always, remember to wipe off any chips from the bolt threads and use that blue LocTite!
|
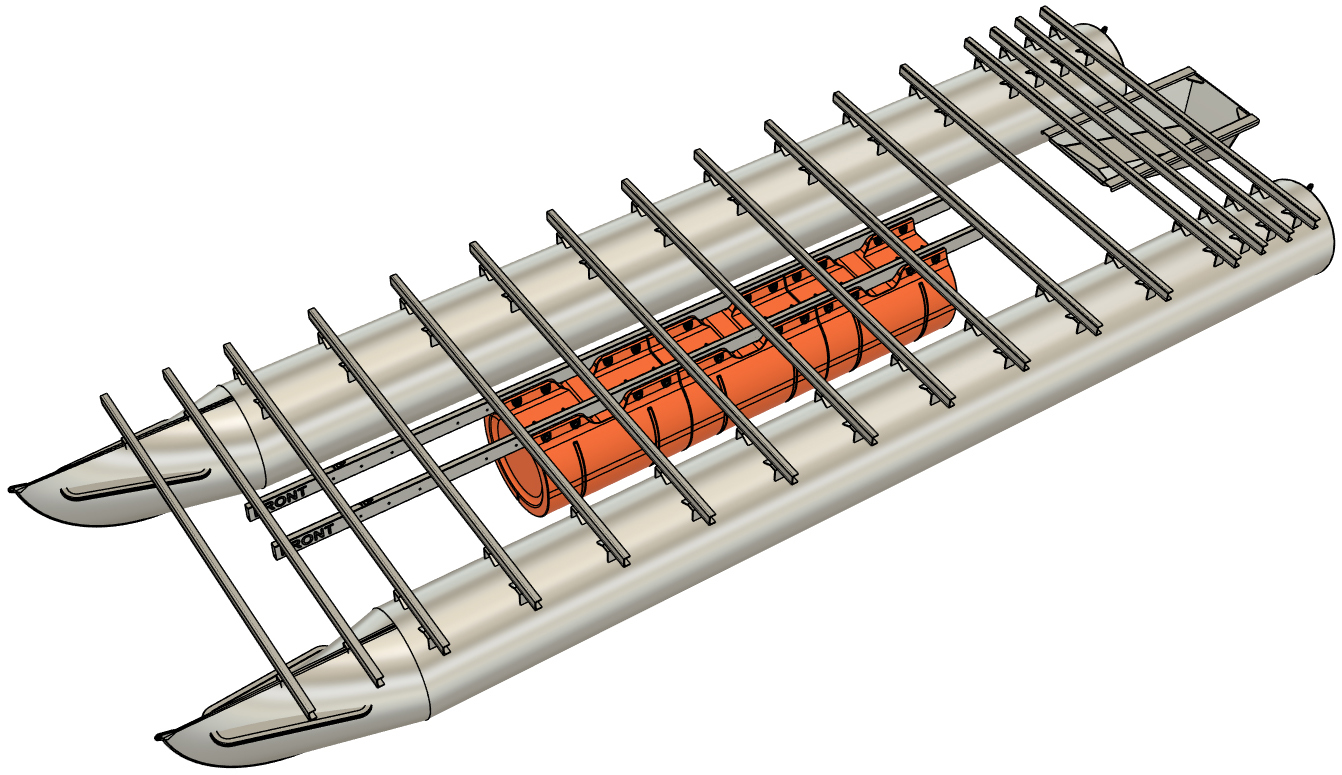
|
YOUR INSTALLATION IS COMPLETE!
The installation of your third pontoon is now complete! If you choose to remove the marker from the mounting tube and floats, a little bit of lacquer thinner and a rag will do the job and not hurt either. Also, if you want to plug the ends of the mounting tube, McMaster sells a plastic plug that pops right in if you used 3" x 1.5" tube. A link the plug is listed below. We have not found the equivalent for the 4" x 1.5" tube that we used in our example installation.
Enjoy your additional buoyancy and have fun on the water! |