
|
603-630-5658
|
|
tinypontoonboats@gmail.com
|

|
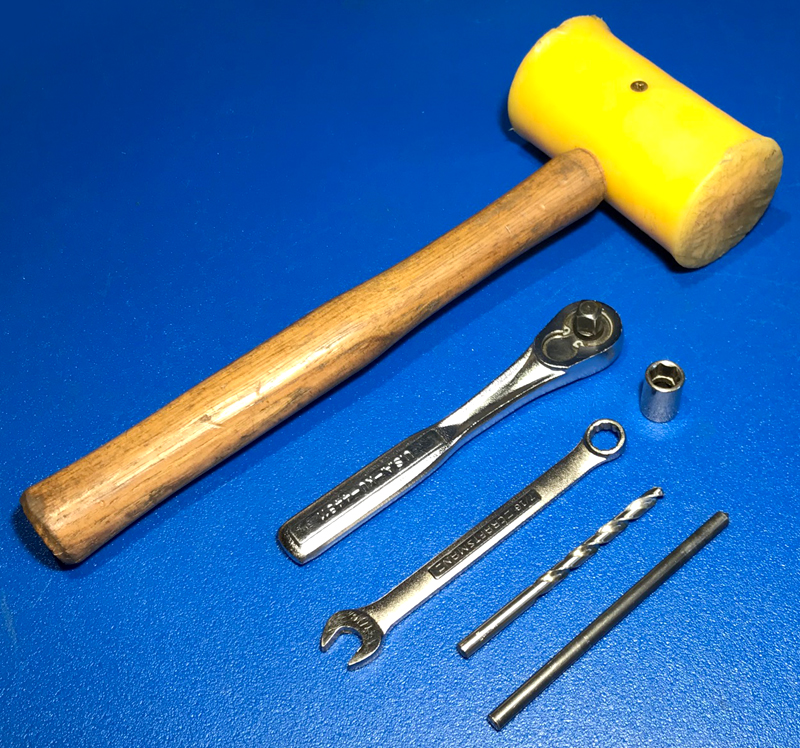
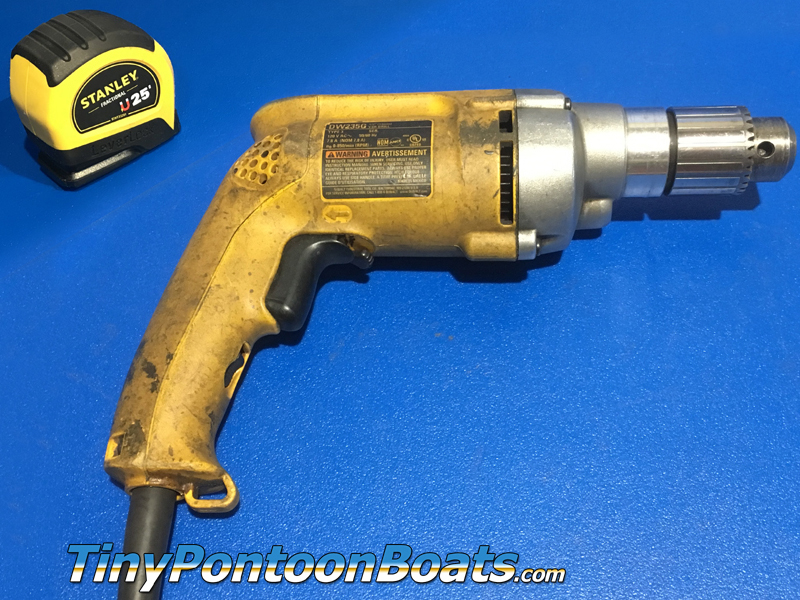
REQUIRED TOOLS
Installation of your full-surround fence system is simple and requires only basic tools. Below we have provide a list of everything that you'll need. Most customers will already have the required tools on hand.
|
|

|
STEP 1
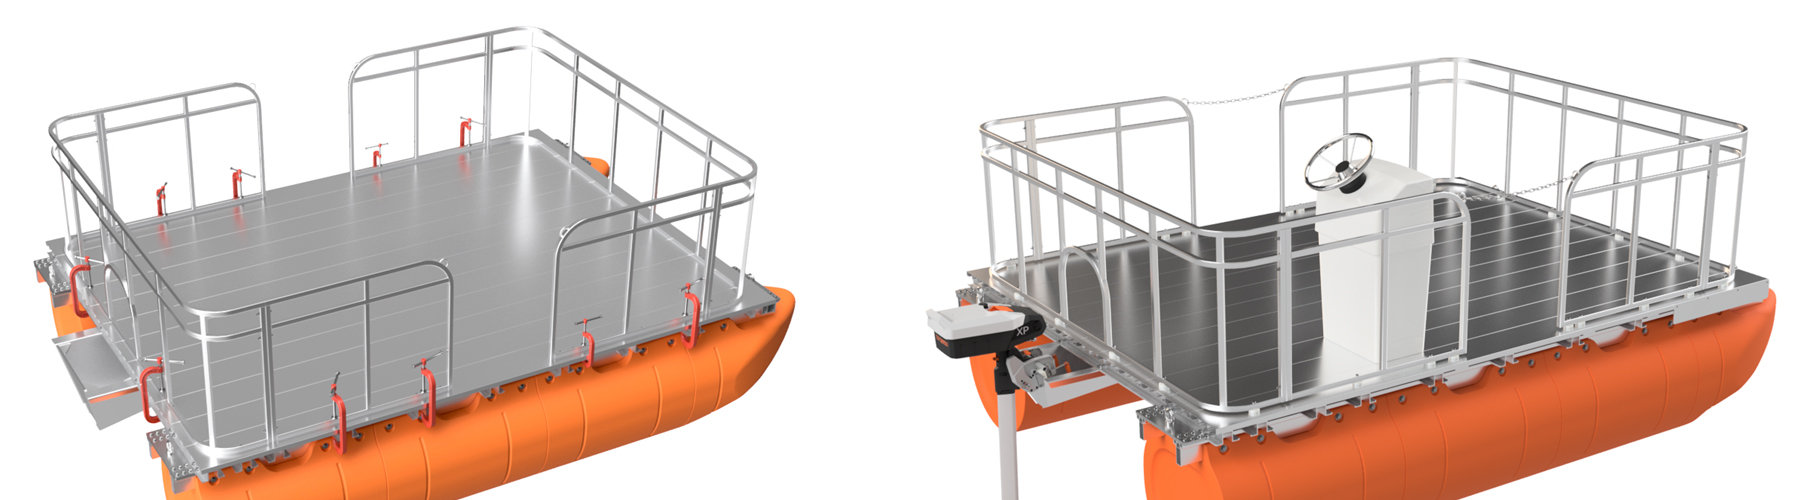
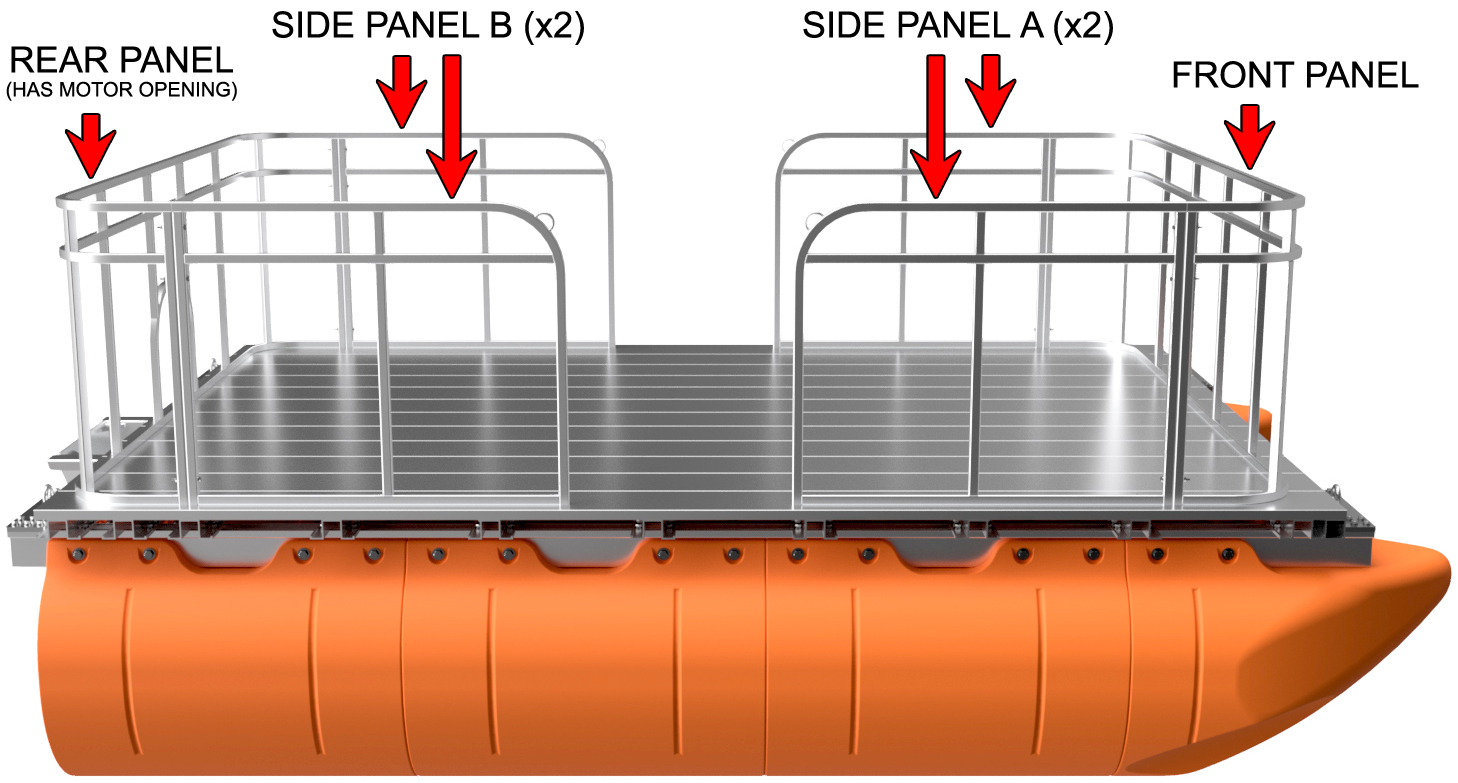
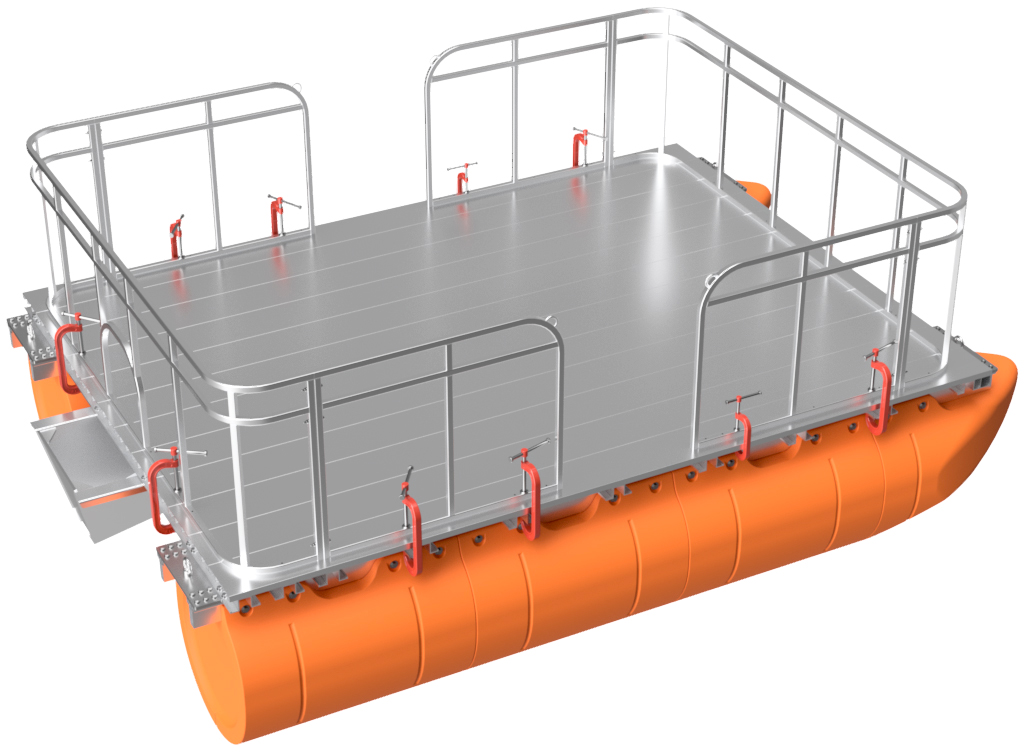
Your fence system includes 6 welded fence frame panels, which are listed below.
-Rear Panel
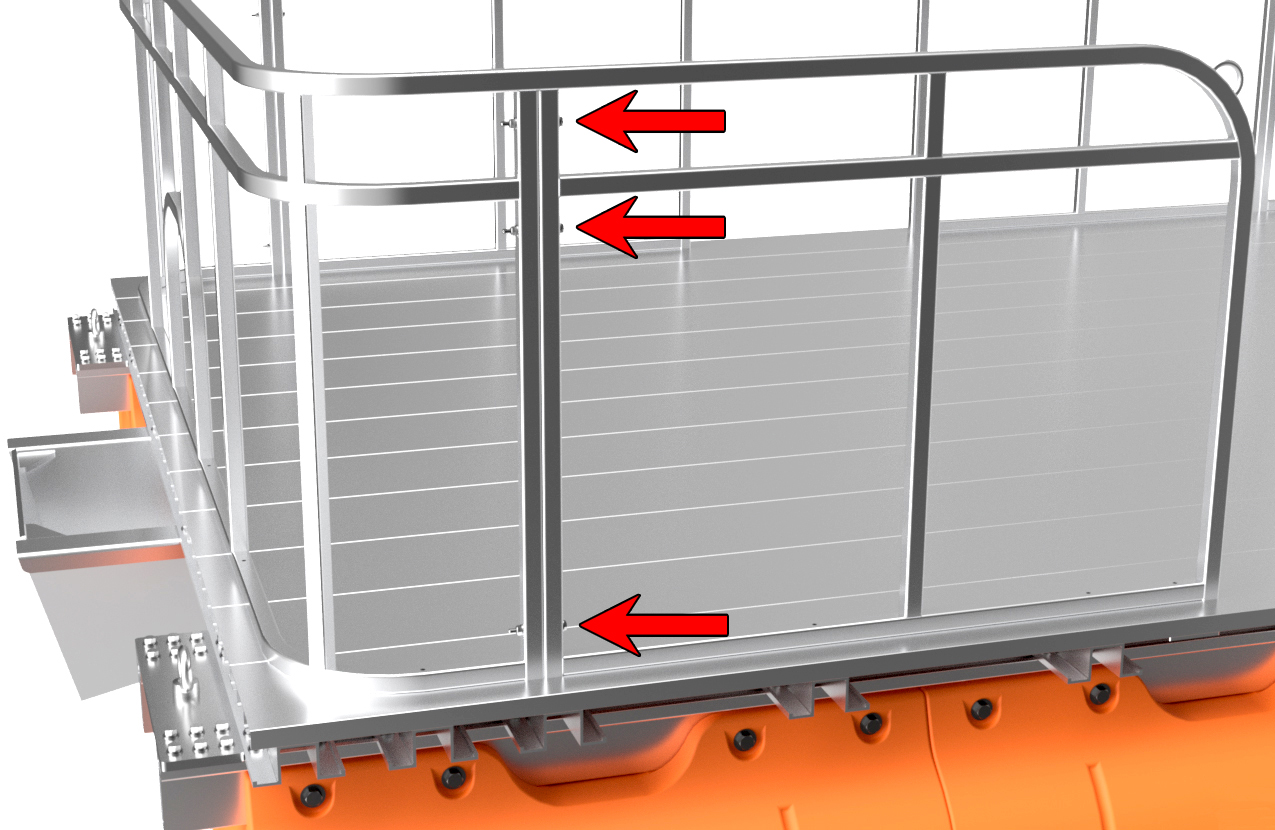
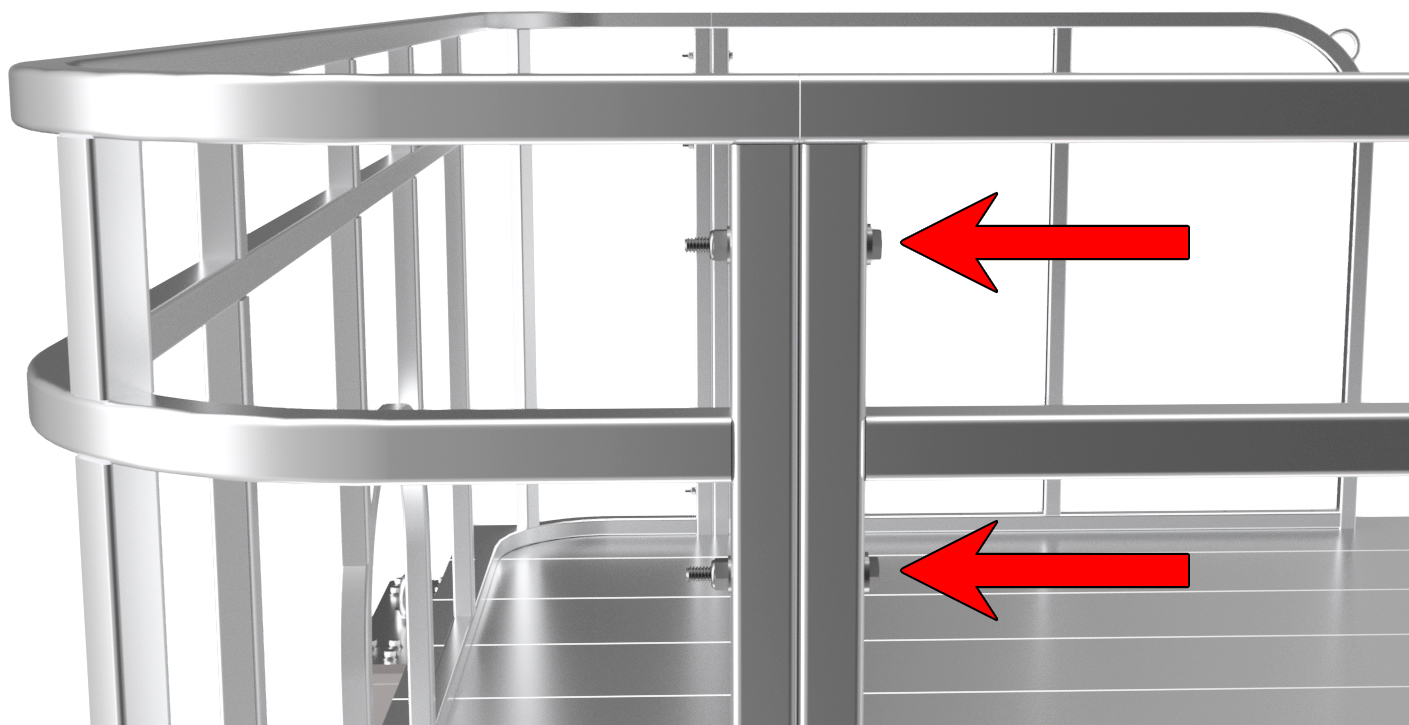
The Rear Panel is the U-shaped panel with the hoop in the center to access your motor. The Front Panel is the other U-shaped fence panel. The Side Panels are the short panels that have loops welded to them for the entry chain. The Side Panels come with labels. Referencing the diagram to the upper right, place all six panels on the boat as shown. Using the included 1/4" x 2 3/4" bolts, 1/4" flat washers, and 1/4" flange lock nuts, bolt the two "Side Panel A" fence panels to the Front Panel and bolt the two "Side Panel B" fence panels to the Rear Panel as shown. We like to have the bolts aim toward the ends of the boat, but this is just for aesthetics. Be sure to align the connecting fence panels before tightening the bolts as the bolt holes are slightly oversized for ease of fitment. Double-check that all your side panel connection bolts are tight.
 |
|
|
STEP 2
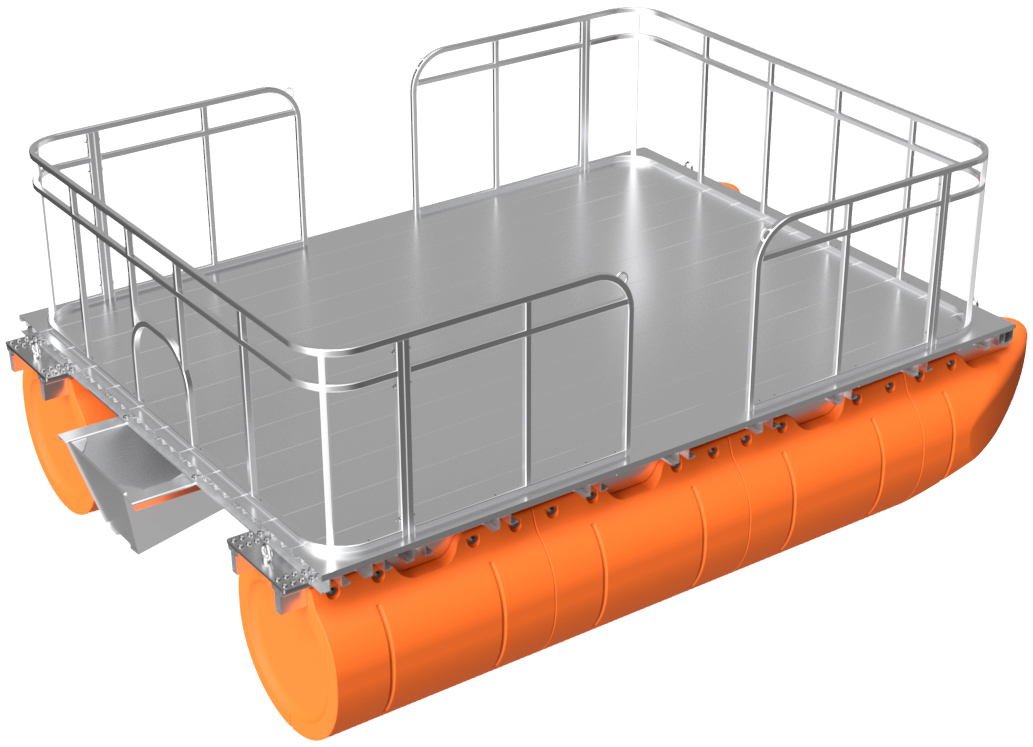
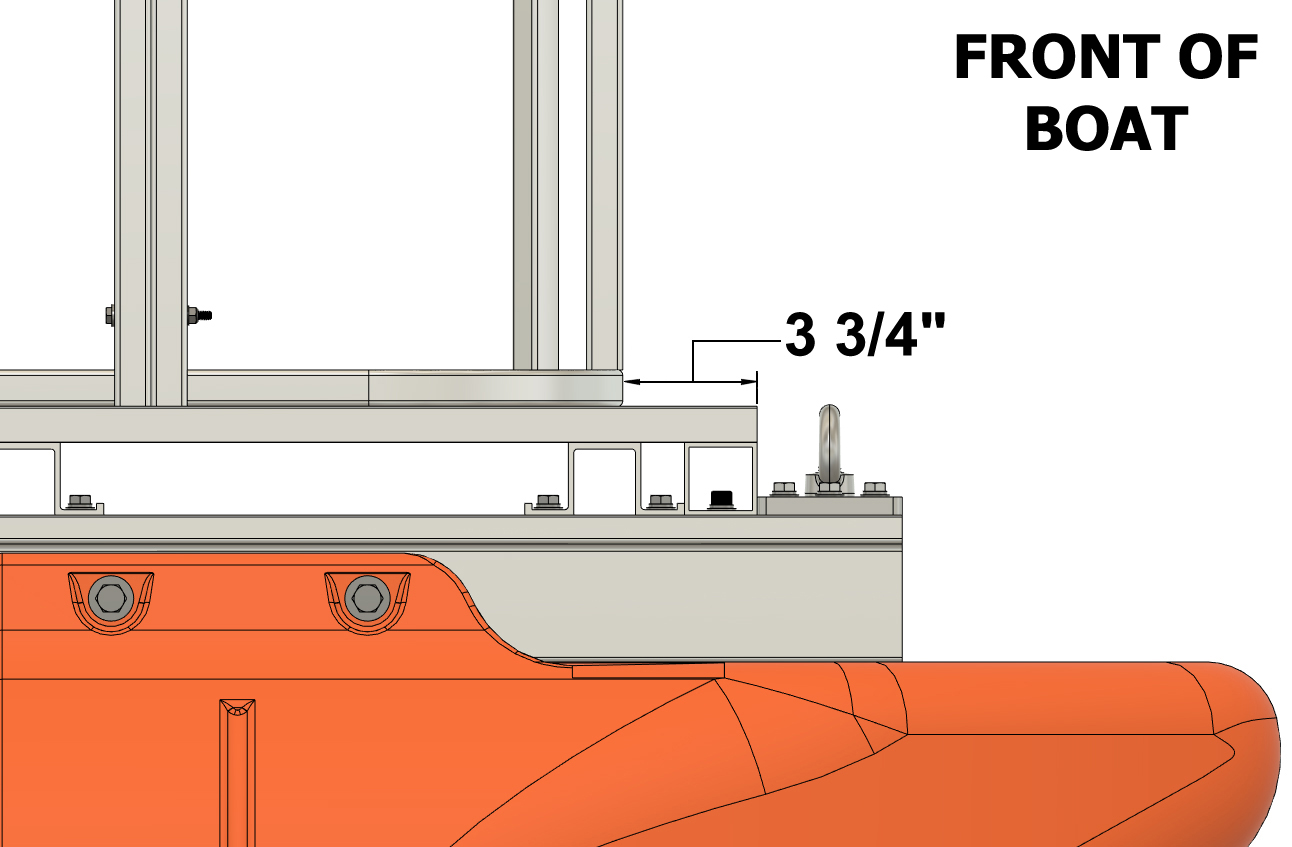
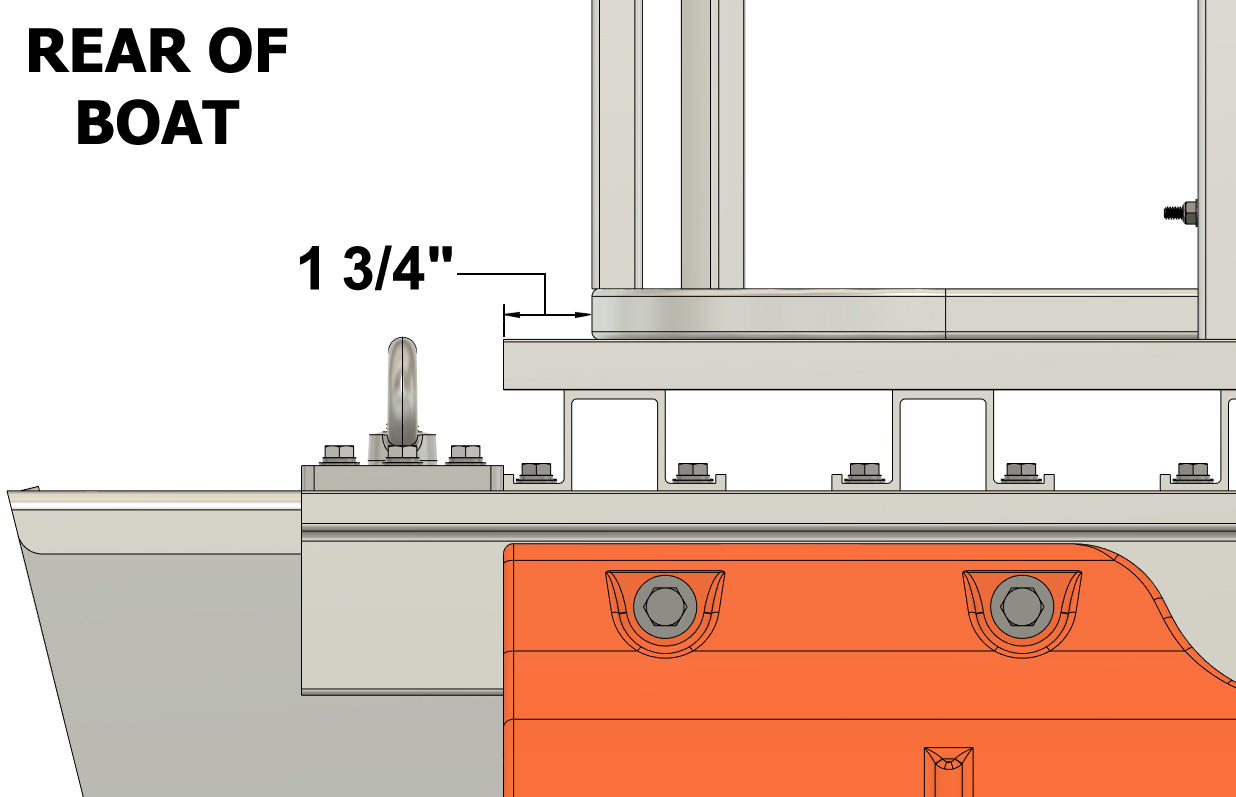
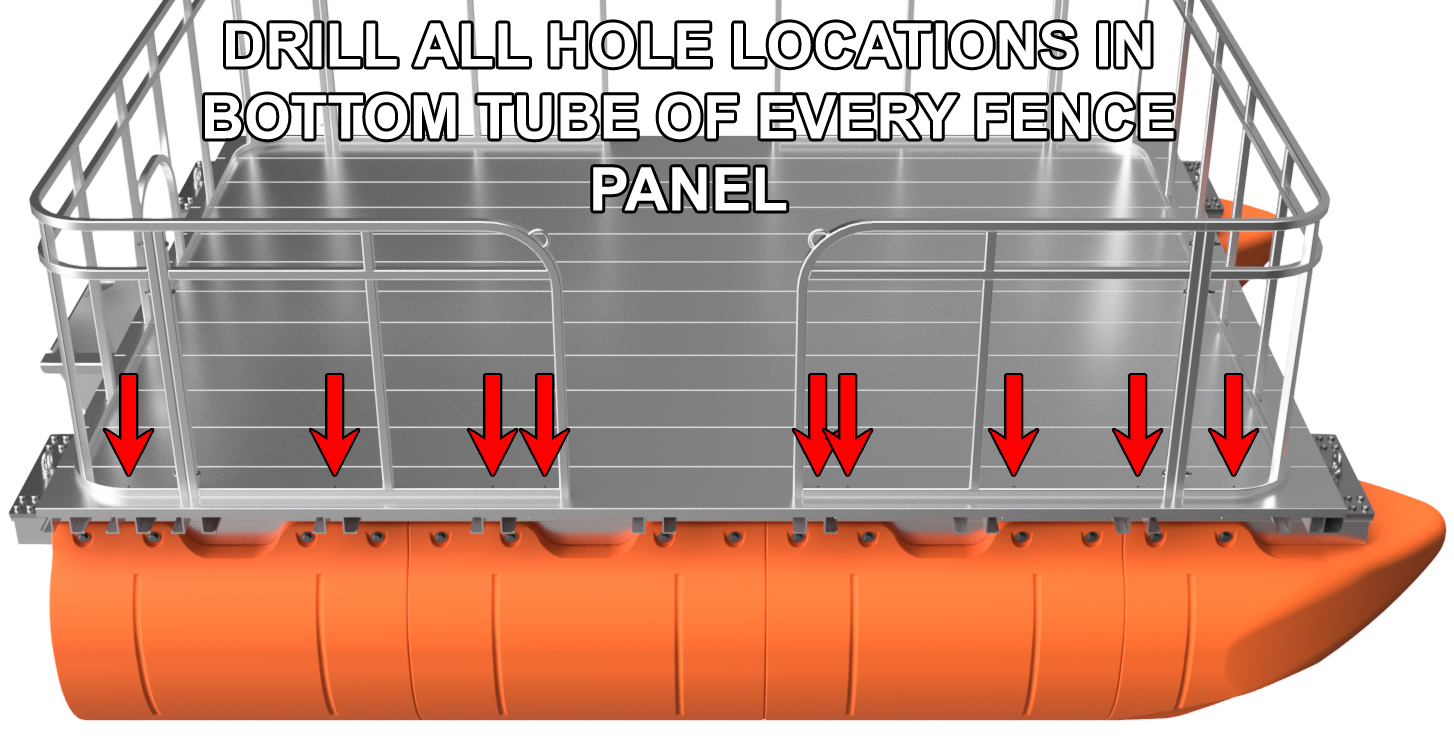
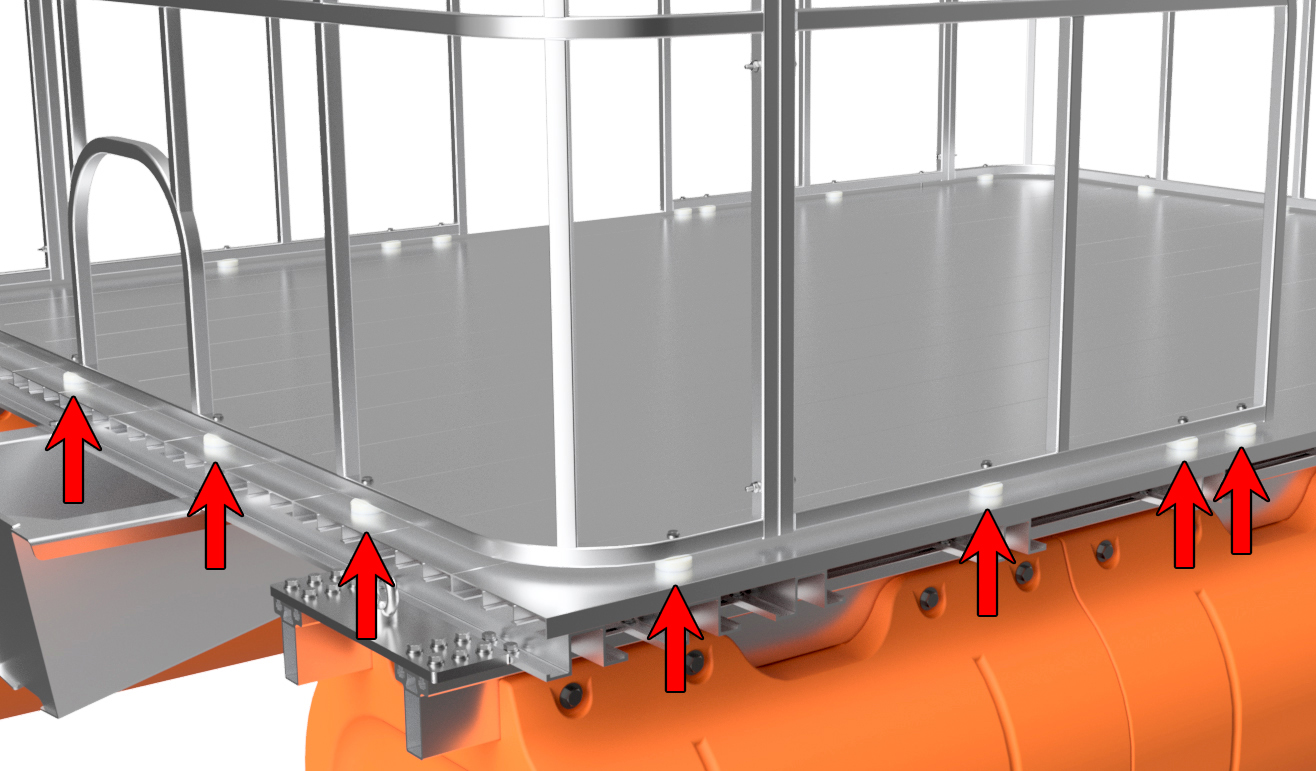
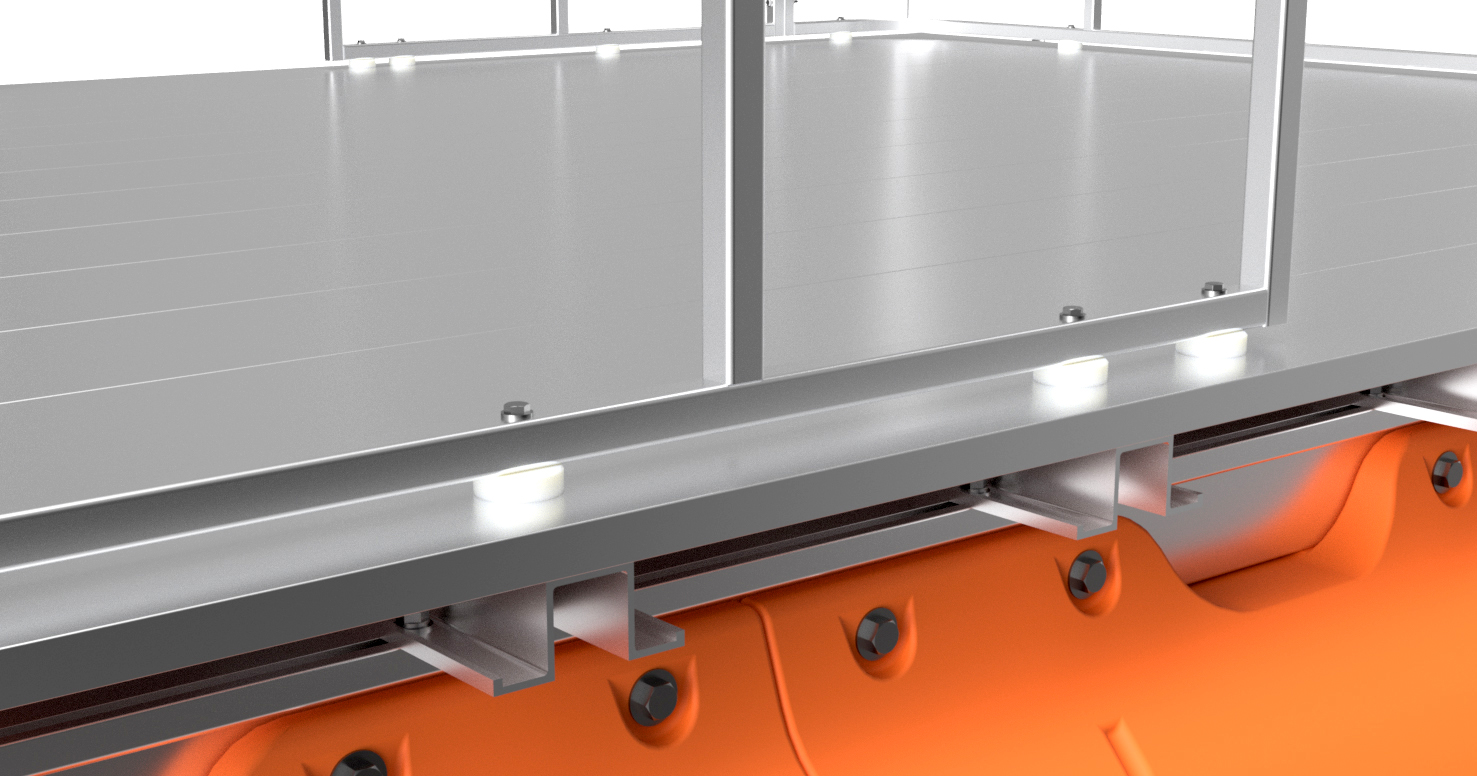
You now have two large U-shaped fence assemblies. Position the front fence assembly so that it is 3 3/4" from the front end of your deck planks. Position the rear fence assembly so that it is 1 3/4" away from the ends of your deck planks. The diagrams below show this. The bottom tube of the front and rear fence panels will be centered over the frontmost and rearmost hat channels and all but 8 of the bolt holes you'll be drilling in the next step align with hat channel crossmembers. Position the two large fence frame assemblies so they are centered left to right on the boat's platform. You will note that the side panels may be slightly bent outward or inward on the boat, so center the Rear Panel and Front Panel before being aligning the Side Panels with the edges of the platform.
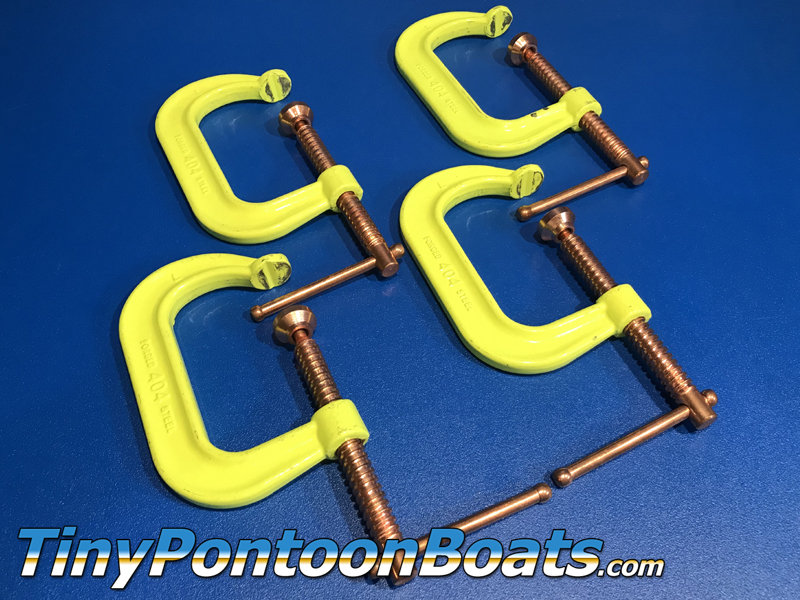
Using C-clamps or F-clamps, clamp the Rear Panel into position and then clamp the bolted-on Side Panel B fence panels into position. Be sure to align the side panels with the side of the platform (make sure the fence and edges of the platform are parallel - may have to bend the fence inward or ourward slightly for this) and clamp the side panels into position against the platform as well. Depending on what you have available for clamps, the front panel can be a little trickier if you have to bend the side panels in or out slightly. When we install front panels like this, we typically drill two of the through-deck bolt holes (as described below) and "pin" the Front Panel in place before we clamp the side panels in place. Extra-deep clamps, or clamps with a couple pieces of scrap material can be used to clamp the front panel in place as well. With the Side Panel A fence panels clamped to the platform as shown (side panels parallel with the edges of the deck), move onto the next step.
|

|
|
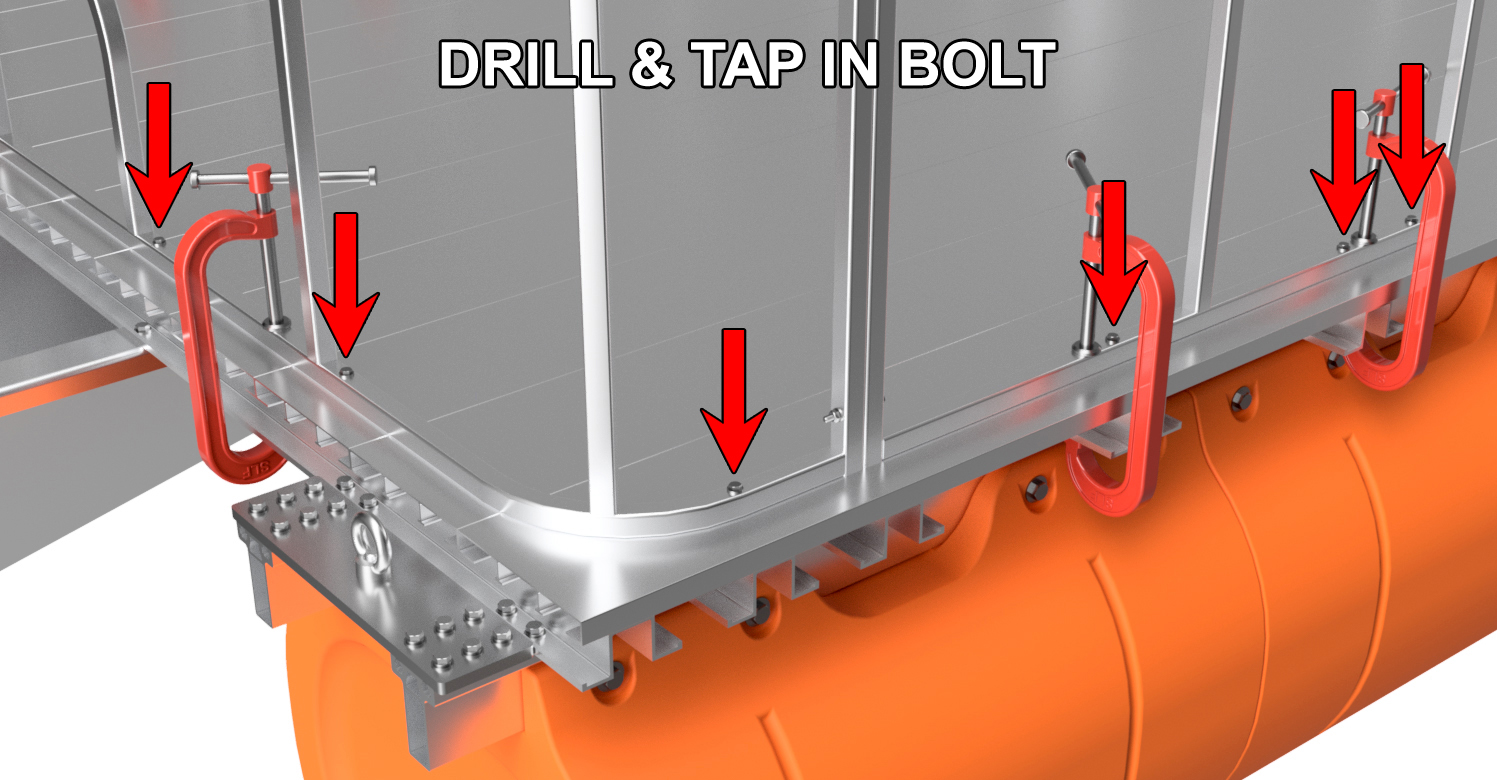
STEP 3
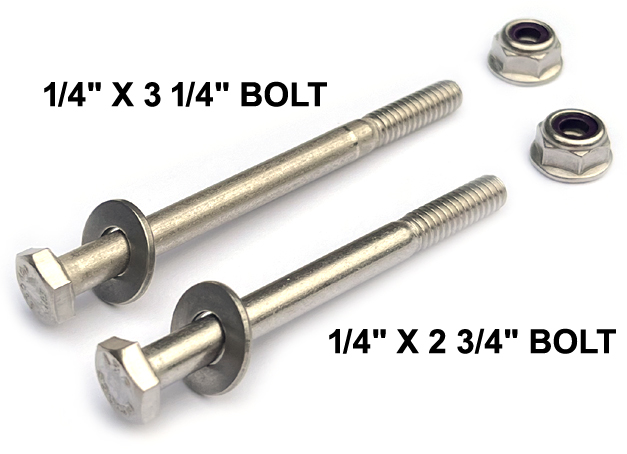
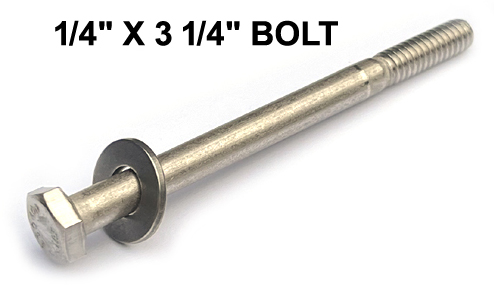
With the fence panels clamped into position, use a 1/4" drill bit to drill through the bolt holes in the base of all six fence panels. Drill all the way through the deck planks and through the top of the hat channels that align with bolt holes. As mentioned prior, 8 of the bolt holes will not align with hat channels. For these, just drill all the way through the deck plank. When doing this, drill a single hole, slide one of the 1/4" x 3 1/4" bolts into the new hole (DO NOT INSTALL NUTS YET), and then move onto the next hole to repeat the process. We find that "pinning" the fence panels into position with the bolts helps hold the position of the fence as the task progresses. Drill and "pin" every hole in the base tube of your fence system. We repeat, do not install nuts yet.
 |
|
|
STEP 4
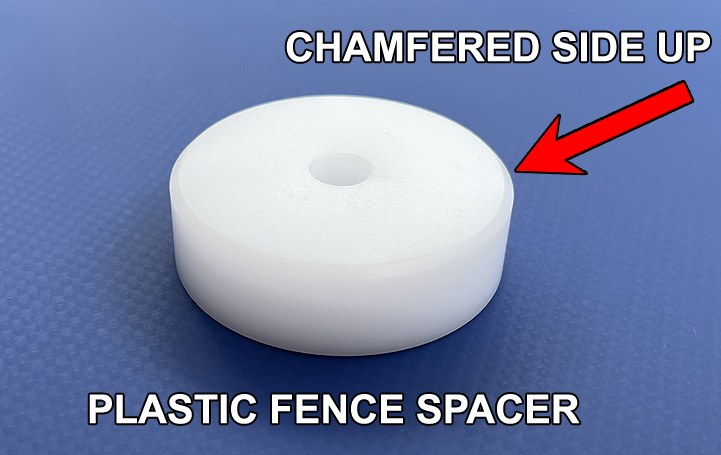
Pull the entire fence upward and remove all the bolts you just inserted through the newly drilled holes. You may have to remove each individual bolt to pull the fence upward. Brush away any chips and place one plastic spacer under each fence mounting hole. Align the holes in the spacers with the holes in the fence and adjust the position of the fence assembly to line up all the bolt holes you just drilled in the platform. Insert a 1/4" x 3 1/4" stainless hex bolt with a washer through each hole you just drilled through. Make sure there are no chips stuck to the bolt's threads before doing this. You may have to tap the bolt into position with a rubber or plastic hammer. A little tap won't hurt anything, but if it fights you, use your drill to put a 1/4" drill bit through the hole again. When there is resistance, it typically means that there are chips blocking the hole, and your drill will easily clear those out. Double-check that you didn't miss any bolt holes in the base of the fence and move onto the next step.
|
|
|
STEP 5
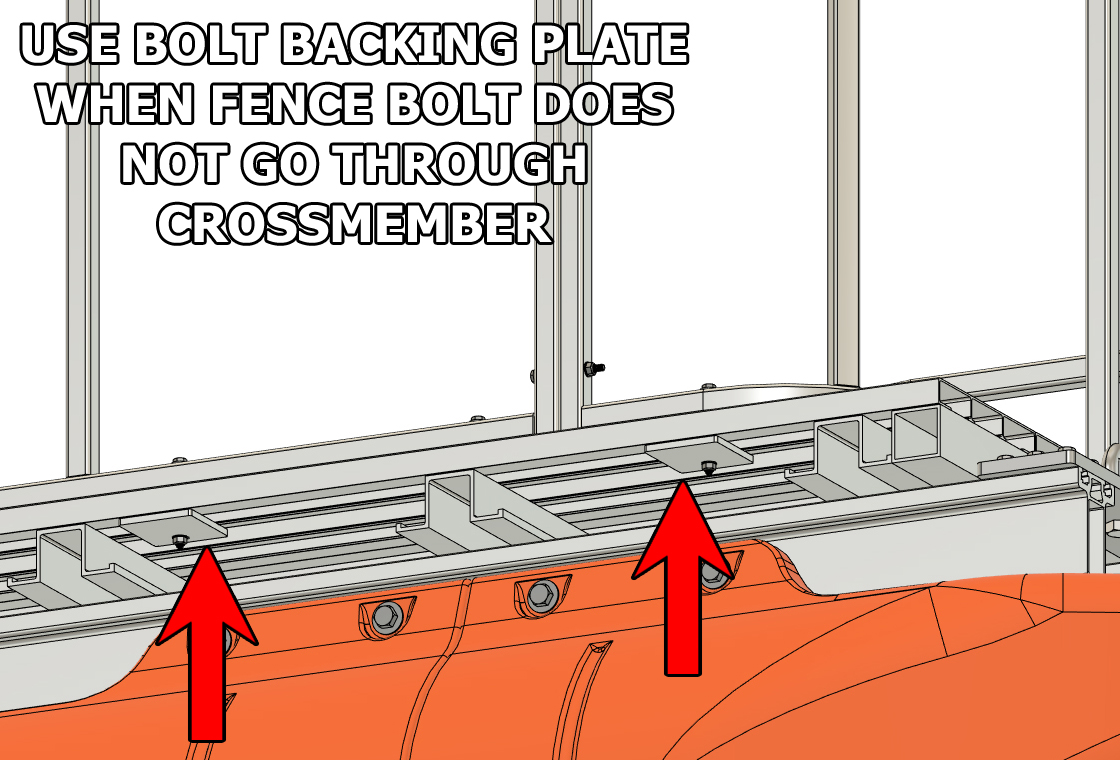
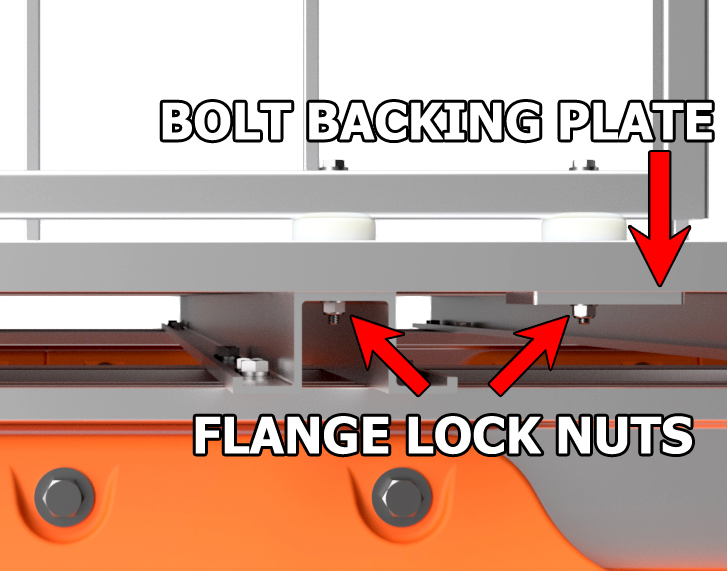
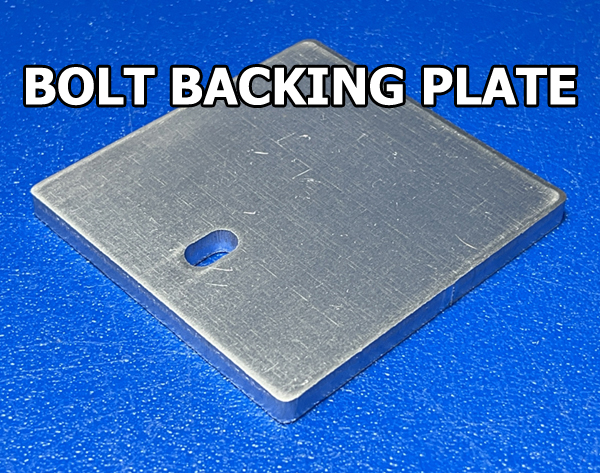
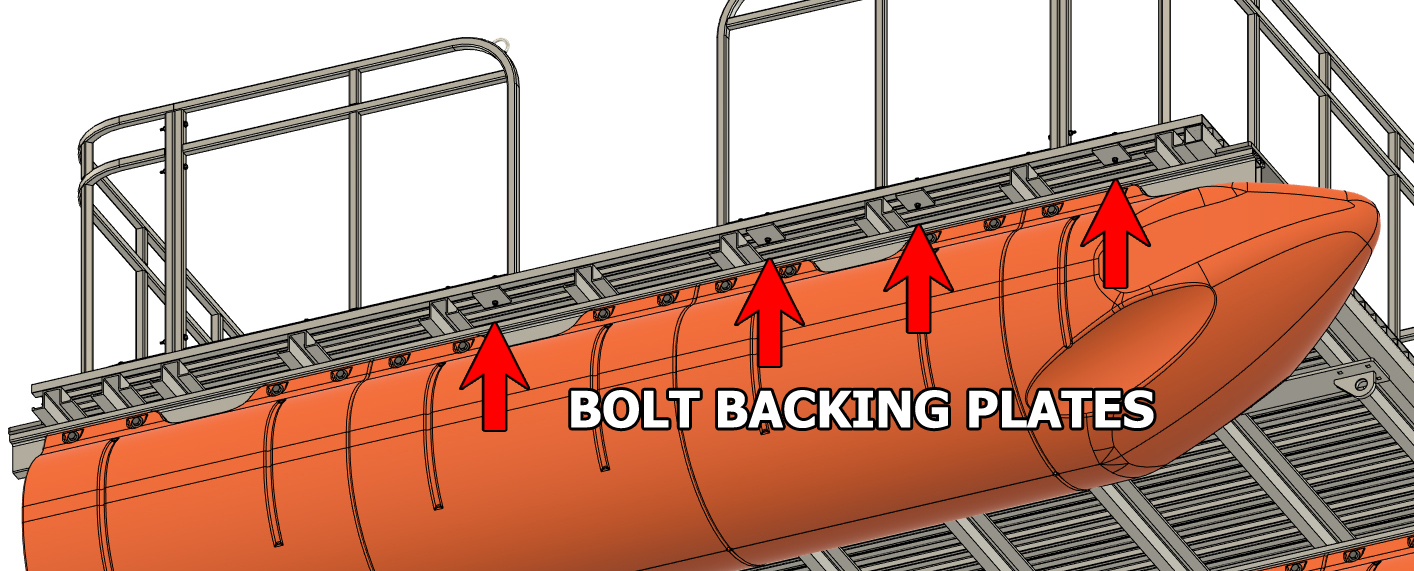
For each bolt that goes through a hat channel crossmember, install a 1/4" flange lock nut. For each of the 8 bolts that go through the decking, but do not go through hat channel crossmembers, install one of the included 1/4" thick bolt backing plates and a flange lock nut. The hole in the plate goes toward the center of the boat as shown. Double-check that all your fence mounting bolts have nuts installed and have been tightened.
|
|
|
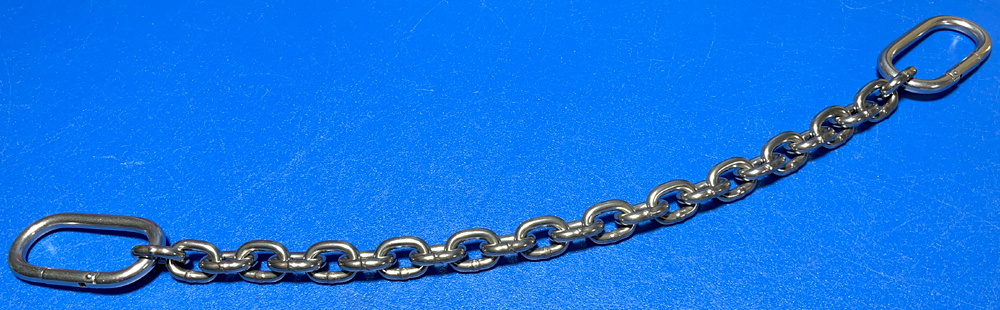
STEP 6
Clip a stainless steel entry chain between the fence Side Panels on each side of the boat and your fence installation is complete!
|
|